- Navigating the High Seas: A Comprehensive Guide to Sailboat Masts
Sailboat masts are the unsung heroes of the sailing world, silently supporting the sails and ensuring a smooth journey across the open waters. Whether you're a seasoned sailor or a novice, understanding the intricacies of sailboat masts is essential for a safe and enjoyable voyage. In this comprehensive guide, we will delve into the world of sailboat masts, discussing their types, maintenance, and everything in between.

Types of Sailboat Masts
Sailboat masts come in various configurations, each with its advantages and drawbacks. The two primary types are keel-stepped and deck-stepped masts.
Keel-Stepped Masts
Keel-stepped masts are the most common type, extending through the deck and resting on the boat's keel. They provide excellent stability and are suitable for larger sailboats. However, they require careful maintenance to prevent water intrusion into the boat's cabin.
Deck-Stepped Masts
Deck-stepped masts rest on the deck of the boat, making them easier to install and remove. They are commonly found on smaller sailboats and are more forgiving in terms of maintenance. However, they may offer slightly less stability than keel-stepped masts.
Components of a Sailboat Mast
To understand mast maintenance better, it's essential to know the various components of a sailboat mast. The key parts include the masthead, spreaders, shrouds, and halyard sheaves.
The masthead is the topmost section of the mast, where the halyards are attached to raise and lower the sails. It also often houses instruments such as wind indicators and lights.
Spreaders and Shrouds
Spreaders are horizontal supports attached to the mast to help maintain the proper angle of the shrouds (cables or rods that provide lateral support to the mast). Properly adjusted spreaders and shrouds are crucial for mast stability and sail performance.
Mast Materials: Choosing the Right One
Sailboat masts are typically constructed from three primary materials: aluminum, wood, and carbon fiber. Each material has its unique characteristics and is suited to different sailing preferences.
Aluminum Masts
Aluminum masts are lightweight, durable, and relatively easy to maintain. They are commonly used in modern sailboats due to their cost-effectiveness and longevity.
Wooden Masts
Wooden masts, while classic and beautiful, require more maintenance than other materials. They are best suited for traditional or vintage sailboats, where aesthetics outweigh convenience.
Carbon Fiber Masts
Carbon fiber masts are the pinnacle of mast technology. They are incredibly lightweight and strong, enhancing a sailboat's performance. However, they come at a premium price.
Mast Maintenance
Proper mast maintenance is essential for safety and longevity. Regular cleaning, inspection, and addressing minor issues promptly can prevent costly repairs down the line.
Cleaning and Inspection
Regularly clean your mast to remove salt, dirt, and grime. Inspect it for signs of corrosion, wear, or damage, paying close attention to the masthead, spreaders, and shrouds.
Common Repairs and Their Costs
Common mast repairs include fixing corroded areas, replacing damaged spreaders, or repairing shrouds. The cost of repairs can vary widely, depending on the extent of the damage and the materials used.
Extending the Lifespan of Your Mast
Taking steps to prevent damage is essential. Avoid over-tightening halyards, protect your mast from UV radiation, and keep an eye on corrosion-prone areas.
Read our top notch articles on topics such as sailing , sailing tips and destinations in our Magazine .
Stepping and Unstepping a Mast
Stepping and unstepping a mast is a crucial skill for any sailboat owner. This process involves removing or installing the mast on your boat. Here's a step-by-step guide for safe mast handling.
Step-by-Step Guide for Safe Mast Handling
- Gather the necessary tools and equipment.
- Disconnect all electrical and rigging connections.
- Use a crane or mast-stepping system to safely lower or raise the mast.
- Secure the mast in its proper place.
- Reconnect all electrical and rigging connections.
When and Why to Unstep a Mast
You may need to unstep your mast for various reasons, such as transporting your sailboat or performing extensive maintenance. It's crucial to follow the manufacturer's recommendations and ensure a safe unstepping process.
Sailboat Mast Boot: Protecting Your Mast
A mast boot is a simple yet effective way to protect your mast from water intrusion and damage caused by the elements. Here's what you need to know.
The Purpose of a Mast Boot
A mast boot is a flexible material that wraps around the mast at the deck level. It prevents water from entering the cabin through the mast opening, keeping your boat dry and comfortable.
Installing and Maintaining a Mast Boot
Installing a mast boot is a straightforward DIY task. Regularly inspect and replace it if you notice any signs of wear or damage.
Replacing a Sailboat Mast
Despite your best efforts in maintenance, there may come a time when you need to replace your sailboat mast. Here's what you should consider.
Signs That Your Mast Needs Replacement
Common signs include severe corrosion, structural damage, or fatigue cracks. If your mast is beyond repair, it's essential to invest in a replacement promptly.
The Cost of Mast Replacement
The cost of mast replacement can vary significantly depending on the type of mast, materials, and additional rigging needed. It's advisable to obtain multiple quotes from reputable marine professionals.
Yacht Masts: Sailing in Style
For those looking to take their sailing experience to the next level, upgrading to a yacht mast can be a game-changer.
Differences Between Sailboat and Yacht Masts
Yacht masts are typically taller and offer enhanced sail performance. They are often equipped with advanced rigging systems and technology for a more luxurious sailing experience.
Upgrading to a Yacht Mast
Consult with a marine professional to determine if upgrading to a yacht mast is feasible for your sailboat. It can be a significant investment but can transform your sailing adventures.
Sailboat Mast Steps: Climbing to the Top
Mast steps are handy additions to your mast, allowing easier access to perform maintenance or enjoy panoramic views. Here's how to use them safely.
Using Mast Steps Safely
Always use proper safety equipment when climbing mast steps. Make sure they are securely attached to the mast and regularly inspect them for wear or damage.
The Advantages of Mast Steps
Mast steps provide convenience and accessibility, making sailboat maintenance tasks more manageable. They also offer an elevated vantage point for breathtaking views while at anchor.
Mast Maintenance Tips for Beginners
If you're new to sailboat ownership, these mast maintenance tips will help you get started on the right foot.
Essential Care for First-Time Sailboat Owners
- Establish a regular maintenance schedule.
- Seek advice from experienced sailors.
- Invest in quality cleaning and maintenance products.
Preventing Common Mistakes
Avoid common pitfalls, such as neglecting inspections or using harsh cleaning agents that can damage your mast's finish.
Sailing with a Mast in Top Condition
A well-maintained mast contributes to a safer and more enjoyable sailing experience. It enhances your boat's performance and ensures you can rely on it in various weather conditions.
How a Well-Maintained Mast Improves Performance
A properly maintained mast helps maintain sail shape, reducing drag and improving speed. It also ensures that your rigging remains strong and secure.
Safety Considerations
Never compromise on safety. Regularly inspect your mast, rigging, and all associated components to prevent accidents while at sea.
Sailboat masts are the backbone of any sailing adventure, and understanding their intricacies is crucial for a successful voyage. From choosing the right mast material to proper maintenance and upgrading options, this guide has covered it all. By following these guidelines, you can sail the high seas with confidence, knowing that your mast is in top condition.
So what are you waiting for ? Take a look at our range of charter boats and head to some of our favourite sailing destinations .
- Shop eStore
- Boatbuilding
- Caulking & Adhesives
- Cleaners & Waxes
- Covers & Accessories
- Dinghies, Canoes & Accessories
- Electronics
- Fishing Commercial
- Fishing Pleasure
- General Tools
- Hatches & Portholes
- Teak Accessories
- Trailer Accessories
- Ventilation
- Watersports
- Current Ads
- Locations & Hours
MAST BOOT UNIVERSAL
Departments.
- ACCESSORIES
Universal Mast Boot. Made of extremely flexible UV resistant vinyl. Designed to fit a number of sizes of mast and deck collars of the same basic shape. Molded in small steps so top and bottom can be cut at the level that provides a snug fit to the mast and the deck collar. Boot may be installed on stepped mast by cutting one side and glue together with the included adhesive. Secure the top and bottom with stainless steel hose clamps. Complete installation instructions are included with each kit.
*Product images are for illustration purposes only and may not be an exact representation of the item. Please refer to item description.
Denotes a non-stock item. These items are not regularly stocked in our store locations and may require extra time to arrive from our supplier(s) and incur incoming freight.
- Forgot Password/Username?
- Check eGift Card Balance
- Manufacturer Rebates
- Tide Charts
- Return Policy
- Privacy Policy
About Hamilton Marine
- Rebates and Promotions
- Splicing Information
- California Consumer Protection Act

We accept the following forms of payment:


- Recent Blog Picks
- Schooner Feed
- Sailing Blog Feed
- SELLING FAQ
- THE BACKSTORY
- My Wishlists
- Seller Dashboard
- START SELLING!
- NEWSLETTER SIGNUP!

Small Recycled Sunbrella Ditty Bag
Handmade item Colour: Tan Materials: canvas, sunbrella

Nautical Cloth Napkins

Cold press soap/ all natural/ handmade

Recycled Racing Sailcloth Makeup/Shaving Bag

Nautical sailcloth coin purse

Large Recycled Sunbrella Ditty Bag
Handmade item Materials: canvas, sunbrella
Since we always like to address the most difficult part first, let’s talk about the MAST BOOT first. A clean area is essential, so make sure that the existing mast boot has been removed completely. Make sure the mast area at the partner, and the deck ring are clean and don’t have any funky residue, solvent, sealant or grease on them. Here at the The Rigging Company we like to use SSI’s Universal Mast Boot . Now, I know some people have had problems installing these boots properly, but I assure you this purely due to bad application methods and partially due to poor instructions in the box. Let me see if I can’t show you how we go about installing one of these…

THE EASY PART: Now, using a 6 in 1 screwdriver with the bit removed so that you are using the socket function, you are ready to tighten the hose clamp, all the while ensuring there are no ugly folds. Taking your time here to clamp it neatly without folds is the first step in preventing leaks. Once you are happy with the how the top of the boot looks, tighten it up all the way. Depending on whether or not you went with the white side out or grey side out method – you will need to either trim the excess boot material above the hose clamp carefully with sharp blade (white side out method); using the clamp as your guide and pulling the vinyl away from the spar as you cut so you don’t scratch it. OR, simply flip down the inside-out boot over the deck collar (grey side out method).
TIP: You should be able to use one of the socket drive ends (the bit removed) of your 6-in-1 screwdriver to make tightening the hose clamp easier!
THE HARD (frustrating) PART: Next, put the second (larger) hose clamp down over the boot and the deck ring; slightly tighten it so that you can still adjust the boot, yet making sure it is snug enough to hold the lower part of the boot in place. Here is what will make it look like something special: use the excess material that is hanging out of the bottom of the hose clamp and pull the vinyl tight, then tension the clamp some more, but not yet all the way. Be patient and keep working out the wrinkles and folds as you pull the boot material tight. Be sure you keep the hose clamp down as you pull the material tight; this can be a bit frustrating as it will try and slide up. Using a 6 in 1 screw driver (carefully so you don’t poke a hole in the boot) with the bit removed to push the clamp down and just the right amount of clamping tension is the trick to success here. Continue to pull tight on the boot and tension the clamp bit by bit to work out any last wrinkles. Now, tighten the clamp once more to ensure that it is really tight.

SPREADER BOOTS: Installing a spreader boot is typically easier than people make it. No seizing wire, zip ties, hose clamps, or any other silly ideas required. All you need here is to “adhere” to a good taping technique and some good quality tape. There are two main types of spreader boots we use, both are made of molded rubber or vinyl.

One is the more traditional boot (see picture right), made by Tempo (now out of business but still available) best for tubular spreaders or West Marine best for aerofoil spreaders.

The other is the more low profile modern boot (see picture left) made by Isomat – who is also out of business but their boots and other parts are still available.

We also like the elk hide boots , but these pre-made kits aren’t a guaranteed fit. Elk hide boots will typically need to made custom and are only necessary where there are unusually shaped ends or the customer is just looking for a more custom look. A nice touch indeed, but another blog all together :-0).

REMEMBER: always cut your tape, never tear, and never stretch the tape before you cut it! Then just firmly press it down for a molded look.
I hope these tips help. Let us know if you have any questions or if you would like us to assist you with this.
Thanks for the Read,
RIGGERS TIP: You can wipe both these vinyl/rubber mast boots and spreader boots with acetone once in a while and re-tape as needed to keep them looking nice and make them last longer.
Similar Posts
It takes two to tango…..
Volvo Ocean Race has seen yet another disaster. Leg leaders, Groupama have unfortunately been dis-masted just some 600NM from the finish line. This may have been some sort of record for the Volvo Ocean Race and Whitbread Cups combined, for being the most disastrous leg in history. Abu Dhabi, who never seemed to quite catch up from their initial…
A 1903 Lawley Built Yacht
When I started in the marine industry, I was fortunate enough to work aboard a truly unique yacht. The name of this yacht was Witchcraft. The yacht was built in 1903 by the Lawley Ship Yard in Boston, MA and designed by B.B. Crowninshield. Originally, the boat had a very tall gaff rigged mast which…
Solomon Islands A-Stern…..
The Volvo Ocean Racing Fleet, is almost there. After the the guys successfully navigated the Solomon Islands they only have one more thing on their minds, Auckland. Looks like the portion of the fleet that split to the east prevailed, with better ‘breeze’ and better wind angle than the fleet to leeward. Take 3 minutes and catch up!…

The sailboat block (commonly referred to as a pulley) is used to turn a line or wire as well as to facilitate a purchase. The parts of a block, in simple terms, consist of the following: a sheave for the line to run on a sheave pin or axle for the sheave to spin on a strap or…
Team Vestas Wind Gets a New Boat…
…well, maybe. If you’ve not heard by now, the Volvo Ocean Race Team Vestas Wind smashed into the earth several days ago. The boat grounded in the Indian Ocean Off of the southeast coast of Africa on the Cargados Carajos Shoals (St. Brandon), some 260 miles north east of Mauritius. Here is the latest edit of…
Harken Travelers
Harken dominates the sailboat parts market in many areas. Travelers are no exception. Don’t think for a minute that this product is only for racers, it is for cruisers too! There is nothing more frustrating than not being able to move the traveler while under load (what’s the point of having one otherwise?). Of course there…
Leave a Reply Cancel reply
Your email address will not be published. Required fields are marked *
Save my name, email, and website in this browser for the next time I comment.
Need spreader boots for a Victoria 18…old ones made by “Tempo” – Thanks
Thanks for reaching out. More than happy to help. Look for an email from us shortly.
I appreciated your clear article on mast boot and spreader boot replacement. I have an Isomat spar that uses the BF-4 Spreaders and so I need a pair of Spreader Boots (part # BF4-4P). You mention that some Isomat parts are still available. Do you have these boots for sale or can you tell me where I might be able to purchase a pair?
Has anyone considered using Waterboot for custom applications? We design custom mast/deck seals to your specifications without needing to remove any mast hardware like vang brackets etc.
Thanks for the info and the link Bob. I will take a look…
Seems like a nice product Bob. Any pricing info? Sample?
Thanks for taking the time.
Holiday Greetings to all at The Rigging Co! Thank you so much for this post on Mast Boot replacement. The rains are starting to show up here in Sausalito, more specifically inside my cabin! The culprit is the subject at hand and it appears that it was ‘modified’ so that a boomvang could be installed (prior owner). There is only an inch of clearance between the deck and the lowest point of the mast connector for the boomvang. The installers did a horrible job with patching the boot but the boomvang itself seems to be installed correctly. So the question is should the connector for the boomvang be taken off the mast and reinstalled over the new boot or is the 1″ clearance enough for the boot installation? Many thanks for your help and direction,
Have a safe and peaceful Holiday Season!
Username or Email Address
Remember Me
Lost your password?
Review Cart
No products in the cart.
- Privacy Overview
- Strictly Necessary Cookies
This website uses cookies so that we can provide you with the best user experience possible. Cookie information is stored in your browser and performs functions such as recognising you when you return to our website and helping our team to understand which sections of the website you find most interesting and useful.
Strictly Necessary Cookie should be enabled at all times so that we can save your preferences for cookie settings.
If you disable this cookie, we will not be able to save your preferences. This means that every time you visit this website you will need to enable or disable cookies again.
Waterboot was first introduced to the sailing world in 1991 at the Annapolis Boat Show. Since then we have supplied thousands of our custom mast/deck seals to sailboat owners, production sailboat manufacturers and custom boat builders. Waterboot can now be found on fine production and custom sailboat of all sizes in harbors throughout the world.
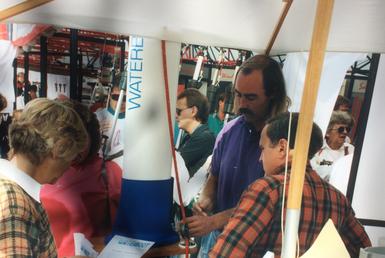
Why sailors and some of the best production boat manufacturers make Waterboot standard equipment:
- Simple attractive design fits a majority of keel stepped sailboats
- Durable UV resistant membrane stands up to the toughest demands of sunlight and salt water
- Unique velcro closure makes installation easy with the rig in the boat
- Waterboot is easily removed and reinstalled allowing inspection of mast wedges, partner, tie rods, etc.
- Easily cleaned with a majority of marine cleaners
- Fully compatible and effective when used with Spartite
- Guaranteed and made in the USA, Patent #5,097,781

Sabre Yachts makes Waterboot standard equipment on their Sabre Spirit
- For Sale/Wanted
- Readers Tips
- Your Yarns.
- Restoration
- Miscellaneous
- DIY Boat Yards
- Boat Building
- Cabin Cruisers
- Free Boat Plans
- Begin Boating
- Boating Terms
- Ropes and Rigs
- Just for Fun
- Celestial Navigation
- Passage Planning
- Sailing Rigs
How to make a Mast Boot
A mast boot, skirt or coat is the traditional method for making a waterproof seal between the deck and a keel stepped mast.
Despite modern advances in sealant technology, a flexible boot is still the most effective and best looking solution to preventing water leaking down the mast into the cabin.
- Making a Pattern
- Fitting and Sewing
A skirt is also a relatively simple, low tech, DIY solution, which can also be retrofitted.
It is possible to simply caulk and seal around the wedges and partners but this is unlikely to be very satisfactory and every time you need to re-step the mast or adjust the wedges it will all have to be raked out, and then resealed.
The next simplest method is to use a rigging and mast boot tape.
This is the self-amalgamating type of tape which can be bought in wide rolls.
It is waterproof flexible and extremely simple to wrap on.
First it does need to be wrapped on to something, it is fine around the mast and wedges but getting it to cover the seam between the wedges and the deck is the problem.
It will also show dirt and tends to peel after time, and it isn’t all that cheap either, especially as you will need a couple of rolls for the average mast diameter.
The next best DIY solution is the rubber mast boot.
These are made using inner tube material, if you can find any theses days.
Wile the inner tube and hose clamp system works well if done right it does look pretty ugly and the rubber will degenerate over time in sunlight.
Another option is to use a combination of the above methods, then cover with a wraparound cover of material such as ‘sunbrella’, which could simply be attached with a ‘velcro’ strip.
But then if you are going to the trouble of cutting and sewing a cover why not make a proper mast boot in the first place.
The top of the mast boot attaches directly to the mast.
The bottom edge will also need to be attached to something.
So you will need a deck ring or flange.
The deck-ring should be well clear of the wedges and with a grove or lip into which the bottom of the boot is securely fastened.
It will also be of the same profile as the mast, circular for a round mast, oval foe an oval mast and be positioned so as to allow the mast boot to have a runoff slope of somewhere in the region of 60 degrees.
Making a Mast Boot Pattern
The material for a mast boot should be strong, such as proofed acrylic or painted canvas.
The best mast boot requires three separate pieces.
The top and bottom collars will simply be cylindrical so they are easy to cut and sew.
The middle part is the cone shaped bit, so that’s the tricky one to measure out and cut.
It is always best to start with a paper pattern which can be tried against the mast before cutting the material.
And perhaps even before buying material so you know exactly what you will need.

In order to draw the pattern you will need to take note of three measurements.
- The circumference of the mast.
- The circumference of the deck ring.
- And the proposed height of the mast boot from the deck ring to the top position on the mast. (H).
This height should allow for the finished boot to have a slope of at least 60degrees and be clear of wedges and any mast fittings.
This is for a circular mast and deck ring, for masts and rings which are not perfectly circular add a bit extra to the height (H) then trim the pattern to fit.
Take these measurements and write them down.
So, lets start with the top and bottom collars, these are added to smooth the transition from the cone shape of the boot to the cylindrical shape of the mast and deck ring.
The collars are simple oblong strips cut to the respective circumferences of the deck ring and mast with an allowance all round for sewing.
The width of the deck ring collar needs to allow for any tuck around the lip, one and a half times the deck ring height should be sufficient, plus the hem.
The mast collar needs to be wide enough to take whatever means of fastening you decide on.
Now the next stage is to work out that ‘lampshade shape’ for the main part of the mast boot.
I have tried to do this just by pinning paper against the mast and trying to do it free hand, believe me it is easier and quicker to do the simple maths first.
So, fi rst, we need to work out the diameters of the mast (Bd) and the deck ring (Cd), which if you remember your geometry is the circumference divided by 3.1416 ().
Now we need to draw two arcs both with their centres at A.
But first we need to work out the length of their respective radiuses.
To get R2, multiply H by the diameter of the deck ring (Cd), and then divide by the difference between the diameter of the deck ring (Cd) and the diameter of the mast (Bd).
At this stage it is always best to round any odd numbers up, the paper pattern can always be trimmed down later.
To get R1 simply subtract the height (H) from R2.
The lengths of the arcs should be the respective circumferences plus a bit for trimming/sewing.
Now, cut out your paper pattern, take it to your mast, pin it or hold it against the mast to check how it fits and trim as necessary.
Once you are satisfied with the fit you can take the pattern to your cloth and mark it out, not forgetting to allow plenty of extra for seams and overlaps.
Sew the top and bottom collars on to the ‘lampshade’ and hem the top and bottom edges.
Ideally the whole mast boot would be sewn up, the seams sealed and then fitted to the mast before the mast is stepped.
However, it can be fitted to an already standing mast, it just means that the final sewing is a bit awkward, though the overlap can be done with a good sticky sealant.
Begin by placing the boot inside out and upside down around the mast and securing the top collar to the mast.
The very large sized hose clamps are ideal for this.
Don’t seal it just yet as the position may need to be altered.
Then pull the boot down over the top collar so that it reaches the deck ring without being too tight.
Make sure that the overlaps are tucked inwards.
Secure the bottom edge to the deck ring temporally so you can check and if necessary alter the fit.
Mark where you want the overlap to be sewn.
You can now release the bottom edge to make sewing a bit easier, it is still going to be a fiddly job but well worth taking you time and getting it as neat as possible.
You can then run some sealant down the seams.
You could just glue that side seam but the problem is how to hold the edges together wile the glue or sealant sets.
Then all you need to do is paint or proof the mast boot or if you've used a waterproof cloth just run some sealant along the outside of the seams.
And you now have a relitively leak free Mast Boot.

Recent Articles
WANTED: Long lost Chris Craft 26 feet
Jan 29, 24 01:35 AM

"Everyone, in some small sacred sanctuary of the self, is nuts." (Leo Rosten, 1908-1997)
You might like these

Plywood and Veneer Guide for Marine use.
A guide to plywood for boat building and why you should use the best marine grade you can afford.

DIY Woodboat Building Questions
Woodboat building questions a Forum for wooden boat building, plans, lumber, caulking compounds and other boat building problems.

Boat Books for Wooden Boat Builders
Boat Books a series of boat books based on some of the 1960's, classic, Free Boat Plans that were published in magazines such as "Popular Mechanics", "Popular Science" and the "Boat Builder Handbook".

Build a Boat, tips for the DIY Wooden Boat Builder.
How to Build a Boat, Wooden Boat Building methods for the DIY, backyard, self-builders explained, carvel, lapstrake and plywood

Clench Nails, Fastening for Small Wooden Boats.
How to use Clench Nails, these provide a fast reliable method for fastening small wooden boats.

Wood Screws for Boat Building and Repair.
Wood Screws are the most widely used and versatile fasteners used on wooden boats. Which type to use and how to use them

Timber, Lumber for Boat Building.
A brief description of the most common Timber used for building Wooden Boats how to choose wood for your project boat

Timber Properties
A brief guide to timber properties and wood, characteristics such as strength, stiffness and elasticity for choosing lumber for wooden boat building and restoration.

Rivets and Copper Rove Wood Boat Fastenings.
How to use Copper Rivets and Roves construction guide to fasteners on your wooden boat.
Ring Nails for Marine Fastening.
Ring Nails sometimes call Gripfast or ring shank, silicon bronze boat nails are renowned for their holding power. but how to get them out?
HELEN M HOBART
Jan 21, 24 05:31 AM
Drain plug for wooden hull
Dec 28, 23 11:28 AM

Privacy Policy
Advertising Policy
Cookie Policy

I am perfectly aware that the majority of Wooden Boat aficionados are sensible folk. However, I need to point out that I am an amateur wooden boat enthusiast simply writing in order to try to help other amateur wooden boat enthusiasts. And while I take every care to ensure that the information in DIY Wood Boat.com is correct, anyone acting on the information on this website does so at their own risk.
- New Sailboats
- Sailboats 21-30ft
- Sailboats 31-35ft
- Sailboats 36-40ft
- Sailboats Over 40ft
- Sailboats Under 21feet
- used_sailboats
- Apps and Computer Programs
- Communications
- Fishfinders
- Handheld Electronics
- Plotters MFDS Rradar
- Wind, Speed & Depth Instruments
- Anchoring Mooring
- Running Rigging
- Sails Canvas
- Standing Rigging
- Diesel Engines
- Off Grid Energy
- Cleaning Waxing
- DIY Projects
- Repair, Tools & Materials
- Spare Parts
- Tools & Gadgets
- Cabin Comfort
- Ventilation
- Footwear Apparel
- Foul Weather Gear
- Mailport & PS Advisor
- Inside Practical Sailor Blog
- Activate My Web Access
- Reset Password
- Customer Service

- Free Newsletter
Ericson 34-2 Finds Sweet Spot

How to Sell Your Boat

Cal 2-46: A Venerable Lapworth Design Brought Up to Date

Rhumb Lines: Show Highlights from Annapolis

Solar Panels: Go Rigid If You have the Space…

Leaping Into Lithium

The Importance of Sea State in Weather Planning

Do-it-yourself Electrical System Survey and Inspection

When Should We Retire Dyneema Stays and Running Rigging?

Rethinking MOB Prevention

Top-notch Wind Indicators

The Everlasting Multihull Trampoline

What Your Boat and the Baltimore Super Container Ship May Have…

Check Your Shorepower System for Hidden Dangers

DIY survey of boat solar and wind turbine systems

What’s Involved in Setting Up a Lithium Battery System?

The Scraper-only Approach to Bottom Paint Removal

Can You Recoat Dyneema?

How to Handle the Head

The Day Sailor’s First-Aid Kit

Choosing and Securing Seat Cushions

Cockpit Drains on Race Boats

Re-sealing the Seams on Waterproof Fabrics

Safer Sailing: Add Leg Loops to Your Harness

Waxing and Polishing Your Boat

Reducing Engine Room Noise

Tricks and Tips to Forming Do-it-yourself Rigging Terminals

Marine Toilet Maintenance Tips

Learning to Live with Plastic Boat Bits
- Sails, Rigging & Deck Gear
Revive Your Mast Like a Pro
Each spar section has unique signs of trouble to look for during inspection..

Unobtainium is the metal at the top of every Naval Architect’s wish list. It’s a perfect marine material; light, strong, stiff yet flexible—it’s as inert as gold, but costs only pennies per pound. Sadly, like the search for El Dorado, this metal quest remains more alchemy than chemistry.
For now, aluminum, especially the alloy 6061-T6, is the solid performer. It singlehandedly upstaged spruce as the mast material of choice, and for decades it’s done its job admirably. The alloy isn’t perfect, but by understanding its vulnerabilities, and mitigating those negative characteristics, the functional lifespan of an aluminum spar can be measured in decades not years.
Yes, carbon fiber spars are in many ways the next step forward. But for those intent on being cost effective and not in the hunt for a few tenths of a knot increase in boat speed, aluminum remains the cost effective alternative. In a future issue we’ll focus on carbon’s influence on spars, hulls, rigging, and sails.
Most metal masts are made from long, cylindrical billets of aluminum alloy. Each tube section is created using a powerful ram to force a heated billet (400-500 C) through a set of dies that squeeze and shape the billet into the cross section and wall thickness of a specific spar. Lots of lubricating release agent and 15,000 tons of ram pressure are used to reshape the malleable aluminum.
Billet residue is captured and recycled, while the tube shape undergoes quenching as it moves off on the runout table. The next stop in the line involves a process that draws (pulls) and straightens the tube section.

Once fully cooled, it goes through a T6 heat tempering process that elevates tensile strength from 35,000 to 45,000 psi. Lastly, spars can be anodized, painted, powder coated, or left uncoated. Some masts are extruded in half sections and machine-welded together lengthwise.
There are other aluminum alloys that are better suited to welded hull construction or used for metal casting purposes, but 6061-T6, containing small amounts of silicon, magnesium, and other trace elements, delivers the strength, stiffness and lightness that’s vital when it comes to making spars.
The “T6” alloy is weldable, but doing so anneals and weakens the area that’s welded. This is one of the reasons why, when splicing two sections together, a doubler is added internally that overlaps the junction. Excess heat buildup during the plug welding process that joins the sections is kept to a minimum. Some manufacturers mechanically fasten the junction using machine screws or heavy duty pop rivets.
Unfortunately, aluminum isn’t quite the sequel to tomorrow’s Unobtainium . Aluminum, like steel alloys, show a proclivity to oxidize. But in the case of most steel alloys, oxidation is an ongoing process that only reaches completion when the object in question has become an unrecognizable pile of rust.

Bare aluminum, on the other hand, reveals a very different oxidation curve. A shiny new piece of aluminum develops a speckled, gray, oxidized coating that actually becomes a protective layer, preventing further oxidation. Ironically, this means that the ugliest looking mast in the marina, that non-anodized, unpainted one with the aesthetic appeal of dirty socks, is about as well protected from further deterioration as the spar on the gold-plater with the automotive finish. This is the reason why most commercial mariners restrain from painting the deck and topsides of their aluminum workboats.
The root cause of this aesthetic injustice is the way moisture, especially salt water, finds every microscopic void or coating imperfection and causes aluminum to oxidize around voids and spread beneath the paint layer. By the time blisters appear and paint begins to flake, the sub surface is covered with aluminum oxide and starting to pit.
There are several ways to tame the effect of chloride-rich seawater. But when it comes to a failing painted surface, thorough prep work is essential. Modern epoxy primers help hold corrosion at bay, and single and two-part urethane coatings seal the surface. Hard-anodized or powder coated spars are even better protected, but cost more and are more complicated to refinish when they finally fail.
GALVANIC CORROSION
Galvanic corrosion is aluminum’s second major nemesis, and it stems from an electrical interaction rather than oxidation. Metals are rated on a galvanic corrosion scale that places less reactive (more noble) metals at one end and more reactive (less noble) ones at the other end.
Platinum, beryllium and magnesium lean against one of the bookends of this scale. Magnesium, a plentiful element, is strong and light, 35 percent lighter than aluminum, but way too reactive in the marine environment. Platinum and gold sit at the opposite bookend of reactivity and are so inert that all other metals become anodic in their presence. The metals that lie in between these are relatively ranked according to their behavior in an electrolyte such as seawater.
When it comes to marine applications, there aren’t many platinum thru hulls, but silicon bronze is a pretty good compromise between cost and corrosion resistance. It’s rank on the galvanic scale is toward the more noble end and it behaves as a cathode to less noble metals like zinc, brass, and aluminum, which become anodes in the proximity of more noble metals.
Unfortunately, when dissimilar metals are in direct contact, all it takes is a little rain or morning dew to set up a temporary galvanic cell. Salt spray finds all the nooks and crannies on a sailboat and as the water evaporates it leaves behind crystalized sodium chloride (NaCl). Each raindrop, wave splash or drop of dew rehydrates the electrolyte. And as every galvanic cell demonstrates, wherever two or more dissimilar metals are immersed, a current flows and the less noble material (anode) corrodes causing electrons to flow toward the more noble metal (cathode). The net result is pitting and eventual destruction of the anode.
This prolonged, double-barrel assault on an aluminum spar is most noticeable in areas where dissimilar metals make contact.
There’s an old superstition about putting a couple of silver or copper coins under the mast step, just before stepping the spar. It may have been a good luck charm in the days of iron men and wooden masts. But today, placing a copper penny or silver eagle in a wet mast step completes a highly reactive galvanic cell and creates a corrosion experiment of the first order. The right answer is to do everything possible to separate dissimilar metals. Putting a Delrin strip or dielectric PTFE tape between the hardware and the mast wall really helps.
When installing larger stainless steel hardware on a mast, it’s easy to cut out a gasket from a sheet of 30 mil thick Teflon. Also be sure to use Tef-Gel or a similar dialecrtic grease or sealant on all screw threads.
MAST INSPECTION
Once the mast has been unstepped, positioned horizontally on horses and the headsail furling gear removed, it’s time to take a close look in all the nooks and crannies where things can go wrong. I prefer a bottom up approach and group the mast into four related subsets: base, column, spreaders, and masthead. If the mast is going to be painted, postpone this DIY inspection until all the rigging and hardware has been removed. In either case, scrutinize the spar, hardware and rigging attachment points, especially where high loads are focused.
It helps to have a good magnifying glass, a pick, knife and small scraper on hand to expose and inspect oxidized areas. Place a piece of contrasting color masking tape on each point of concern as you progress toward the masthead. Once the inspection is complete, use a digital camera or smartphone to document the more serious issues. These snapshots provide a record of the location and extent of all corrosion, deep pitting and any cracks emanating from fasteners or hardware. Also record all dents or other impact damage and any sign of ongoing abrasion. Serious damage can be caused by misled wire running rigging and the cycle loading wear linked to variations in tension. Naturally, all standing and running rigging should be thoroughly inspected at this time— a topic of a future article.
AT THE BASE
Keel-stepped masts aboard many cruisers and racers are hidden below the cabin sole and reside in a wet, corrosion prone, bilge ambiance. And it’s another reason why, when a mast is unstepped, the entire support structure, step and the heel fitting deserve a close look. Check for signs of corrosion and make sure the hardware that fastens the heel fitting to the grid or other transverse and fore-and-aft support is in good shape. This structure supports compression loads and also must respond to changes in backstay tension and side loading, not to mention the shock loads of a beat to windward in heavy seas. This is also the time to do what I call spar-oscopy. Take a compact LED flashlight and tape it to the end of a long, thin PVC tube or bamboo fishing pole that will be used to look at the mast interior.
This jury-rigged light on a pole, allows you see signs of internal corrosion and gives you a chance to locate abrasion points where halyards have been misled or are rubbing on hardware. A narrow spot beam will illuminate much of the inner wall of the mast, and if the running rigging has been replaced with thin messengers and the spreader “dog bones” (cross connecting supports) have been removed, you will have a clear sight line up the spar. This is a good time to sort out any halyard overlaps.
Riggers also look for an ailment called “elephant foot.” It’s a descriptive name for the partial crumpling of the spar near the base of the mast, It’s caused by over-compression and/or a wall section that is too thin. This wrinkling is usually just above the mast step, and it indicates a condition just shy of complete failure. It can be linked to prolonged ponding to windward with excessive backstay tension and overpressuring mast jacks. In some cases a new section can be spliced into the spar. By if it’s an older mast and other significant signs of deterioration are present, it may be time to opt for a new spar. Don’t bet the farm on an “it hasn’t failed yet” assumption; hire a skilled rigger to advise on the tough calls.
At first glance, the mechanical challenge linked to stripping hardware from a mast seems rather simple. All you need are a couple of screwdrivers and you’re ready to go. Unfortunately, the gods of galvanic corrosion have placed another obstacle in the sailor’s way.
The threads of those stainless steel screws attaching hardware to base plates or to the mast wall itself have become so corroded they are likely to be screwdriver-proof. Part of the blame goes to original hardware installers, who gave little attention to coating threads with an anti-seize compound and the effect it would have on future maintenance.

So after some years or decades, when it’s time to see what lies underneath the hardware, my first step is to clean all oxidation, paint and grime away from the screw slots and make sure that the chosen screwdriver fills the entire slot. A snug fit is the goal. Then, if a good counter clockwise twist fails to elicit any rotation, it’s time to add a wrench to the screw driver and deploy a good deal more torque.
If this also fails to loosen the bugger, I go to plan B before I ruin the screw slot. Step one is to use a pick to scrape away oxidation around the screw head perimeter. The next step is to douse the area with a penetrant such as PB Blaster, CRC’s Ultra Screwloose, Knocker Loose Plus, Gasoila Free-All or a similar product (see Inside Practical Sailor blog post, “More Boat Tips: Unsticking Stuck Nuts and Bolts”).
Before once again applying torque to the problem, I spend some time using a drift pin and a small ball-peen hammer to tap each chemically soaked fastener. Afterwards I add more penetrant around each screw head. Instead of immediately reverting to a brute force approach, which more often than not leads to a broken fastener or a damaged screw slot, I let the penetrant do its thing and return the next day with my portable impact driver and assortment of screw driver bits. The small Makita impact tool applies a pulsing torque. Combined with a little penetrant and a lot of patience, I’ve found this tool to be very effective on stubborn fasteners. Screw diameters of ¼ inch or less are not hard to snap so use pulsing torque is far better than more leverage and brute force.
If the screw slot is damaged it’s time to switch gears and be ready to drill out the head of the screw and pull the hardware off the remaining stud. A stud remover fitted to a socket wrench works better than vise grips when it comes to backing out a headless screw. But it requires a half-inch or more of the screw stem to be exposed.
The secret to drilling off the damaged head of a screw involves the use of a drill bit made for stainless steel. Place it in the chuck of a low-speed drill that delivers ample torque at slow speeds. Those using a dull bit and a high-speed drill are likely to work-harden the stainless steel screw head, making it even harder to drill. Applying cutting oil that both cools and lubricates a bit will make drilling more effective.
ALONG THE COLUMN
A sailboat mast is like a long electrical fuse: one bad spot and the show is over. Critical failures are usually linked to standing rigging failures and can occur at toggle or tang attachment points, on the spar itself or at spreader tips and roots. Upper shroud tang fittings, near the masthead, need a close look. Check clevis pin holes for elongation and Tball or stem ball cups for deformation.
Sight along the open spans of the spar, where no hardware is attached. It should be free of abrasion marks and signs of halyard shackle damage. It’s surprising how many painstakingly applied paint jobs are ruined by halyard slating cause by poorly set halyards. During this part of the inspection also check exit sheaves, winch bases/pads, mast steps, the bow light, radar bracket and other attached hardware.
The gooseneck fitting and boom vang points of attachment are highstress areas and prone to developing stress cracks. Just below this union, forces converge at the mast partners, the reinforced area where a keelstepped spar passes through the deck. Check here for stress-related damage as well as corrosion issues. If you find signs of extensive pitting or stress cracks, a cosmetic repair can be more harm than help. Have a local rigger with a good reputation take a close look at what you have uncovered.
The mainsail mast track should be straight and the slugs, slides or cars that run in or on them should slide freely. Take an extra slide or car and hand test the track, identifying any points where friction increases. Problems are often caused by burred or dented metal, oxidation in an internal track or misalignment at track joints. Most of these issues are easy to resolve while the spar is horizontal and access is optimized. In-mast or in-boom furling systems each have an inspection and maintenance routine outlined by the manufacturer. Maintaining optimum reliability revolves around following these guidelines. Care should be taken to avoid keeping paint and primer from hampering track function.
Search for causes of abrasion, eliminate the dings and dents from halyard shackles by solving lead problems. And be on the lookout for hairline cracks emanating from fasteners on the leading edge of the mast. Modern spar design accounts for backstay tensioning that induces bend in the mast to adust headsail shape. This bending results in an intentional tension increase on the spar’s leading edge, adding new stress to a column already in compression. Small cracks emanating from fasteners on the leading edge of the mast can be enlarged as the mast is intentionally bowed.
Every sailor who’s painted anything on their boat has plenty of tips to share. But when it comes to useful insider advice, pay more attention to the pros who have learned what works over many years. The good news is that although paint brand allegiance may vary, generic mast prep and painting techniques have a high degree of correlation.
When it comes to the first step in the prep process, every expert sings the same refrain. Remove the hardware if possible, especially if there’s any sign of blistering or paint failure around the edges. If there’s no sign of any corrosion at all, and the fasteners are likely to snap rather than release, carefully prep and tape around the hardware.
Sand, wire brush or sand/soda blast all areas where corrosion has pitted or left the surface covered with white aluminum oxide. Take a close look at the heel of the mast and the mast step itself. Both need to be free of corrosion and not damaged by metal loss or physical damage. The same goes for the area where spreaders, stays and shrouds attach. The masthead fitting also deserves close scrutiny. Inspect the aluminum around where the sheave axle(s) attach. A corroded aluminum masthead truck, with deterioration around the support for headstay or backstay toggles, can spell disaster. This corrosion inspection is a good time to catch pending problems.
In most cases, OEM painted spars hold up quite well, especially those that have been carefully prepped, epoxyprimed and LPU top coated. Eventually, weathering causes the gloss to disappear, but the paint retains excellent adhesive quality. If you’re facing such a challenge and there’s little or no sign of physical damage or corrosion around hardware, there’s nothing wrong with simply renewing the top coat.

In such cases, begin with a wash and/ dewax cleanup, sand with 220/320, remove dust, tape off hardware, solvent wipe and apply of two coats of the same (or similar type) topcoat, scuff-sand between coats.
However, if there are dings, scrapes or areas where corrosion has damaged the coating or areas where paint adhesion is failing, a decision must be made between spot repairs and complete mast redo. The latter involves removal of most or all of the hardware and stripping off every bit of the old paint. A spot repair approach is much less labor intensive, but if corrosion is rampant, spot repairing can be counterproductive.
During the prep process it’s essential to clean and degrease the surface before doing any sanding or other abrasive work. I prefer to use the solvent/cleaner of the paint manufacturer I’ve chosen. Clean cotton rags work best, and by meticulously wet wiping the surface you eliminate contaminants that can be forced into the substrate during sanding.
In the case of a repair and recoat effort, once the corrosion and flaking paint have been removed, feather in the adjacent painted mast surface with 60- 80 grit paper to achieve a toothy grip for the epoxy primer that follows. When doing a spot repair, this taper zone becomes an important test of one’s ability to feather an edge and hide the old to new paint junction. Seamless blending of the primer sets the stage for a successful, smooth transition spot repair. If, as you sand the boundary, the old paint continues to flake rather than allow you to feather the edge, It time to switch gears and consider removing all the paint.
An important step in painting aluminum is to get an epoxy primer on a freshly sanded and clean surface as soon as possible. When painting an entire spar, It helps if you can set up a way to hang the mast at waist level so it can be rotated in order to access all surfaces efficiently.

PRODUCT UPDATE
Interlux recommends doing the degrease wipe down with their 202 Solvent Wash prior to sanding. Then prime the spar using their InterProtect 2000E/2001E, thinned 15-20% with their brush or spray reducer. It’s a user friendly epoxy primer and easy to sand. Two coats makes the 60-80 grit sanding marks disappear. Both single-part Bright Sides and two part Perfection deliver a smooth glossy finish. The former is easier to apply and the latter is more durable and long lived.
Pettit offers a complete lineup of aluminum paint and prep products. Their approach kicks off with a solvent clean and a medium grit emery cloth sanding. When the residue has been removed, a thin coat of #6455 Primer should be applied. Two hours later, EZ Prime #6149 is applied and when it’s cured and sanded with 220 (repeat if necessary). Finish with two coats of Easypoxy.
Awl Grip recommends an initial cleaning with their surface cleaner T340 followed by a vigorous Scotchbrite scrubbing with Deoxidine and a thorough rinse to remove all residue. When dry prime with 30-Y-94 and within 3-6 hours, without sanding, apply 545 epoxy primer. Sand 220/320 and top coat with Awl Craft 2000.
If the spar was previously anodized precede the above with a 10-minute wash using a 33% solution of natrium hydroxide. Don’t let the solution dry on the spar. Immediately water-rinse and follow the prime and paint process above.
Spreader junctions are like a dangerous highway intersection, a point where competing forces interact and where there are no traffic lights to tame the flow. Rigging tension on the windward side of a sailboat cause compression loads to increase in the windward spreader(s) and decrease in the leeward spreader(s). Discontinuous standing rigging optimizes wire/rod diameter in each panel section, but it also complicates spreader tip hardware. All too often, spreader boots or a well-meaning taping effort, ends up looking like a response to an ankle injury. Even worse it creates a moisture-holding corrosion bath that enhances galvanic corrosion and oxidation. The goal is to avoid going overboard with padding and tape and making sure that water will not collect around spreader tip hardware.
Spreader bases are another realm of serious concern due to cycle loading, multidirectional forces and dissimilar metal contact. Swept back spreaders, especially those that eliminate the need for a backstay, cope with even greater loads. So when the rig is un-stepped, check how the spreader attachment was engineered. Was a doubler added to the mast wall and/ or were cutouts installed and hardware added to connect spreader pairs? In either case, corrosion in key load path areas can greatly decrease the spar’s ability to cope with the fluctuating loads. It’s no surprise that masts often break just above a set of spreaders.
AT THE MASTHEAD
Once launched, it’s hard to see what’s going on at the masthead. This means that when the spar is down it’s time to get a really close look at the mast truck and its associated fittings. Begin by disconnecting the standing rigging and checking the geometry of every hole that supports a clevis pin. The rule of thumb is: round is good, elliptical is bad. This goes for the tangs that connect upper shrouds to the spar as well as the holes in a welded aluminum masthead fitting. The loss of an upper shroud while beating to windward usually brings down the mast, so extra attention in this area is time well spent.
Carbon spar manufacturing mimics the engineering pioneered in the aerospace industry. They have become an essential component In the most competitive ranks of sailboat racing and caught on with cruising sailors who own lighter, more performance oriented sailboats.
Most spars are built on metal mandrels by carefully aligning layers of prepreg unidirectional and multi-axial carbon fiber from masthead to heel. Intermittently, a debulking process is used to squeeze the layers together, and after the laminate schedule has been carefully aligned, it’s placed in an autoclave. Here the epoxy prepreg in the carbon material becomes viscous and cures under controlled heat and air pressure. These materials are expensive, the labor is time-consuming and the quality control must be rigorous.

One of the major advantages of carbon mast building is the ability to engineer the layup to coincide with the load paths and stresses in the structure. Finite element analysis has helped identify how and where forces are transferred through the tube section. Weight is saved by only adding material where it is needed.
A cruising boat designer may opt for extra reinforcement that increases the safety factor by raising the breaking point of the material. Racing sailors have validated the performance uptick associated with carbon spars. Carbon/epoxy laminates do not suffer from corrosion but they are anything but immune to UV light. It’s one of the reasons a white primer and LPU topcoat is the sensible finish.
Minor impact damage and abrasion from poorly led running rigging is fairly straight forward to repair. But damage linked to sailing loads that cause major cracks in the laminate or interlayer delamination is another story altogether. In these cases, the spar builder or a composites shop engineer has some tough decisions to make. The big challenge is when a high-tech laminate bundle fails it’s very difficult to scarf in a new section that will handle all the loads in a manner that’s equivalent to, let alone, better than new. Some insurance companies put restrictions or higher premiums on coverage of carbon masts.

RELATED ARTICLES MORE FROM AUTHOR
Leave a reply cancel reply.
Log in to leave a comment
Latest Videos

40-Footer Boat Tours – With Some Big Surprises! | Boat Tour

Electrical Do’s and Don’ts

Bahamas Travel Advisory: Cause for Concern?

Island Packet 370: What You Should Know | Boat Review
- Privacy Policy
- Do Not Sell My Personal Information
- Online Account Activation
- Privacy Manager
Mast Stepped: A Comprehensive Guide to Properly Installing and Maintaining Your Sailboat’s Mast
by Emma Sullivan | Jul 17, 2023 | Sailboat Gear and Equipment
Short answer mast stepped: Mast stepped refers to the position where a sailing boat’s mast is supported and secured on deck. It commonly involves attaching the base of the mast to a step or partners, ensuring proper rigidity and stability for sailing operations.
What does it mean for a mast to be stepped on a sailboat?
Blog Title: Navigating the Seas: Demystifying Mast Stepping on a Sailboat
Introduction: Sailing is often associated with a sense of freedom and adventure, as you glide through the serene waters powered only by the wind. However, behind every majestic sailboat lies a complex set of components working in synchrony. One such crucial element is the mast, which plays an integral role in allowing your vessel to conquer the seas. In this blog post, we will delve into what it truly means for a mast to be stepped on a sailboat and explore its significance in sailing.
What is Mast Stepping? When we refer to “stepping” the mast on a sailboat, we are essentially describing the process of erecting or installing it onto the boat’s deck. Picture this: just like erecting a tent requires setting up poles, attaching beams, and securing them firmly in place – stepping the mast follows similar principles but with much more complexity.
The Role of Mast: To comprehend why this process holds vital importance for sailors, understanding the role of a mast itself is paramount. The mast serves as an essential vertical spar that supports and secures all standing rigging – encompassing shrouds and stays – which ensures that your sails remain taut amidst ever-changing weather conditions. Additionally, it houses various components necessary for smooth navigation, including halyards (ropes used to raise and lower sails), sheaves (pulleys facilitating rope movement), and even instrumentation like wind sensors or radar systems.
Now that we have established why masts are pivotal in sailing, let’s explore the different types of masts commonly found on sailboats:
1. Keel-Stepped Mast: In modern sailboats, keel-stepped masts are prevalent. These masts rest securely in support at their base within or directly on top of the keel (the large fin-like structure underwater). This design enhances structural integrity and stability while also allowing for easy maintenance.
2. Deck-Stepped Mast: Alternatively, some sailboats feature deck-stepped masts. These masts are secured on the boat’s deck itself, with a lower support or compression post transmitting the mast’s loads to the keel. Deck-stepped masts offer advantages like simplified installation and removal, making them particularly favorable for smaller boats or those frequently transported by trailer.
The Process of Stepping the Mast: Now that you grasp the significance of the mast and understand its types let’s explore how this intricate process is executed:
1. Preparation: Before embarking on mast stepping, it is crucial to ensure that all necessary rigging hardware, lines, hoisting equipment (such as a crane or gin pole), and safety gear are readily available. Thoroughly inspecting all components for wear and tear is equally important to avoid any mishaps during installation.
2. Alignment & Integrity Check: Next comes aligning the mast properly at its designated step point on the boat’s deck or within/upon the keel structure (depending on mast type). Checking for proper alignment prevents undue stress on both the boat and mast while ensuring efficient sailing performance.
3. Hoisting & Securing: With preparation complete and alignment precise, it’s time to gently hoist the mast using an appropriate force measurement technique to prevent overloading any connection points or causing damage. Adequately securing the mast at its step point is paramount – utilizing sturdy stainless steel bolts, shackles, or other suitable fixtures ensures a robust connection.
4. Rigging Installation: Once your mast stands tall and firm, it’s time to attach various standing rigging elements such as shrouds, stays, halyards – each with their specific task in supporting sail control systems aboard your vessel. This requires careful attention to detail – adjusting tensions correctly according to manufacturer guidelines guarantees optimal sail performance across different wind conditions.
Conclusion: Stepping the mast on a sailboat is a critical procedure that sets the foundation for successful and safe sailing adventures. A well-adjusted mast brings stability, facilitates efficient control, and allows your sails to harness the power of the wind, propelling you towards new horizons. So, next time you embark on an aquatic journey, appreciate the skill and craftsmanship behind this process – knowing that every smooth glide owes its gratitude to a perfectly stepped mast.
How is a mast stepped on a sailboat? A step-by-step guide.
Stepping the mast on a sailboat is a fundamental process that marks the beginning of every sailing adventure. It involves raising and securing the mast into its proper position, allowing for the attachment of sails and rigging, ultimately enabling the boat to harness the power of wind and embark on exciting voyages. In this step-by-step guide, we will explore the intricacies of stepping a mast, providing you with all the necessary knowledge to do so successfully.
Step 1: Preparation Before stepping your mast, it is important to ensure that all preceding preparations have been completed. This includes assembling all necessary tools and equipment such as shackles, halyards, or winches. Additionally, inspecting both your boat’s standing rigging and mast itself for any signs of damage or wear is crucial for safety and optimal performance during future sailing endeavors.
Step 2: Clearing obstructions In order to safely step your mast onto your sailboat’s deck, make sure that all potential obstructions are removed. Check for any lines or fittings that may hinder the smooth process of raising the mast. A clutter-free workspace will significantly reduce stress and allow for seamless progress throughout this procedure.
Step 3: Proper positioning You now need to position your sailboat in an ideal location from where you can safely step the mast. Find a spot protected from strong winds or currents that might make this task more challenging. Ideally, choose an area with ample space around you to maneuver freely without risking damage to your vessel or nearby objects.
Step 4: Assemble assistance team Without doubt, stepping a mast is rarely a one-person job. Recruiting assistance from fellow sailors or friends will not only make this process less physically demanding but also contribute to safer execution overall. Ensure everyone involved understands their assigned roles and responsibilities before proceeding further.
Step 5: Attach standing rigging Begin the process of stepping the mast by attaching and adjusting the standing rigging. This includes securing your forestay, backstay, shrouds, and any other supporting cables or wires. Follow manufacturer guidelines and best practices to ensure proper tension and alignment. It is vital to double-check all connections, as loose or improperly attached rigging can compromise the stability and performance of your sailboat.
Step 6: Hoisting the mast Here comes the exciting part – raising the mast! Depending on your boat’s design, this step might require a crane or a simple manual lifting mechanism. Communicate clearly with your team and follow a synchronized approach while hoisting the mast to avoid any accidents or setbacks.
Step 7: Aligning and securing Once your mast is in an upright position, carefully align it with its designated base partner (known as a step) on deck. Any misalignment at this stage can result in unwanted stress on fittings or potentially damage critical components of your sailboat’s rigging system. Use shims if necessary to level out any minor discrepancies.
Step 8: Stabilizing and tightening Now that your mast is properly aligned, securely fasten it using nuts, bolts, or pins provided by its design specifications. Pay close attention to recommended torque values to avoid under- or over-tightening. This step ensures that even under significant wind forces, your mast remains steadfastly anchored.
Step 9: Check for secure fit Before celebrating the successful completion of stepping your sailboat’s mast, conduct a final inspection to ensure everything is secure. Inspect all attachments points thoroughly, checking for signs of movement or looseness. Shake the mast gently from various angles to identify any wobbling that may indicate insufficient tightening.
By following these nine steps meticulously, you will have successfully stepped the mast on your sailboat like a pro! Properly stepping a mast ensures both safety and optimal performance, granting you the freedom to set sail and explore new horizons with confidence. Remember, if you ever feel unsure or uncomfortable during any stage of this process, consult your boat’s manufacturer or seek professional assistance for guidance. Happy sailing!
Mast Stepped: Frequently Asked Questions (FAQ)
At Mast Stepped, we understand that many boat owners have questions about the mast-stepping process. To help alleviate any concerns or confusion, we’ve compiled a list of frequently asked questions (FAQ) below. Read on to discover detailed professional answers to these queries.
1. What is mast stepping, and why is it important? Mast stepping refers to the process of raising a boat’s mast into its designated position. This task is crucial because it enables your boat to properly harness wind power for sailing or cruising. A well-aligned and secured mast ensures better performance and stability on the water.
2. When should I step my mast? Mast stepping is typically done during spring commissioning, when boats are taken out of winter storage and prepared for the upcoming season. However, it can also be necessary if you’re re-rigging your mast or performing maintenance on your rigging system.
3. Can I step my mast by myself? Stepping a mast requires careful planning, preparation, and coordination. While some experienced sailors may be able to do it alone, it’s generally recommended to have at least one other person assisting you. Moreover, enlisting professionals who specialize in mast stepping can provide extra peace of mind and ensure a smooth process.
4. How much does professional mast stepping cost? The cost of professional mast stepping services varies depending on factors such as the size and complexity of your boat’s rigging system, location, and additional services required. It’s best to request quotes from reputable marine service providers who can assess your specific needs accurately.
5. What steps are involved in the mast-stepping process? Mast stepping involves several key steps:
– Preparation: Ensure all rigging lines are securely attached with no tangles or snags. – Support: Use sturdy supports such as a crane or gin pole to temporarily hold your mast in place during the raising process. – Alignment: Carefully align the mast with the boat’s keel, making sure it is perpendicular to the waterline. – Attachment: Securely attach the mast to its base (deck or keel) using appropriate hardware and fasteners. – Rigging: Reconnect all necessary lines, cables, and electrical connections according to your boat’s specific rigging configuration.
6. Are there any safety precautions I should take during mast stepping? Safety is paramount when dealing with a tall structure like a mast. It’s essential to follow best practices such as wearing proper protective gear (e.g., harnesses), using secure lifting equipment, and conducting a thorough inspection of all rigging materials beforehand. Additionally, be cautious of overhead powerlines that may pose a hazard during the mast raising process.
7. How often should I inspect my mast and rigging system? Regular inspections are crucial for detecting any signs of wear, corrosion, or damage that could compromise your boat’s safety while at sea. Ideally, you should visually inspect your rigging system yearly and perform more detailed examinations every three to five years or as recommended by professionals.
8. Can Mast Stepped assist me in selecting the right rigging components? Absolutely! Our team of experts can provide guidance on selecting appropriate rigging components tailored to your boat’s specifications and sailing needs. From wire ropes to turnbuckles and fittings, we’ll help you choose durable and reliable equipment from trusted manufacturers.
9. What are some common indicators that my mast needs attention? Signs that your mast may require attention include loose shrouds or stays, clanging noises while under sail, excessive movement or swaying of the mast when underway, leaks around deck penetrations connected to your mast (e.g., halyard exits), visible cracks or deformation on any part of the structure. If you notice any of these issues, it’s best to have them inspected promptly by professionals.
10. Can Mast Stepped assist with unstepping a mast too? Absolutely! Just as we specialize in mast stepping, our services also encompass unstepping masts. Whether you’re preparing for winter storage or need to address rigging maintenance, we have the expertise and equipment to safely handle the de-rigging process.
In conclusion, at Mast Stepped, we understand that proper mast stepping is essential for optimal sailing performance and safety. By addressing frequently asked questions about this process, we aim to empower boat owners with knowledge and resources to ensure their rigs are ready for every adventure on the water. Whether you decide to tackle mast stepping yourself or seek professional assistance, don’t overlook this crucial aspect of boat maintenance – your sailing experience will thank you!
The importance of proper mast stepping for sailboat performance.
Title: Elevating Sailboat Performance: Unveiling the Crucial Role of Proper Mast Stepping
Introduction: Ah, the allure of sailing! The mere thought of gliding through azure waters on a sailboat evokes a sense of freedom and adventure. Yet, behind every successful seafaring expedition lies an often overlooked factor that can make or break a sailor’s experience – proper mast stepping. In this blog, we delve deeper into the importance of ensuring your sailboat’s mast is securely and skillfully stepped, unlocking the secrets behind achieving optimal performance on the high seas.
1. Stability in Every Gust: Imagine navigating a turbulent sea only to find yourself at the mercy of every gusty squall. The trunk-like stability of proper mast stepping is precisely what separates sublime sailing from unbridled chaos. By meticulously aligning and securing your boat’s mast, you establish a foundation that resists excessive movement when encountering powerful wind currents. This stability not only enhances safety but also allows you to maintain better control over your vessel, optimizing performance even in challenging conditions.
2. Maintaining Alignment: Taming Sail Power: A crucial aspect of proper mast stepping lies in maintaining perfect alignment between your sails and rigging components. Just as an orchestra conductor ensures each musician produces harmonious melodies, correctly aligning your mast orchestrates collaboration between sail power and hull dynamics – key factors influencing boat speed and responsiveness. Through careful adjustment and tuning during mast stepping, optimum alignment can be achieved, maximizing propulsion efficiency while minimizing unnecessary strain on vital components.
3. Mastering Balance for Speed: Speed aficionados know that reducing drag is paramount to capturing those elusive knots on open waters. Correctly stepped masts enable boats to strike an equilibrium where dynamic forces align symmetrically with hydrodynamic profiles beneath the waterline—less drag equals more speed! Aligning the center of effort (where sails produce force) with the centerboard or keel down below ensures enhanced balance and a streamlined course through the waves, transforming your boat into a true speed demon.
4. The Symphonic Rigging Ensemble: Proper mast stepping unifies all elements of your sailboat’s rigging system into a harmonious symphony. Whether sails, sheaves, halyards, or shrouds – each element has its part to play in creating the perfect melody that propels you forward. By ensuring precise mast alignment during stepping, you unleash the full potential of each component to work together seamlessly, unlocking enhanced efficiency and promoting optimal performance on every seafaring escapade.
5. Defying Cataclysm: Durability and Safety: A sailboat is only as strong as its weakest link, and improper mast stepping can undermine not just performance but also safety at sea. The consequences of neglecting this critical aspect can range from sagging masts to compromised connections that give way when challenged by harsh weather or sudden jolts. Skillful mast stepping eliminates vulnerability by guaranteeing robust connections, significantly reducing the risk of structural failure or catastrophic dismasting when navigating choppy waters.
Conclusion: From beginners embarking on their maiden voyage to seasoned sailors seeking to optimize their craft’s performance, proper mast stepping remains an indispensable factor deserving meticulous attention. When done skillfully, it unveils a world where stability meets agility, harmony merges with power, and durability fuses with safety—all seamlessly working together to elevate your sailboat’s performance above all expectations. So next time you set sail, don’t overlook the importance of proper mast stepping – let it be the wind in your sails!
Common challenges and troubleshooting when stepping a mast.
Stepping a mast can often be a daunting task, especially for novice sailors or boat owners who are new to the process. It is important to approach it with caution and follow proper techniques to ensure a successful outcome. In this blog post, we will discuss some of the common challenges that you may encounter when stepping a mast and provide effective troubleshooting tips to overcome them.
1. Aligning the Mast: One of the primary challenges is aligning the mast properly during installation. Improper alignment can lead to structural issues or difficulty in raising and lowering the sails smoothly. To tackle this challenge, utilize a mast-stepping partner if available or seek assistance from crew members. Communicate clearly and establish guidelines to ensure everyone understands their roles in aligning the mast correctly.
2. Clearing Obstacles: Another challenge involves clearing any potential obstacles such as rigging lines, electrical wires, or deformed deck hardware that might hinder the smooth stepping of the mast. Conduct a thorough inspection of your boat’s setup beforehand and anticipate these obstacles in advance. If possible, reroute or temporarily remove any obstructions before beginning the process.
3. Dealing with Underneath Services: Boats often have various services passing through their decks, including plumbing lines, wiring conduits, or even fuel lines. Ensuring that these services are adequately protected during mast stepping is crucial to prevent damage while also ensuring they don’t impede the process. Consider using protective covers such as pipe insulation or duct tape where necessary.
4. Adjusting Tension: Proper tension adjustment for shrouds and stays plays an essential role in maintaining structural integrity and sail performance after stepping the mast. However, achieving optimum tension can be challenging due to factors such as limited visibility or excessive friction on turnbuckles when adjusting rigging lines under pressure. Utilize proper tools like turnbuckle wrenches or lubricants specifically designed for marine applications to ease tension adjustments effectively.
5. Securing the Mast: Once the mast is stepped and correctly aligned, it is crucial to secure it firmly while also avoiding excessive compression or stress points. Common methods include tensioning support lines (also known as “baby stays”) or using strap systems directly connected to the mast base. Ensure that these securing measures are evenly distributed on both sides of the mast and properly tensioned to maintain its stability.
6. Rigging Tuning: After successfully stepping the mast, you may need to fine-tune your boat’s rigging for optimal sailing performance. This can involve adjusting shroud tensions, forestay length, or mast rake depending on wind conditions and desired sail shape. Consult your boat’s manual or seek advice from experienced sailors to ensure proper tuning techniques specific to your vessel.
Stepping a mast requires patience, attention to detail, and a methodical approach. By understanding and addressing potential challenges in advance, you will be well-prepared to troubleshoot any problems that arise during this critical process. Remember, seeking guidance from seasoned sailors or professional riggers can greatly assist you in overcoming these challenges effectively and maintaining a safe sailing experience.
Mastering the art of mast stepping: Tips and techniques for sailboat owners.
Mastering the Art of Mast Stepping: Tips and Techniques for Sailboat Owners
Are you a proud sailboat owner? If so, then you already know that becoming an expert at mast stepping is a critical skill to possess. The process of stepping the mast might seem daunting at first, but with the right knowledge and technique, it can be mastered in no time. In this blog post, we will delve into the intricacies of mastering this art form, offering you valuable tips and techniques that will make raising your sailboat’s mast a breeze.
1. Safety First – Before even attempting to step your boat’s mast, ensure that safety is at the forefront of your mind. Taking precautions such as wearing appropriate safety gear (including a sturdy helmet), having a spotter to assist you, and checking all equipment thoroughly will minimize potential risks.
2. Plan Ahead – Planning plays a pivotal role in any successful endeavor, and stepping your boat’s mast is no exception. Familiarize yourself with the manufacturer’s instructions specific to your sailboat model. Understanding the exact procedure beforehand will prevent unnecessary confusion or errors during the process.
3. Gather Your Tools – To execute this task seamlessly, prepare by gathering all necessary tools and equipment beforehand. Common tools required include a tape measure, wrenches or socket sets (size determined by fasteners), shackles or pins for connecting stays/drill booms/Bob Stay/etc., halyards (mainly used for aligning fixtures), lubricants for easier installation, grease or anti-seize compound for preventing corrosion in stainless steel fittings.
4. Proper Alignment – Aligning your sailboat’s mast correctly is crucial to avoid damage when stepping it. Start by positioning the keel amidships while ensuring that fore/aft alignment rails are straightened in line with deck plates and web frames below decks using various measurements provided within manufacturers’ guidelines.
5. Calling on Friends – Family or friends come in handy during mast stepping. Having an extra pair of hands to assist you significantly reduces stress and increases efficiency. Assigning roles helps delegation, such as someone holding the base of the mast while another person secures the stays or shrouds.
6. Slow and Steady – While eagerness may prompt a desire to rush through this process, taking it slow and steady is key. Moving too quickly can lead to mistakes, mishaps, or even accidents. Patience and attention to detail are your allies throughout mast stepping.
7. The Power of Technology – Modern technology offers various tools that simplify mast-stepping tasks. Using a block-and-tackle system or an electric winch will reduce physical strain when raising your boat’s mast, allowing for smoother operations.
8. Avoiding Snags – Ensure that all lines, halyards, and anything else that could snag on surrounding objects are cleared away before starting the mast-stepping process. This prevents unnecessary snags and potential damage to your sailboat or surrounding structures.
9. The Perfect Alignment – Achieving perfect alignment involves using halyards or temporary stays to adjust for lateral movement once the spar is raised partially but not fully secured yet – don’t be afraid to make minor tweaks until satisfied with the outcome.
10.Preventing Corrosion – Regularly inspecting fittings for corrosion is essential in maintaining your sailboat’s overall integrity. Consider using anti-seize compound or grease on stainless steel fasteners during reassembly to mitigate future corrosion risks.
Mastering the art of mast stepping requires patience, practice, and attention to detail – but with these tips and techniques under your belt, you’ll soon become a pro at this vital skill for every sailboat owner! Remember always to prioritize safety first and enjoy many successful ventures out on the open water!
Recent Posts

- Sailboat Gear and Equipment
- Sailboat Lifestyle
- Sailboat Maintenance
- Sailboat Racing
- Sailboat Tips and Tricks
- Sailboat Types
- Sailing Adventures
- Sailing Destinations
- Sailing Safety
- Sailing Techniques
Sailboat Mast: Everything You Need To Know
Anyone who loves sails and boating needs to know their sailing boat from the inside out. If you are new to the sport, then you are probably wondering about things like a sailboat mast and everything around it.
In this article, we have everything you need to know about a sailboat mast, like what it is, its different types, as well as the material it is made of.
All you have to do is keep reading below to find it all out!
What Is A Sailboat Mast?
A sailboat mast is a tall pole that is attached to the deck. It helps secure the sail’s length to the boat and upholds the sail’s structure.
A sailboat mast is the most defining characteristic of a sailboat, helping keep the sail in place. What’s amazing about it is that it can even be taller than the vessel’s length!
Although conventional sailboats use wood, the majority of the newer sailboat masts are constructed of aluminum. The kind of sailboat mast a vessel has depends on the kind of sail plan supported.
What Are The Parts Of A Sailboat Mast?
The sailing mast is essentially a pole that cannot operate effectively without certain critical components.
Moving from the deck to the rest of the sailboat, we can first see the mast boot, which prevents the water from draining down the mast and flooding the cabin.
The stays are the long cords hooked up on each side of the mast, and they hold the mast up off the ground under massive force.
A gooseneck pipe fitting joins the boom to the mast. The sail is raised and lowered using halyard lines that go to the mast’s highest point.
Types Of Sailboat Masts
Rigs with one mast.
Many people that are not aware of the modern sailboat design envision single-mast sailboats.
The reason why this type of sailboat is so widely known is that these masts are low-cost to construct and fairly simple to operate alone.
Sloops, cutters, and catboats are among the most popular rigs with only one mast.
Sloop Masts
Nowadays, sloop rig vessels are the most popular type of sailing boat. Sloops typically have only one mast positioned somewhere on the front third or the middle of the deck, even though some boat models might vary a bit.
A sloop mast is equipped with a big mainsail and a jib sail (see also ‘ Why Are Sails Made In A Triangular Shape? ‘). A Bermuda-rigged sloop has only one towering mast and a triangle-shaped sail. Other not-so-popular gaff-rigged sloops have a significantly smaller mast and bigger 4-point mainsails.
Catboat Masts
Catboats are distinctive New England boats that have a forward-mounted standard mast and a long boom. A catboat, unlike a sloop-rigged boat, is only equipped with one sail.
It is also typically mounted (more or less) right in front of the boat, and it is commonly short and relatively thick.
Catboats are frequently gaff-rigged. In a single-mast design, gaff-rigged sail designs (see also ‘ The Definition And History Of The Lateen (Triangular) Sail ‘) succeed in making the most out of short masts and are relatively simple to maneuver.
The mast of gaff-rigged catboats is shorter than that of a Bermuda-rigged boat of comparable size, but it is typically taller than that of comparable gaff-rigged crafts.
Cutter Mast
A cutter-rigged sailboat has only one towering mast and several headsails, which is why it can be mistaken for sloops when seen from afar.
However, because cutters use numerous headsails rather than one standard jib (see also ‘ Everything You Need To Know About Sailboat Jibs ‘), their masts are typically taller than those of comparable-sized sloops.
In several places, a gaff-rigged cutter is far more usual than a gaff-rigged sloop. Even at times when its sails are folded, a cutter can be distinguished from a sloop.
This is due to the fact that cutters frequently have a protracted bowsprit and two front stays; the forestay and the jib stay.
Rigs With Multiple Masts
Multi-mast sailboats (see also ‘ Small Sailboats: What Are They Called? ‘) are not as popular as single-mast sailboats. That is why the design and structure of a multi-mast boat usually make it classier and more navigable.
A multi-mast boat provides more than simply great looks. It also provides speed and efficient control for skilled seamen.
Most of these boats have two masts, which seem to be frequently smaller than the masts on comparable-sized single-mast crafts. Yawl, ketch, as well as schooner rigs, are among the most popular types.
Yawls are sturdy multi-mast boats whose length ranges from 20 to more than 50 ft. A yawl has a lengthy forward main mast and a small mizzen mast at the back of the vessel. This type is also frequently gaff-rigged and was previously used as a utility boat.
A yawl-rigged boat can also self-steer by using the mizzen mast and sail. The yawl can be distinguished from many other double-mast vessels by its short mizzen mast, which is frequently half the size of the main mast.
Furthermore, the mizzen mast is located toward the back of the rudder post.
Ketch Masts
Ketch masts can be mistaken for yawls with a quick look. However, ketch masts are equipped with two masts of comparable size and a significantly bigger mizzen mast. A ketch boat’s mizzen mast is located at the front of the rudder post.
Ketch-rigged vessels are frequently gaff-rigged, with topsails on each one of their masts. Triangle-shaped sailplanes on some ketch-rigged vessels prevent the necessity for a topsail.
Ketch masts, much like the yawl ones, have a headsail, a mainsail, and a mizzen sail that are similar in size to the mainsail. Finally, a ketch-rigged vessel can sail while handling more than one rear sail.
Schooner Masts
Schooners are some of the most beautiful multi-mast sailboats. They are clearly more similar to ketches than yawls. However, if you closely look at a schooner, you will see that it will feature a smaller foremast and a longer (or nearly equal-sized) mast behind it.
Schooner masts are large and heavy, but they are generally shorter than single-mast vessels of comparable size.
This is due to the fact that double-masted vessels share the sail plan over 2 masts and do not require the additional length to compensate for the reduced sail space.
Finally, they are typically gaff-rigged, with topsails and topmasts that expand the mast’s length.
Masts Of Tall Ships
Tall ships are those traditional large cruising ships that ruled the seas well before age of steam. Renowned ships with this massive and intricate rig setup include the U.S.S Constitution as well as the H.M.S. Victory.
Tall ships have 3 or more massive masts that are frequently constructed using big tree trunks. Tall ships with 5 or more masts are quite common too.
Tall ships typically are as long as 100 feet or more, since the size and sophistication of these square-rigged vessels render them only useful at scale.
Tall ships have main masts, foremasts, mizzen masts, and gaff-rigged jigger masts at the back of their mizzen masts.

Mast Materials For Sailboats
The masts of sailboats (see also ‘ Two-Mast Sailboat Types ‘) are typically constructed of aluminum or other specific types of wood. Until the 1950s, almost all sailboat masts were constructed of wood.
That began changing around the time that fiberglass vessels rose to fame, with aluminum being now the most used mast material.
Aluminum Masts For Sailboats
Aluminum has become the most popular modern mast material. Aluminum masts are lighter in weight, hollow, and simple to produce. Such reasonably priced masts efficiently withstand seawater. These masts are also heavy for their size.
If there is one drawback to this type of mast that would be galvanic corrosion, which happens extremely quickly once seawater is in contact with aluminum and another metal, like steel and copper.
So, in types like the Bermuda-rigged sloop which are frequently made with aluminum, that is an issue.
Wooden Masts For Sailboats
The typical material for sailboat masts is wood, which is still employed for many specially designed boats nowadays.
Wood masts are big and bulky, yet very sturdy, and proper maintenance can guarantee their lengthy (over 100 years!) lifespan. They are also prevalent on gaff-rigged vessels because wood is best suited for short masts.
The Fir family provides the most popular mast wood. Although Douglas Fir is widely used, regional models (such as British, Columbian, and Yellow Fir) are also ideal.
Several sailboats, especially the tall ships, have masts made of pine and sometimes redwood. Other cedar species like the Port Orford or the Oregon cedar, can also be used for masts and spars.
Carbon Fiber Masts For Sailboats
Carbon fiber masts are a relatively new addition to the boatbuilding industry, and they have a few perks over the wood and aluminum ones.
First of all, carbon fiber is both strong and light, making it perfect for sailboats designed for races and which typically have tall masts. The best top-quality carbon fiber masts in the business are used by ships competing in America’s Cup races.
Maintenance Of Masts
It is critical to maintaining the sailboat masts and all of their associated hardware. Masts’ stays, lines, and halyards must be regularly checked, modified, and replaced on a regular basis. Masts made of wood must be lacquered and inspected for rot.
Masts made of aluminum do not typically require regular checks and maintenance, but any indications of a corrosive environment should be acted upon right away.
Build a clear maintenance schedule with your regional boat repairman or boating specialist. Keep in mind that preventative maintenance is always less expensive and simpler than repair work.
Choosing The Right Mast
For those who own a production boat, the options will be determined by the model and manufacturer.
The important factors to keep in mind for one-off boats without a designer sail plan are:
- the masts step’s features
- the length and displacement of the boat
- the addition of backstays and running backstays
- the quantity and placement of chainplates
If the mast is on a step on deck rather than on the structural beam, an image of the step may be useful to the mast maker.
For those who frequently take part in races, a carbon mast will save them from the extra weight and enhance their performance.
The Bottom Line
We hope that this article was helpful in learning more about a sailboat mast, the different types of mast you can see on vessels, as well as the materials they are made of, and their maintenance requirements.
Masts play a vital role in holding the boats in place, allowing people to keep on sailing to their dream destination, and they are also an eye-catching element of sailboats thanks to their vertical form and their length that often surpasses that of the sailboat itself.
Depending on the use of the boat, you will get a different type of mast, and the material it will be made of, its size, height, and weight, will guarantee the best sailing experience!
Related Posts:

Rigging - Turnbuckles , Toggles , Wire & Rod Components, Norseman Cones & Fittings.
Furling Systems - Systems and replacement parts from a variety of Manufacturers.
Traveller Systems - Adjustable Track Systems for Mainsheet and other applications.
Sailboat Hardware - Rope Clutches, Blocks, Track & Fittings, Winches, etc.
Custom Parts - Custom items, or those out of production or otherwise unavailable.
Consultation - Special projects, research, or information not detailed on-site.
Copyright 1996 - 2024, Rig-Rite, Inc. Disclaimer Web Site maintained by The WATER Group
Please verify you are a human
Access to this page has been denied because we believe you are using automation tools to browse the website.
This may happen as a result of the following:
- Javascript is disabled or blocked by an extension (ad blockers for example)
- Your browser does not support cookies
Please make sure that Javascript and cookies are enabled on your browser and that you are not blocking them from loading.
Reference ID: 2d0a23d0-edeb-11ee-bfc2-f390e81e2127
Powered by PerimeterX , Inc.
IMAGES
VIDEO
COMMENTS
Sail Systems Universal Mast Boots are designed to provide a durable seal between the mast and the mast collar. Available in three sizes, each model is constructed using a UV resistant vinyl and features molded steps to provide guidance for a perfect custom fit. Installation on a stepped mast is possible by cutting the boot and using the ...
3 Bandage Boot. Surprisingly, a common Ace bandage can be used to make a mast boot. Simply wrap the bandage around the mast, starting at the bottom and going up to 6 inches above the deck. Apply a thin coat of Hypalon paint (commonly used to waterproof RV roofs; Geocel is a common brand) to waterproof the bandage.
Hard molded white PVC Mast Boot is 3 1/4" high. As used on Nonsuch 26. Mast Boot for 8" OD Round Mast - Freedom 28: PP RM8MB-F28: Special Round Mast Boot to fit 8" Round Mast and Freedom "A" Round Deck Collar. Soft molded white Rubber Mast Boot is 4 1/2" high x 15" long when flat. As used on Freedom 28.
These flexible vinyl mast boots are designed to fit a number of sizes of masts with deck collars of the same basic shape. The boots are molded in a series of small steps, so that the user merely cuts the top at the level that provides a snug fit to the mast, and then cuts the bottom at the first level that gives a snug fit to the deck collar.
30" to 44". 934032. 91400000. In Stock: Leaves Warehouse: Same Day. Sailing Spring Launch Sale. SSI's flexible universal mast boots are designed to fit a number of sizes of masts with deck collars of the same basic shape. The boots are molded in a series of small steps, so that the user may cut the top at the level that provides a snug fit to ...
Designed to fit a number of sizes of mast with deck collars of the same basic shape. CLEAN LOOK - Molded in small steps so top and bottom can be cut at the level that provides a snug fit to the mast and deck collar. SIMPLE INSTALLATION - Boot may be installed on stepped masts by cutting one side and glue together with enclosed adhesive.
Sail Rigging Refine by Category: Sail Rigging Mast Boots selected Currently Refined by Category: Mast Boots Price. Price. $50 to $100 (2) Refine by Price: $50 to $100 Brand. Brand. BAINBRIDGE (1) Refine by Brand: BAINBRIDGE INCOM (1) Refine by Brand: INCOM ...
Sailboat Mast Boot: Protecting Your Mast. A mast boot is a simple yet effective way to protect your mast from water intrusion and damage caused by the elements. Here's what you need to know. The Purpose of a Mast Boot. A mast boot is a flexible material that wraps around the mast at the deck level. It prevents water from entering the cabin ...
Universal Mast Boot. Made of extremely flexible UV resistant vinyl. Designed to fit a number of sizes of mast and deck collars of the same basic shape. Molded in small steps so top and bottom can be cut at the level that provides a snug fit to the mast and the deck collar. Boot may be installed on stepped mast by cutting one side and glue together with the included adhesive.
Custom Canvas Mast Boot. This is a simple drawstring mast boot. It's intention is to cover up whatever tape/goop mess you have used to seal your mast on your sailboat. It is NOT designed to keep water out of your mast. Please include mast circumference (at base) and height in order notes. Please include, in the order notes, the exact shade of ...
Spars, Rigging, and Hardware for Sailboats. Rig-Rite, Inc. Phone: (001) 401-739-1140 -- FAX: (001) 401-739-1149 www.RigRite.com Ordering/Questions: ... *** Special Round Black Mast Boot to fit Freedom 21 is PP RM5.5-MBF, See: Mast Boots. Urethane Mast Collar Wedges for Isomat Masts:
Custom mast boot for keel stepped sailboats. We have done our best to make ordering Waterboot as easy as possible. Understand that Waterboot is a custom product and we take pride in designing and producing a product that will provide an optimum fit for your particular mast/deck configuration.
Spars, Rigging, and Hardware for Sailboats. Rig-Rite, Inc. Phone: (001) 401-739-1140 -- FAX: (001) 401-739-1149 ... Mast Boot Tape is used in applications where no suitable Mast Boot is available. Mast Boot Clamps are used to secure the Mast Boot to the Mast, and to the ...
Das Boot! By The Rigging Company June 28, 2014February 10, 2016. There are many styles of mast boots and spreader boots. Just like with anything else, choosing the right product and installing it properly is essential to its functionality. Installing a mast boot that doesn't leak, has a low profile, ensures that the chocks (pictured below) or ...
Unique velcro closure makes installation easy with the rig in the boat. Waterboot is easily removed and reinstalled allowing inspection of mast wedges, partner, tie rods, etc. Easily cleaned with a majority of marine cleaners. Fully compatible and effective when used with Spartite. Guaranteed and made in the USA, Patent #5,097,781.
Durable mast boots that adapt to almost any mast. Sail Systems Universal Mast Boots are designed to provide a durable seal between the mast and the mast collar. Available in three sizes, each model is constructed using a UV resistant vinyl and features molded steps to provide guidance for a perfect custom fit. Installation on a stepped mast is ...
A mast boot, skirt or coat is the traditional method for making a waterproof seal between the deck and a keel stepped mast. Despite modern advances in sealant technology, a flexible boot is still the most effective and best looking solution to preventing water leaking down the mast into the cabin. Methods. Fittings. Making a Pattern.
A sailboat mast is like a long electrical fuse: one bad spot and the show is over. ... All too often, spreader boots or a well-meaning taping effort, ends up looking like a response to an ankle injury. Even worse it creates a moisture-holding corrosion bath that enhances galvanic corrosion and oxidation. The goal is to avoid going overboard ...
Stepping the mast on a sailboat is a critical procedure that sets the foundation for successful and safe sailing adventures. A well-adjusted mast brings stability, facilitates efficient control, and allows your sails to harness the power of the wind, propelling you towards new horizons. So, next time you embark on an aquatic journey, appreciate ...
A sailboat mast is a tall pole that is attached to the deck. It helps secure the sail's length to the boat and upholds the sail's structure. A sailboat mast is the most defining characteristic of a sailboat, helping keep the sail in place. What's amazing about it is that it can even be taller than the vessel's length!
Since 1961, RIG-RITE has engineered, manufactured and distributed Spars, Rigging and Hardware Systems for Sailboats. RIG-RITE stocks the largest variety of related Systems and Hardware available anywhere, Specializing in original replacement parts for Systems on yachts built the world over. Spars - Masts, Booms, Spreaders, Spinnaker Poles ...
MARINE CITY Stainless Steel Polished Sailboat Teak Mast Steps with Anti-Skid Teak 12 x 5 Inches for Marines - Boats - Ships - Yachts. 4.8 out of 5 stars 6. ... USAMADE Vinyl Mast Boot - Protect Your Boat from Drips Down The Mast. 3.8 out of 5 stars 36. $45.99 $ 45. 99. FREE delivery Nov 29 - Dec 4 .
Bainbridge Mast Boot Tape provides a quick way to seal an existing mast boot or create a new one. The UV resistant PVC material is self-bonding and will not leave behind a sticky residue when removed. The 4" tape forms a watertight/air tight barrier (with sail track and other cavities in the extrusion sealed) that remains flexible to maintain ...