No products in the cart.
Sailing Ellidah is supported by our readers. Buying through our links may earn us an affiliate commission at no extra cost to you.

The Running Rigging On A Sailboat Explained
The running rigging on a sailboat consists of all the lines used to hoist, lower, and control the sails and sailing equipment. These lines usually have different colors and patterns to easily identify their function and location on the vessel.
Looking at the spaghetti of lines with different colors and patterns might get your head spinning. But don’t worry, it is actually pretty simple. Each line on a sailboat has a function, and you’ll often find labels describing them in the cockpit and on the mast.
In this guide, I’ll walk you through the functions of every component of the running rigging. We’ll also look at the hardware we use to operate it and get up to speed on some of the terminology.
The difference between standing rigging and running rigging
Sometimes things can get confusing as some of our nautical terms are used for multiple items depending on the context. Let me clarify just briefly:
The rig or rigging on a sailboat is a common term for two parts, the standing , and the running rigging.
- The standing rigging consists of wires supporting the mast on a sailboat and reinforcing the spars from the force of the sails when sailing. Check out my guide on standing rigging here!
- The running rigging consists of the halyards, sheets, and lines we use to hoist, lower, operate and control the sails on a sailboat which we will explore in this guide.
The components of the running rigging
Knowing the running rigging is an essential part of sailing, whether you are sailing a cruising boat or crewing on a large yacht. Different types of sailing vessels have different amounts of running rigging.
For example, a sloop rig has fewer lines than a ketch, which has multiple masts and requires a separate halyard, outhaul, and sheet for its mizzen sail. Similarly, a cutter rig needs another halyard and extra sheets for its additional headsail.
You can dive deeper and read more about Sloop rigs, Ketch Rigs, Cutter rigs, and many others here .
Take a look at this sailboat rigging diagram:
Lines are a type of rope with a smooth surface that works well on winches found on sailboats. They come in various styles and sizes and have different stretch capabilities.
Dyneema and other synthetic fibers have ultra-high tensile strength and low stretch. These high-performance lines last a long time, and I highly recommend them as a cruiser using them for my halyards.
A halyard is a line used to raise and lower the sail. It runs from the head of the sail to the masthead through a block and continues down to the deck. Running the halyard back to the cockpit is common, but many prefer to leave it on the mast.
Fun fact: Old traditional sailboats sometimes used a stainless steel wire attached to the head of the sail instead of a line!
Jib, Genoa, and Staysail Halyards
The halyard for the headsail is run through a block in front of the masthead. If your boat has a staysail, it needs a separate halyard. These lines are primarily untouched on vessels with a furling system except when you pack the sail away or back up. Commonly referred to as the jib halyard.
Spinnaker Halyard
A spinnaker halyard is basically the same as the main halyard but used to hoist and lower the spinnaker, gennaker, or parasailor.
The spinnaker halyard is also excellent for climbing up the front of the mast, hoisting the dinghy on deck, lifting the outboard, and many other things.
A sheet is a line you use to control and trim a sail to the angle of the wind . The mainsheet controls the angle of the mainsail and is attached between the boom and the mainsheet traveler . The two headsail sheets are connected to the sail’s clew (lower aft corner) and run back to each side of the cockpit.
These are control lines used to adjust the angle and tension of the sail. It is also the line used to unfurl a headsail on a furling system. Depending on what sail you are referring to, this can be the Genoa sheet , the Jib sheet , the Gennaker sheet , etc.
The outhaul is a line attached to the clew of the mainsail and used to adjust the foot tension. It works runs from the mainsail clew to the end of the boom and back to the mast. In many cases, back to the cockpit. On a boat with in-mast furling , this is the line you use to pull the sail out of the mast.
Topping lift
The topping lift is a line attached to the boom’s end and runs through the masthead and down to the deck or cockpit. It lifts and holds the boom and functions well as a spare main halyard. Some types of sailboat rigging don’t use a topping lift for their boom but a boom vang instead. Others have both!
Topping lifts can also be used to lift other spars.
A downhaul is a line used to lower with and typically used to haul the mainsail down when reefing and lowering the spinnaker and whisker poles. The downhaul can also control the tack of an asymmetrical spinnaker, gennaker, or parasailor.
Tweaker and Barber Haul
A tweaker is a line, often elastic, attached to the sheet of a headsail and used to fine-tune the tension on the sheet.
Barber haul
A barber haul is a line attached to a headsail’s sheet to adjust the sheeting angle to the wind. It is often used to pull the clew further toward the center or outboard than the cars allow.
Boom Preventer
A boom preventer is a line attached to the boom’s end when sailing off the wind. Its function is to hold the spar in place and prevent it from swinging wildly.
If the boat were to get an accidental gybe, it could cause serious damage to the rigging or even harm people on board. It is important for the rigger to be cautious when setting up the boom preventer.
Running Backstay
Running backstays is similar to a normal backstay but uses a line instead of a hydraulic tensioner. Some rigs have additional check stays or runners as well.
Bonus tip: Reefing
The term reefing is used when reducing the effective sailing area exposed to the wind of a given sail. Headsails are usually reefed by partially furling them in, and they often have marks for what we refer to as 1st, 2nd, and 3rd reefs.
The mainsail is reefed similarly with an in-mast furling or in-boom furling system.
On a traditional mast, we use a system called slab reefing. The system has reefing lines running through the boom to reinforced points on the luff and leech, allowing you to pull the sail down to the boom and effectively reduce the sail area.
Having at least two reefing points in the mainsail is normal, but most cruising sailboats have 3. The 3rd is used for the heaviest conditions, giving you only a tiny bit of sail area exposed to the wind.
You want to reef your sails before the wind increases to a point where your boat gets overpowered.
It is essential to practice your reefing technique . You will find yourself in situations with rapidly increasing winds where you need to reduce your sails quickly.
Rule of thumb: If you think setting a reef might be a good idea, do it.
Shaking a reef is the term used when we sail with a reefed sail and want to increase the sail area back to full.
Hardware used for sail handling and the running rigging
Furling system.
Most sailboats have their headsail on a furling system. A furling system is a tube that runs along the forestay from the bottom furler drum to the masthead swivel.
This system allows you to roll the headsail around the forestay, making furling the sail in and out accessible. It is also convenient when reefing the sail when the wind picks up, as you can easily do this from the safety of the cockpit. These furling systems come in manual versions and electric versions.
In-mast furling
In-mast furling is a system that rolls the mainsail in and out of the mast. To unfurl the mainsail, we use the outhaul .
In-boom furling
In-boom furling is a system that rolls the mainsail in and out of the boom. This system has been costly and has mostly been seen on big yachts earlier. They are becoming more affordable and common on smaller boats, though. To unfurl this setup, we use the main halyard.
A Stack pack is also called a Lazy Bag or Lazy Pack. It is a bag with a zip attached to the boom where the mainsail is stored when unused. It protects the mainsail from UV rays from the sun and weather elements. It is a very nice and tidy way to store the mainsail and reefing lines if you don’t have in-mast or in-boom furling.
Lazy Jacks is a system of lines running from the stack pack to the mast. The Lazy Jacks guide the mainsail up and down from the Stack Pack and prevent it from falling down on the deck. It is also possible to rig Lazy Jacks without a Stack Pack.
A block is a pulley with a sheave wheel. Blocks are used to change the direction of a pull on a line or rope and give a mechanical advantage. They have many uses, especially onboard sailboats.
A winch is a metal drum that gives you a mechanical advantage to control and tighten lines. These can be operated by turning a rope around it and pulling manually or by a winch handle to get more force. Most modern winches are self-tailing, which means they lock the line on so you can winch the line without holding on to it. Some boats even have electrical winches operated by a button.
Mainsheet Traveler
The mainsheet traveler is a horizontal track that the mainsheet is attached to through a series of blocks. The traveler enables you to adjust and lock the boom at an angle and also plays a critical part in trimming the mainsail.
Most cruising sailboats have their traveler attached to the top of the coachroof in front of the spray hood. A racing boat typically has the traveler in the cockpit near the helm to give the helmsman better control over the mainsheet.
The cars are basically a pulley or block attached to a track on the port and starboard deck that your headsail sheets run through. Cars are used to control the angle of the sheet between the clew and the deck. The cars are handy when you trim the sail to set the right balance of tension between the foot and leech, depending on your point of sail.
The jammer is used to lock a line in place. Most sailboats use these for locking the halyards, mainsheet, outhaul, reef lines, traveler lines, boom vang lines, etc. You can pull or winch a line through a closed jammer, but it won’t run away if you let go of it unless you open the lock.
As I explained earlier, it is normal to have most or all of the lines led back to the cockpit, and they are usually run through a series of jammers.
The jammers are often labeled with the name of the line it locks, which makes it easier to remember which line goes where.
Spinnaker Pole
A spinnaker pole is a spar used to wing out a headsail when sailing off the wind, particularly the spinnaker. The spinnaker pole should have the same length as the distance between the mast and the forestay measured along the deck. We use a fore and aft guy and the pole’s topping lift to rig a pole correctly.
The rigging varies depending on the layout of the boat, but it usually looks like this:
- One line runs from the bow to the end of the pole.
- An aft line runs from near the stern to the end of the pole.
- A topping lift is used to raise and lower the pole.
Whisker Pole
A whisker pole is similar to the spinnaker pole and is rigged similarly. It is typically built lighter and attached to a track on the mast. These can be found in fixed lengths or adjustable lengths. Ideally, the length should be the same as the foot of the headsail you intend to pole out.
Boom Vang/Rod Kicker
The Boom Vang has a few different names. Rod-kicker, kicking strap, or kicker. It is used to tension the boom downwards. When you are sailing downwind and have the boom far out, the mainsheet won’t pull the boom down as much as inboard, and you can then use the vang to adjust the twist and shape of the mainsail.
Mooring line
A mooring line is a traditional rope lead through a fairlead to the vessel’s cleat and a mooring buoy, key, or pontoon.
Final words
Congratulations! By now, you should have a much better understanding of how the running rig on a sailboat functions. We’ve covered the different lines, their purpose, and the hardware used to operate them. I hope you’ve enjoyed this guide and learned something new.
Now it’s time to take what you’ve learned and put it into practice by getting out on the water, setting sail, and getting hands-on experience with the lines.
Or you can continue to my following guide and learn more about the different types of sails .
Sharing is caring!
Skipper, Electrician and ROV Pilot
Robin is the founder and owner of Sailing Ellidah and has been living on his sailboat since 2019. He is currently on a journey to sail around the world and is passionate about writing his story and helpful content to inspire others who share his interest in sailing.
Leave a Reply Cancel reply
Your email address will not be published. Required fields are marked *
The Ultimate Guide to Sailboat Rigging Rope
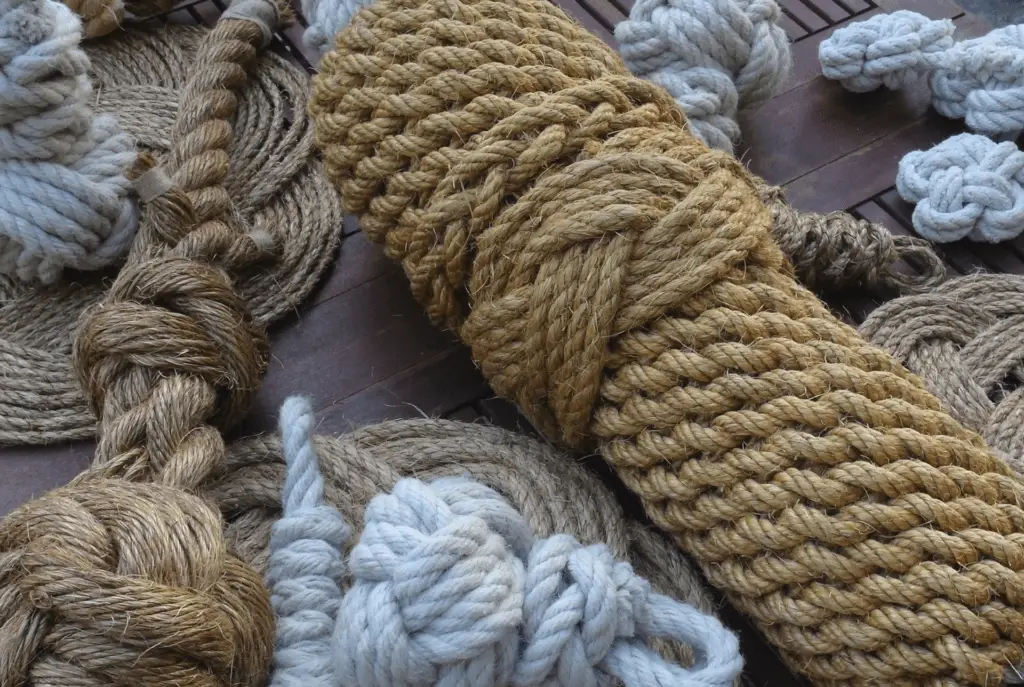
What is sailboat rigging rope?
Sailboat rigging rope is the lifeline of a sailboat , connecting the sails to the mast and allowing the boat to harness the power of the wind.
Essentially, it is a specialized type of rope that is designed to withstand the forces and stresses encountered while sailing.
Why is a rope called a line on a boat?
In nautical terms, a line refers to a rope that has a specific purpose or is used for a particular function.
For example, a halyard line is used to hoist a sail, while a sheet line controls the position of the sail.
By using the word “line” instead of “rope,” sailors were able to clearly communicate their intentions and actions on a boat.
What ropes are used for ship rigging?
When it comes to sailboat rigging ropes, there are a variety of types available, each with its own unique characteristics and applications.
Let’s explore some of the most common types and their uses.
Polyester ropes.
Polyester ropes are popular for their durability, strength, and resistance to UV rays and saltwater corrosion. They are suitable for a wide range of applications, from halyards and sheets to control lines and running rigging.
Dyneema ropes
Dyneema ropes, also known as high-performance ropes, are incredibly strong and lightweight. They are perfect for high-load applications such as rigging and running backstays, where strength and low stretch are crucial.
Sta-Set ropes
Sta-Set ropes are made from polyester and are known for their flexibility and ease of handling. They are commonly used for general-purpose applications like halyards, sheets, and control lines.
Wire ropes, made from stainless steel, provide excellent strength and resistance to abrasion. They are commonly used for standing rigging , such as shrouds and stays, where stiffness and stability are required.
Vectran ropes
Vectran ropes offer high strength and low stretch properties, making them suitable for applications that require minimal elongation, such as halyards and control lines.
- Boat Rigging: Everything You Need to Know
- Line or Rope of Your Boats (explained)
- Choosing The Right Mooring Lines Or Dock Lines For Your Boat
- What’s the Difference Between a Spring line, a Breast line, and a Dock Line?
Which type of rope used in rigging is the strongest?
- One of the strongest types of rope used in rigging is Dyneema.
This high-performance rope is incredibly strong and lightweight, making it perfect for high-load applications. Its low stretch characteristics also contribute to its strength, ensuring minimal elongation under heavy loads.
- Stainless steel wire ropes are also known for their exceptional strength.
Made from corrosion-resistant stainless steel, these ropes provide excellent tensile strength and resistance to abrasion.
What are the three ropes on a boat?
On a sailboat, three primary ropes play essential roles in controlling and maneuvering the boat.
The first rope is called the halyard, and it is used to raise and lower the sails.
The halyard connects to the top of the sail and allows you to adjust its position and tension. Common options for Halyard include polyester, nylon, and dyneema.
The second rope is known as the sheet. Sheets are used to control the angle and position of the sails in relation to the wind.
There are typically separate sheets for the main sail and jib or genoa. By adjusting the tension and angle of the sheets, you can optimize the sail’s performance and power.
Common options for sheets include polyester, nylon, and blended ropes.
Control line
The third rope is the control line.
Control lines are used for various purposes, such as adjusting the shape of the sails, controlling the boom, or operating the boat’s various systems.
They are typically found on larger boats with more complex rigging setups.
Generally, control lines need to be strong and durable, with good grip and flexibility. Common options include polyester, nylon, and braided ropes.
How do i choose a rigging rope?
Here is a step-by-step guide to help you make an informed decision:
1. Assess your sailing needs
Consider the size of your boat, the sailing conditions you typically encounter, and your rigging setup. This will help you determine the strength and durability requirements for your rigging rope .
2. Research different rope materials
Look into the characteristics and benefits of materials like polyester, Dyneema, and stainless steel. Understand how each material performs in terms of strength, UV resistance, and corrosion resistance.
3. Determine the appropriate size
Based on your boat size and rigging setup, identify the ideal thickness and strength of rope needed. Larger boats and high-performance rigs will generally require thicker and stronger ropes, while smaller boats may benefit from lighter options.
4. Consider flexibility and handling
Ensure that the rope you choose is easy to work with and provides a good grip. It should be flexible enough to maneuver but not overly stretchy.
5. Consult with experts
If you’re unsure about any aspect of choosing a rigging rope, don’t hesitate to seek advice from professionals or experienced sailors. They can provide valuable insights and help you make the best decision for your specific needs.
What size rope do i need for my boat?
The size of the rope you need will depend on the size of your boat, the specific rigging setup, and the intended use of the rope.
For example a 20 foot sailboat , you would typically need a halyard rope that is around 5/16 to 3/8 inches in diameter. The length of the rope should be long enough to reach from the masthead to the cockpit, allowing for proper hoisting and trimming of the sails.
Generally, a sheet rope with a diameter of 5/16 inch or 3/8 inch should suffice for most sailboats. As a general guideline, the length of the rope should be at least twice the length of your boat. This will allow for proper handling and maneuvering of the sail.
Why is a line called a sheet?
The term “sheet” likely comes from the old English word “sceata,” which means corner or border. The ropes were called sheets because they controlled the corners or edges of the sail.
Over time, the term “sheet” became associated with any rope that controls the position or angle of a sail.
How long should boat lines be?
Boat lines are ropes used for various purposes, such as docking, anchoring, and securing the boat.
A general guideline is to ensure that boat lines are at least 2-3 times the length of your boat. This will provide enough length to handle different docking scenarios and ensure the safety of your vessel.
It’s also a good idea to have a variety of lengths available to accommodate different situations.
Common Problems and Solutions for Sailboat Rigging Ropes
Here are some common problems you may encounter with sailboat rigging ropes and their troubleshooting solutions:
1. Fraying or wear
If you notice any signs of fraying, it’s important to replace the rope immediately to avoid accidents. Regularly inspect your ropes for wear and tear and replace them as needed.
2. Tangling or kinking
To prevent tangling or kinking, always store your rigging ropes neatly coiled and avoid knots or tangles. If your rope becomes tangled, carefully untangle it to restore its proper function.
3. Stiffness or difficulty in maneuvering
If your rope becomes stiff or difficult to maneuver, it may need lubrication. Apply a suitable lubricant to the moving parts of the rope to restore smooth operation.
4. Slippage
If your rope slips or loses tension, you may need to adjust the knot or connection. Ensure that all knots are properly tied and secure, and adjust the tension as needed.
5. Corrosion or rust
Stainless steel wire ropes are resistant to corrosion, but they can still develop rust over time. Regularly inspect your stainless steel ropes for any signs of rust and replace them if necessary.
6. Overloading
Avoid overloading your ropes beyond their recommended weight limits. Be aware of the maximum load capacity of your ropes and use appropriate ropes for heavier loads.
- BOAT OF THE YEAR
- Newsletters
- Sailboat Reviews
- Boating Safety
- Sailing Totem
- Charter Resources
- Destinations
- Galley Recipes
- Living Aboard
- Sails and Rigging
- Maintenance
- Best Marine Electronics & Technology
Understanding Running Rigging
- By Ralph Naranjo
- Updated: January 22, 2020
Regardless of whether you sail a modern, fractional-rigged sloop or a wishbone-rigged staysail schooner, it’s the running rigging that sets, trims, reefs and furls the sails. In the bad old days, decks were full of wobbly, sheaved high-friction blocks and essentially one kind of cordage. Today, running rigging has attained full-system status, with its primary goal being friction abatement.
Various types of synthetic- fiber cordage, with specific strength, stretch and creep characteristics, run through ultraslippery blocks and fairleads. Each line is aimed at the exact spot a team of ergonomics experts determined it should go. Even the halyard hardware that attaches the line to the head of a sail has been computer-modeled and scrutinized with finite element analysis. Soft shackles and strops, made from Dyneema fiber rope, are showing up in high-load locations. In short, we are in the midst of a running-rigging revolution, and much of the new stuff offers real value to the cruising sailor.
What’s My Line?
Just as pistons and cylinders play a primary role in a diesel auxiliary, rope and blocks are the guts of every sail-handling system. A few decades ago, Dacron (polyester cordage) ruled the roost. It remains a key player, but stronger, lighter, and less-stretchy options are gaining ground. Racers have embraced Dyneema, Vectran, Torlon, Zylon and a growing list of other odd-sounding esoteric fibers. The old enemy stretch has been tamed, but the big remaining question is whether a running-rigging makeover is worth the expense. It takes a little cost-benefit analysis to answer that question.
There’s consensus among sailors, riggers and yacht designers that there are cost-effective crossover points, where performance and value intersect. Take, for example, a mainsail halyard upgrade. Polyester has proved to be too stretchy, but PBO (Zylon) cored rope, sometimes called liquid crystal, is way too costly. But for cruisers, a midrange medium-tech upgrade makes a lot of sense. The line of choice is often a double braid with a high-modulus Dyneema core and a conventional polyester cover. This midrange combo results in a halyard with much lower stretch and good handling characteristics, plus it retains a chafe- and ultraviolet-resistant cover.
Going higher-tech in fiber selection for sheets on a cruising boat might not be as desirable. This is because a good-quality double-braid polyester remains a sensible solution, at least on cruising boats under 40 or so feet. Its stretchy nature might even add a little shock-absorber effect, lessening the fatigue cycle on mast, boom and line. However, higher-modulus (less-stretchy) line is a superior halyard material, and it also makes sense for use in running backstays, topping lifts, tack and head pennants, and boom-vang tackles.
When choosing the right high-modulus line, make sure it’s rated for tight turns around small-radius blocks and masthead sheaves. In the early days of synthetic fibers, many ultra-low-stretch lines stiffened with time, making line handling more like wrapping a tree branch around a winch drum. Today, Samson, Yale, New England Ropes and others have tamed this problem, and offer a wide range of products that meet the needs of cruisers and racers. Do some research, talk with a local rigger, and pick the right rope for your boat and your specific sailing requirements.
Around the Blocks
Every ball- and roller-bearing block spins like a roulette wheel when there’s no load on the sheave. But when you add hundreds, even thousands, of pounds of tension to a halyard or sheet, it’s only the better-built blocks that hold friction at bay. Usually these blocks have well-engineered frames and bearing races that resist deformation under heavy loads.
Ironically, cruisers don’t need the highest-tech line, but we certainly do benefit from the best-built blocks. These not only run smoothly under load, but they also continue to do so despite the test of time.
Over the years, as ingested salt spray is baked into grit by the unrelenting sun, bearing abrasion becomes a big problem. Keep in mind that if you can see the high-molecular-weight Delrin, Torlon or other plastic bearings, so can the sun, and this means that UV degradation will become an issue.
It’s also important to recognize that choosing the smallest, lightest block for a given line size makes little sense. A better approach is to pick a one-size-larger block that’s still appropriate for the given line diameter. It will deliver a higher safe working load, and therefore, the normal load will be a smaller percentage of the SWL. Such blocks will also have a larger bearing surface and will operate with less friction. Add to this the fact that lower loading also equates to longer hardware life, and you have another good reason to opt for a size uptick.
Power to the Winches
I think that the hand-crank winch is one of sailing’s most elegant inventions. And the good news is this piece of hardware continues to evolve. New designs come packed with better bearings, improved self-tailers and multiple gear ratios, making them even better muscle-power multipliers.
Modern winches are more ergonomic, and there’s even a model that lets you trim in and ease out via opposite rotations of the winch handle. The shorthanded cruiser has more trimming tools from which to choose—even a push-button electric winch that eliminates the old question: “Where’s the winch handle?”
However, when it comes to power winching, it’s important to rethink the way you handle a sheet or halyard. With the old hand-cranking approach, arm and shoulder strength provided both torque and feedback. Unfortunately, this feedback loop is absent when using an electric winch. As the tension increases, the button doesn’t get any harder to push. Therefore, we need to look more closely at the luff and head of the sail to make sure the halyard or sheet is not being overtensioned.
In the early days of power winches, I watched the crew of a 60-foot sloop set sail with the aid of electric winches. As the mainsail was being unfurled, the furling line hung up, causing the tension on the outhaul to reach full force in the matter of a second or two. A loud bang announced the separation of the clew from the mainsail. It was an attention-grabbing demonstration of the brute force delivered by a power winch—and a costly lesson in how high-modulus, low-stretch materials endure minimal elongation prior to failure. The takeaway from this episode was that careful attention must be paid to the line being tensioned and what’s happening to the sail. Beware of dodgers and Biminis that hide the sails from view and leave the person operating a power winch without any direct visual feedback.
Clutch Plays
Some see the self-tailing winch as the ultimate answer to handling a line under load. But there are other opinions that continue to hold sway. The oldest belongs to traditionalists who swear by horn cleats, just the way Nat Herreshoff intended. It’s a functional approach, especially if the deck is festooned with non-self-tailing winches that remain in good working order.
But we are in a rope-clutch revolution that’s realigned deck layouts and changed the approach to line handling. These lever-operated, clamplike devices allow one winch to cope with several lines, but not all at once. With badgerlike jaws, rope clutches lock lines in place, immobilizing the line under full load. Some clutches allow a sailor to release the fully tensioned line, but lines under load behave more sedately if, prior to releasing, they are wrapped on the winch and re-tensioned prior to releasing the clutch. The line is then eased from the winch drum.
There’s a fine art to making the right rope-clutch commitment. The “too much of a good thing” rule once again prevails, and surrounding a winch with four or five clutched lines can cause more problems than it solves. This is especially true if two or more heavily loaded lines are involved in the same sail-handling evolution. I’ve sailed on boats where a main halyard and mainsheet are clutched off at the same winch. The assumption is that once the sail is set, the halyard will remain locked in the clutch and the winch can be used to handle the sheet. All is copacetic up until it’s time to reef, and the mainsheet and halyard have to be handled with only one winch. Add darkness, a significant seaway and a crew just rousted from a deep sleep, and the value of an extra winch, rather than too many rope clutches, becomes very clear.
Furling systems are center stage aboard modern cruising sailboats. They make sail handling easier and safer because the majority of maneuvers can take place in the cockpit.
Headstay-mounted headsail furlers adorn almost every sailboat seen at in-water boat shows. They come in two distinct generic designs. Both types are comprised of a slotted alloy extrusion that fits over the headstay. A jib or genoa is initially hoisted via a rope halyard, then torque to wind in the sail is provided by a drum affixed to the bottom end of the foil. The difference between the two systems is that one relies on a mast-mounted sheave that leads a jib halyard to a sliding swivel that rides up and down the foil. The other system, usually found on smaller boats, has a sheave assembly affixed to the top foil section and the halyard(s) is not run to the mast. Owners with the latter system often continually fight the stretchiness of the small-diameter polyester line used for the halyard. Switching to a higher-modulus (less-stretchy) line lessens the stretch and is worth the investment.
Both systems rely on a spooled line to deliver the furling and reefing torque. This “in-haul” line endures years of UV and chafe damage, but at some point, failure becomes inevitable. It’s more likely to occur when the sail is reefed and the inhaul line is under significant load. For some reason, such failures seem to occur on a dark, rainy night at about 0300. And when a reefing line parts, the deeply reefed jib becomes a full genoa flogging like a flag in the breeze. Even worse, the line to haul it in is no longer usable. That’s why it makes sense to check for chafe and grow skeptical of a furling line that has been exposed to sunlight for more than a decade.
Endless or continuous line furlers are designed to tame large drifter/reachers and nylon asymmetric spinnakers. There are bottom-up and top-down versions, and each is designated by where the sail first begins to furl. Bottom-up furlers are used for light air, lightweight genoa-like sails (codes and reaching sails). Instead of furling with a fishing-reel-like drum arrangement, these endless line furlers rely on a continuous loop. Line tension turns into torque at the disk-shaped drum that holds only a partial turn of line. The twin leads of the elongated loop can be led aft to the cockpit via multiple sets of double blocks mounted on lifeline stanchions.
Asymmetric spinnakers utilize a top-down furling rotation that is telegraphed from the drum to the head of the sail using a torsion line. The splices on these endless-loop furling lines should be regularly checked, and so should the points where the torsion rope enters the hardware.
Cordage—like the hardware that leads and locks running rigging in place—has been vastly improved, and it makes sense for sailors to tap into what it has to offer. This can be done in a full-scale makeover or in a bit-at-a-time tuneup. With the latter, start with halyards, add some new blocks, and check or replace the mast sheaves. If winches and clutches are part of the redo, make sure the deck structure can handle the load, or have some extra reinforcement added.
Whatever the scale of the rigging refit, keep in mind that on a cruising boat, saving ounces isn’t the issue. Our goal is to add efficiency and reliability, and that involves picking hardware and cordage with the right specs, and using them in a layout that keeps the rigging running as friction-free as possible.
Technical expert Ralph Naranjo is a veteran circumnavigator and ocean racer, and author of The Art of Seamanship .
- More: hardware , How To , print 2020 winter , rigging
- More How To
How to Protect Your Spars from Corrosion
Sailing totem refit series: the forward head makeover, fatty goodlander: dealing with chafe while cruising, how to rig everything in your favor, route planning in the face of climate change.
- Digital Edition
- Customer Service
- Privacy Policy
- Email Newsletters
- Cruising World
- Sailing World
- Salt Water Sportsman
- Sport Fishing
- Wakeboarding
Running Rigging for Sailboats: Everything You Need to Know
by Emma Sullivan | Aug 9, 2023 | Sailboat Maintenance

Short answer running rigging for sailboats:
Running rigging refers to the set of lines or ropes used to control the sails on a sailboat. It includes halyards, sheets, and control lines that regulate sail positioning, trim, and hoisting. These essential components are crucial for maneuverability and sail adjustment during sailing.
Introduction to Running Rigging for Sailboats: What You Need to Know
Sailing has captivated mankind for centuries, offering a unique sense of freedom as we harness the power of the wind to glide gracefully across the water. But behind this graceful dance lies an intricate system of ropes, lines, and cables known as running rigging. In this blog post, we’ll dive deep into the world of running rigging for sailboats and provide you with all the essential knowledge you need to embark on your sailing journey.
So, what exactly is running rigging? In simple terms, it refers to all the ropes and lines that control and adjust various parts of the sails on a sailboat . These components play a vital role in maneuvering your vessel and optimizing its performance on the water.
Let’s now take a closer look at some key elements of running rigging:
1. Halyards: Starting from the topmast, halyards are used to hoist or raise sails. There are different types of halyards depending on the type and size of sail being raised – genoa halyard for headsails, main halyard for mainsails, spinnaker halyard for spinnakers, etc. It’s crucial to have properly sized and well-maintained halyards that can withstand high loads while ensuring smooth operation.
2. Sheets: Sheets are lines connected to any control point on a sail such as clew (lower aft corner) or leech (outer edge). The primary function is to trim or adjust the shape and angle of your sail by controlling its tension. Jib sheets control headsail(s), while main sheets handle mainsails – their correct lengths contribute significantly to achieving optimal airflow over your sails .
3. Control Lines: These lines allow you to fine-tune specific aspects related to sail control . For example, cunningham (for mainsails) adjusts luff tension, outhaul regulates foot shape and tension (especially mainsails), and vang controls leech tension. These lines enable you to precisely tailor your sails to the ever-changing wind conditions, optimizing performance and speed.
4. Reefing Lines: When winds become too strong to handle full sails, reefing allows you to reduce sail area by partially furling or folding it. Reefing lines, often associated with booms or mast cars, make this process smooth and efficient. Understanding how to properly set up reefing lines is crucial for safety during inclement weather while ensuring your sailboat remains manageable in adverse conditions.
5. Lazy Jacks: Tired of dealing with a chaotic heap of lines when dropping your mainsail? Enter lazy jacks – an ingenious system that guides the sail down onto the boom neatly. These lines crisscross above the boom and effectively contain the falling sail until it rests securely on deck . Lazy jacks are a game-changer for solo sailors or those seeking a hassle-free experience when stowing their main sails .
6. Running Backstays: Designed for use on boats with fractional rigs or certain types of staysails, running backstays provide additional support to the mast from behind. By alleviating excessive mast bend under heavy loads, they enhance overall rig stability and performance in varying sailing conditions.
The world of running rigging offers endless possibilities for customization and upgradeability as per your specific sailing needs – whether you’re participating in racing competitions or unwind on leisurely cruises along coastal waters.
In conclusion, understanding running rigging is essential for any aspiring sailor looking to master their craft. It’s not merely a tangle of ropes; rather, it represents the fine art of controlling your vessel’s performance through precise adjustments of its sails and related components .
So next time you set sail on your magnificent vessel across sparkling waters, take a moment to appreciate the intricate web of ropes working together behind the scenes. Embrace the power and beauty of running rigging, knowing that it is your trusted friend in your quest for sailing excellence.
How to Choose the Right Running Rigging for Your Sailboat
Choosing the Right Running Rigging: The Art of Sailing Efficiency
When it comes to navigating the open water on your beloved sailboat, having the right running rigging in place can make all the difference in the world. But with so many options available, how do you go about selecting the perfect rigging that suits your sailboat ‘s needs? Fear not, as we are here to guide you through this challenging decision-making process.
First and foremost, one must understand that running rigging plays a vital role in optimizing the performance and safety of your sailboat. Essentially, it is a set of ropes and lines responsible for controlling various aspects of your boat’s sails during navigation. Now let’s dive into some considerations that will help you make an informed decision while choosing the ideal running rigging:
1. Understand Your Specific Requirements: Begin by assessing the specific needs of your sailboat . Are you a recreational sailor who enjoys leisurely cruises or an adventurous racer seeking maximum speed? The purpose and usage of your sailboat will heavily influence your choice of running rigging. Performance-oriented sailors may opt for high-tech materials such as Dyneema® or Spectra®, known for their exceptional strength-to-weight ratio.
2. Rope Selection – Material Matters: The material used for constructing running rigging significantly impacts its performance, durability, and handling. Traditional choices like polyester (Dacron) offer reliable strength at an affordable price point but may stretch over time. Alternatively, advanced fibers like Dyneema® provide excellent strength while being significantly lighter and less prone to elongation.
3. Tailoring Diameter Choices: While deciding on rope diameter may seem trivial initially, it holds immense importance in enhancing grip and ease of use for crew members aboard. Thicker lines tend to be more durable but might compromise handling efficiency due to increased bulkiness. Conversely, thinner lines offer improved flexibility but may lack adequate strength under heavy loads.
4. Understanding Line Construction: Different line constructions serve distinct purposes. A single braid construction, for example, offers enhanced grip and durability, whereas a double braid provides greater strength and handling flexibility. By considering the specific requirements and onboard conditions your sailboat faces, you can select the most appropriate line construction for optimal performance.
5. Balancing Stretch and Performance: Stretch is an inherent property of all ropes, but excessive elongation can adversely affect a sailboat’s maneuverability and overall power efficiency . For racers seeking maximum performance, low-stretch lines like Dyneema® are ideal. However, cruisers might prefer lines with moderate stretch to absorb shocks and prevent sudden jolts during maneuvers.
6. Colorful Choices for Easy Identification: While aesthetics may not seem critical when choosing running rigging at first glance, opting for lines that contrast against your sail colors can significantly improve crew coordination during hectic moments on board. Bold colors also make it easier to identify different lines quickly or spot potential tangles before they become problematic.
7. Seek Professional Advice: When in doubt or faced with multiple conflicting options, consulting professionals with extensive sailing experience can be invaluable. Sailmakers or rigging experts possess intricate knowledge of various rigging configurations suitable for different boat sizes and sailing styles. They can provide tailored recommendations based on your particular needs and constraints.
In conclusion, selecting the right running rigging requires careful consideration of factors such as boat usage, material selection, rope diameter, line construction, stretch characteristics, color coding possibilities, and professional advice where needed. Armed with this knowledge and a clear understanding of your sailboat’s requirements, you’ll navigate the vast seas efficiently while ensuring optimal safety and performance – seizing countless memorable adventures aboard your prized vessel!
Step-by-Step Guide: Setting Up Running Rigging for Your Sailboat
Setting up running rigging for your sailboat may seem like a daunting task, especially if you’re new to sailing. However, with this step-by-step guide, we’ll walk you through the process in a detailed, professional, witty, and clever way that will make it easy and fun!
Step 1: Assess Your Needs Before diving into setting up your running rigging, take some time to evaluate your sailing style and preferences. Consider factors like the size of your sailboat, the type of sailing you plan to do (racing or cruising), and any special requirements or equipment you might need.
Step 2: Gather Your Materials Now that you know what you need for your specific setup, gather all the necessary materials. This may include ropes (or lines), blocks, cleats, shackles, winches, and any other hardware required for your particular rigging configuration . Make sure to choose high-quality materials that can withstand the pressures of sailing.
Step 3: Plan Your Rigging Configuration Next up is planning! Think about how each line will be led through blocks or pulleys and where they will be attached on deck. This requires careful consideration as it affects both functionality and aesthetics. Aim for an organized layout that minimizes clutter while maximizing efficiency.
Step 4: Install Mast Hardware Start by installing any mast hardware needed for attaching halyards (lines used to raise sails) and other standing rigging components. Be precise in measuring distances between attachment points to ensure proper tension on the lines later on.
Step 5: Run Halyards With the mast hardware in place, run your halyards from their respective attachment points at the masthead down to where they will be managed on deck. Take care to avoid tangling ropes or creating unnecessary friction points along their path.
Pro Tip: As you work on this step, keep a witty pun jar nearby – every time you come up with a clever nautical pun, drop a quarter or dime. This will not only add some entertainment but also motivate you to think outside the box!
Step 6: Lead Control Lines Control lines, such as sheets and reefing lines, play a crucial role in adjusting sail trim and managing different sailing conditions. Run these rigging lines from their respective attachment points on the sails through blocks and down to the cockpit or other manageable locations.
Step 7: Cleat Securely Once you have all your running rigging lines in place, securely cleat them off at designated cleats on deck. Cleating properly is crucial for safety and ensures that your sails are appropriately tensioned while sailing.
Step 8: Test & Adjust Now it’s time for the moment of truth – test out your newly set-up running rigging! Take your sailboat out for a spin (pun intended), and pay attention to how smoothly the lines run through blocks and pulleys . Make any necessary adjustments to improve functionality or eliminate any unwanted friction points.
Final Thoughts Setting up running rigging for your sailboat may seem overwhelming at first, but by following this step-by-step guide with our witty tips along the way, you’ll be able to tackle this task with confidence. Remember, practice makes perfect when it comes to understanding how different adjustments affect boat performance.
So grab your materials, unleash your inner sailor wit, and get ready to enjoy smooth sailing with perfectly set-up running rigging!
Frequently Asked Questions About Running Rigging for Sailboats – Answered!
Running rigging plays a crucial role in the sailing of boats, providing control and maneuverability on the water. However, there are often questions surrounding this topic that can leave even experienced sailors scratching their heads. To help demystify running rigging for sailboats, we have compiled a list of frequently asked questions and provided comprehensive answers. So hoist those sails and get ready to explore the world of running rigging!
1. What exactly is running rigging? Running rigging refers to the various ropes used onboard a sailboat that control its sails, such as halyards, sheets, and control lines. Unlike standing rigging (the fixed cables and rods that support the mast), running rigging is adjustable and subject to frequent use during sailing maneuvers.
2. How important is choosing the right type of rope for my running rigging? Selecting the appropriate rope for your running rigging is paramount as it directly impacts performance on your boat. Factors like strength, stretch, weight, grip, and handling all come into play when choosing between materials like nylon, polyester, or Dyneema®️. Understanding these characteristics will enable you to optimize your sail ‘s efficiency and responsiveness.
3. Should I go for colored ropes or stick with plain white ones? While aesthetics play a role in color choice for running rigging, functionality should always take precedence over style. Colored ropes can aid in differentiating between different types of lines quickly and conveniently. For example, using red for port side lines and green for starboard side lines can eliminate confusion under pressure situations where clarity is crucial.
4. Are there any essential knots every sailor should know when dealing with running rigging? Absolutely! Learning some basic knots will greatly assist you when working with your boat’s running rigging system. The bowline knot allows you to make a secure loop at the end of a line while maintaining its strength. The cleat hitch helps you secure a line around a cleat, while the figure-eight knot prevents the end of a line from slipping through blocks or other hardware.
5. Can I easily replace my running rigging on my own, or should I seek professional assistance? Replacing your running rigging can often be done by sailors with some DIY skills and knowledge. However, it’s essential to consult with sailboat experts or riggers to ensure proper material selection and installation techniques. Their expertise can help you avoid rigging mishaps and costly mistakes that could jeopardize your safety on the water.
6. How frequently should running rigging be inspected and replaced? Regular inspection is crucial to assess the condition of your running rigging and identify any signs of wear or damage. Depending on usage and exposure to environmental elements like UV rays, you might need to replace certain lines every few years or sooner if they show visible signs of deterioration. Remember, prevention is always better than cure when it comes to sailing equipment .
7. What are some common mistakes to avoid when dealing with running rigging? One common mistake is neglecting regular maintenance and inspection of your running rigging, which can lead to unexpected failures at critical moments while sailing. Another mistake is overlooking proper line handling techniques like coiling ropes correctly to prevent kinks or twists that could compromise their strength.
In conclusion, understanding the ins and outs of running rigging is vital for any sailor looking to optimize their boat’s performance on the water. By selecting suitable ropes, learning essential knots, seeking professional advice when needed, regularly inspecting lines, and avoiding common pitfalls, you will ensure smooth sailing adventures through cleverly managed running rigging systems!
Essential Tips and Tricks for Maintaining Running Rigging on Your Sailboat
Maintaining running rigging on your sailboat is crucial for both efficiency and safety on the water. Your sailboat’s running rigging, including halyards, sheets, and control lines, play a vital role in adjusting sail shape and controlling the sails’ position. Here are some essential tips and tricks to help you keep your running rigging in top-notch condition.
1. Choose High-Quality Materials: Investing in quality running rigging materials might cost you a bit more upfront, but it will save you time and money in the long run. Opt for durable ropes made of materials like Dyneema or Spectra that offer excellent strength-to-weight ratios and resistant to UV damage.
2. Regular Inspection: Before every sailing trip, get into the habit of thoroughly inspecting your running rigging. Look out for signs of wear, fraying, or any other damage that may compromise their performance. Pay extra attention to areas where there is increased friction or stress points.
3. Cleanliness Is Key: Saltwater and dirt can accelerate rope degradation, so make sure to regularly clean your running rigging using mild soap and water. Rinse them well afterwards to remove any residue that can cause corrosion or weaken the fibers.
4. Protect From UV Rays: Prolonged exposure to sunlight can weaken ropes over time due to UV degradation. Apply a high-quality UV protector or use protective covers at chafe points to keep your running rigging shielded from harmful rays.
5. Proper Coiling and Storage: Coiling your lines correctly not only makes them easier to handle but also helps maintain their integrity over time. Avoid kinks by loosely coiling lines in large loops instead of tightly winding them around your arm or a winch handle. Store coils away from direct sunlight in a dry space to prevent mildew growth.
6. Lubricate Moving Parts: To ensure smooth operation of blocks, cleats, and other moving parts in your running rigging, apply a silicone or dry lubricant. Avoid greasy lubricants as they attract dirt and can lead to clogged systems or premature wear.
7. Tension Adjustment: Regularly adjust the tension of your running rigging to ensure optimal sail performance and safety. Over time, ropes may stretch or shrink due to exposure to environmental conditions, so keeping a keen eye on their tension is vital.
8. Replace Worn Out Lines: No matter how well you maintain your running rigging, there will come a time when replacement is necessary. Don’t hesitate to retire old and worn-out lines and replace them with new ones to maintain the highest level of safety and performance.
By following these essential tips and tricks for maintaining running rigging on your sailboat, you’ll not only extend their lifespan but also enhance your sailing experience. Regular inspection, proper cleaning, storage, and tension adjustment are all part of responsible boat ownership that ensures both efficiency and safety on the water. So take care of your running rigging like a pro sailor would, and enjoy smooth sailing adventures for years to come!
Advanced Techniques: Upgrading and Fine-Tuning Your Sailboat’s Running Rigging
Are you ready to take your sailboat to the next level? Upgrading and fine-tuning your running rigging is a thrilling endeavor that can greatly enhance your sailing experience. In this blog, we will delve into advanced techniques that will make your sailboat perform at its peak, ensuring smooth navigation and unbeatable speed on the water. So buckle up and get ready for an exhilarating ride!
First off, let’s address the importance of upgrading your sailboat’s running rigging. While it may seem like a daunting task, it is essential in optimizing performance and overall handling. Rigging plays a critical role in controlling the sail shape and maximizing efficiency, whether you’re cruising or racing.
One of the key areas to focus on is replacing old lines with high-performance ones. Technological advancements have given rise to innovative rope materials such as Dyneema or Spectra, which offer superior strength-to-weight ratios and low stretch properties. By using these modern marvels, you’ll experience minimal loss of power due to line sag or stretch – translating into more efficient power transfer from wind to acceleration.
Additionally, consider updating hardware components such as blocks or sheaves with newer models designed specifically for high loads and reduced friction. These upgrades enable smoother movements during maneuvers like tacking or gybing, boosting maneuverability while decreasing effort required at the helm.
Now let’s talk about fine-tuning techniques that can elevate your sailing game even further. One method involves adjusting line tension through various control points on deck. By experimenting with different configurations – tweaking halyards, outhauls, cunninghams, vangs, backstays – you can optimize sail shape for different wind conditions. The ultimate goal is achieving an aerodynamically balanced set of sails that maximize lift while minimizing drag.
Another valuable technique worth mastering is proper lead placement for your running rigging. This refers to positioning blocks or cleats in optimal locations along the deck, allowing for smooth line movement and ideal angles. Correct lead placement can transform the way your sailboat responds to wind shifts, providing unrivaled control and responsiveness in any sailing situation.
To fine-tune your rigging even further, consider installing adjustable backstays or runners. These additions allow for precise control over mast bend, thus altering the shape of the mainsail. Such adjustments are invaluable when adjusting sailing performance as weather conditions evolve throughout a race or cruise – making you one step ahead of your competition or ensuring a comfortable journey.
Of course, all these advanced techniques require skill and knowledge to execute properly . It’s highly recommended to consult with experienced riggers or sailmakers who can guide you through the process. They can offer expert advice on choosing the right materials and equipment, as well as assist in setting up initial configurations based on your sailboat’s dimensions and intended purpose.
In conclusion, upgrading and fine-tuning your running rigging is an exciting venture that will take your sailboat from ordinary to extraordinary. By using high-performance lines, upgrading hardware components, adjusting line tension strategically, placing leads optimally, and introducing adjustable rigging elements such as backstays or runners- you’ll unleash the true potential of your vessel. So don’t delay – embark on this thrilling journey today!
Recent Posts

- Sailboat Gear and Equipment
- Sailboat Lifestyle
- Sailboat Maintenance
- Sailboat Racing
- Sailboat Tips and Tricks
- Sailboat Types
- Sailing Adventures
- Sailing Destinations
- Sailing Safety
- Sailing Techniques

- Rock Climbing
- Home & Crafting
- Recreation & Sports
- Cargo & Towing
- Polypropylene
- Double Braid
- Diamond Braid
- Solid Braid
- Mission Rope
- Tracer Rope
- Teufelberger
- New England Ropes
- Maxim Climbing Ropes
- Samson Rope
- I'd like to search by sized at width Find my Rope
Collections
Sailboat rigging lines.
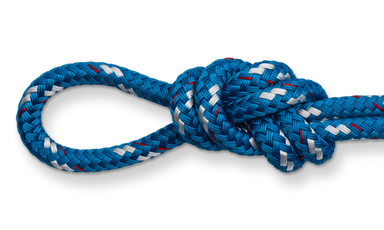
Multi-purpose double braid line that holds up to the elements.
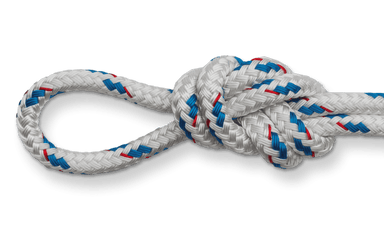
Economical spun polyester static rope

Strong and thin sporting rope made from dyneema.

Pre-stretched ArmourCoated Dyneema rope
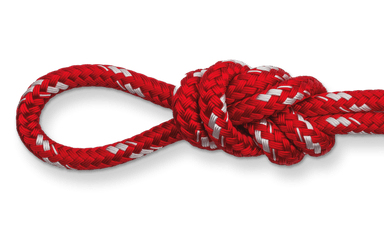
High strength and stretch performance for a polyester braid-on-braid

Dyneema SK78 rope unrivalled in strength and low elongation
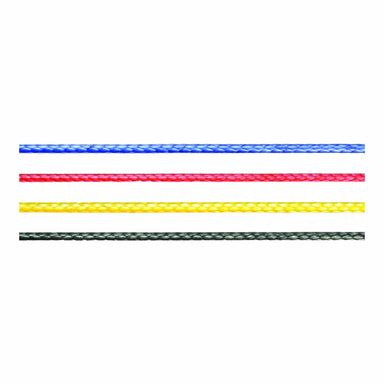
Ideal for club racing and cruising
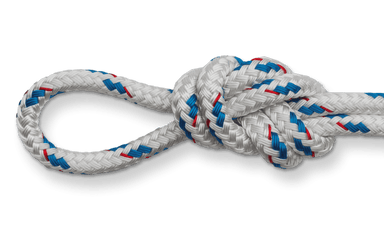
Polyester option for windsurf downhauls and outhauls
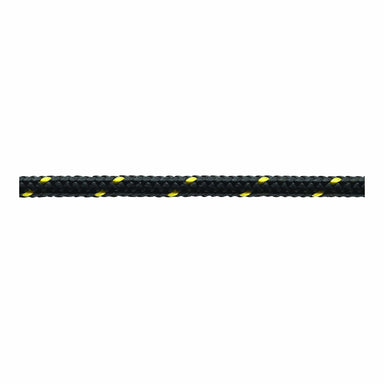
Low stretch and zero creep
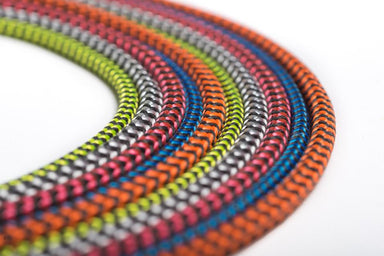
The first and best dedicated line for continuous loop dinghy control lines

High strength and minimal creep
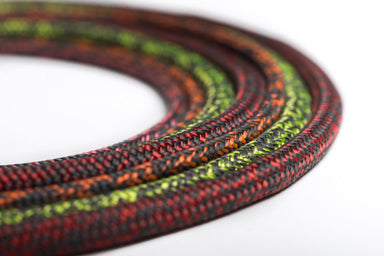
Ideal for halyards, sheets and high strength control lines.
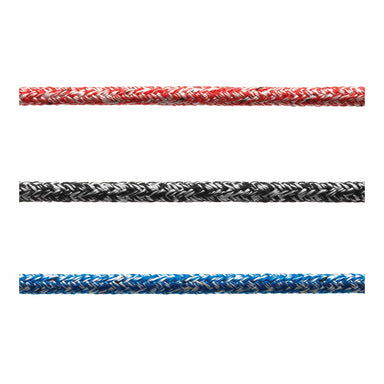
Blended Dyneema and Polypropylene cover
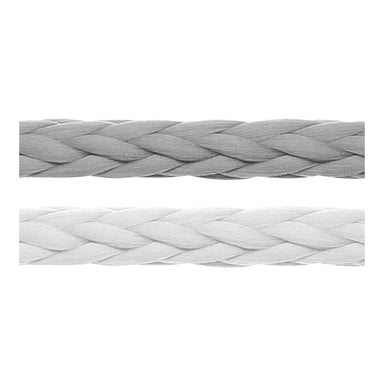
Designed to be spliced for halyard tails and lazy jacks
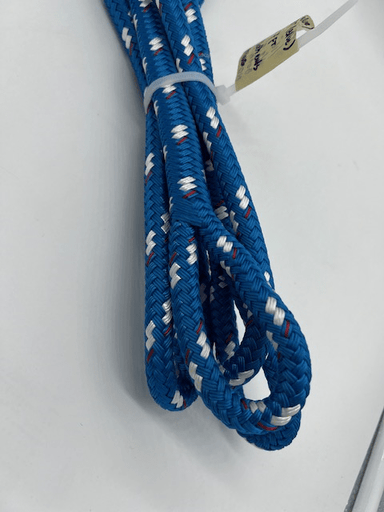
Vectran/Technora cover ensures heat and abrasion resistance
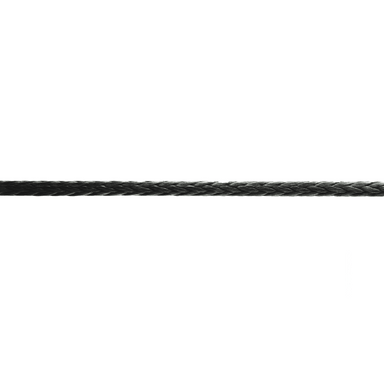
Lightweight and high strength, single braid Dyneema
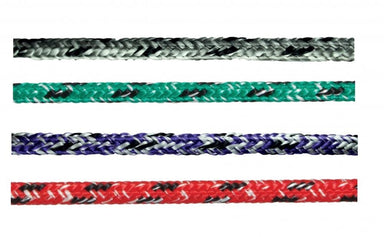
Made with bio-based Dyneema fiber
- Best selling
- Alphabetically, A-Z
- Alphabetically, Z-A
- Price, low to high
- Price, high to low
- Date, old to new
- Date, new to old

Available Mon-Fri, 9am–5pm ET

Pick up the phone and talk to one of our rope specialist to find your answers.
(888) 619-ROPE (7673)

Phone not your thing? Send us a message via chat and we will be happy to help.
Ask us anything

Send us an email and we will get back to you as soon as possible.

Beginner’s Guide: How To Rig A Sailboat – Step By Step Tutorial
Alex Morgan

Rigging a sailboat is a crucial process that ensures the proper setup and functioning of a sailboat’s various components. Understanding the process and components involved in rigging is essential for any sailor or boat enthusiast. In this article, we will provide a comprehensive guide on how to rig a sailboat.
Introduction to Rigging a Sailboat
Rigging a sailboat refers to the process of setting up the components that enable the sailboat to navigate through the water using wind power. This includes assembling and positioning various parts such as the mast, boom, standing rigging, running rigging, and sails.
Understanding the Components of a Sailboat Rigging
Before diving into the rigging process, it is important to have a good understanding of the key components involved. These components include:
The mast is the tall vertical spar that provides vertical support to the sails and holds them in place.
The boom is the horizontal spar that runs along the bottom edge of the sail and helps control the shape and position of the sail.
- Standing Rigging:
Standing rigging consists of the wires and cables that support and stabilize the mast, keeping it upright.
- Running Rigging:
Running rigging refers to the lines and ropes used to control the sails, such as halyards, sheets, and control lines.
Preparing to Rig a Sailboat
Before rigging a sailboat, there are a few important steps to take. These include:
- Checking the Weather Conditions:
It is crucial to assess the weather conditions before rigging a sailboat. Unfavorable weather, such as high winds or storms, can make rigging unsafe.
- Gathering the Necessary Tools and Equipment:
Make sure to have all the necessary tools and equipment readily available before starting the rigging process. This may include wrenches, hammers, tape, and other common tools.
- Inspecting the Rigging Components:
In the upcoming sections of this article, we will provide a step-by-step guide on how to rig a sailboat, as well as important safety considerations and tips to keep in mind. By following these guidelines, you will be able to rig your sailboat correctly and safely, allowing for a smooth and enjoyable sailing experience.
Key takeaway:
- Rigging a sailboat maximizes efficiency: Proper rigging allows for optimized sailing performance, ensuring the boat moves smoothly through the water.
- Understanding sailboat rigging components: Familiarity with the various parts of a sailboat rigging, such as the mast, boom, and standing and running riggings, is essential for effective rigging setup.
- Importance of safety in sailboat rigging: Ensuring safety is crucial during the rigging process, including wearing a personal flotation device, securing loose ends and lines, and being mindful of overhead power lines.
Get ready to set sail and dive into the fascinating world of sailboat rigging! We’ll embark on a journey to understand the various components that make up a sailboat’s rigging. From the majestic mast to the nimble boom , and the intricate standing rigging to the dynamic running rigging , we’ll explore the crucial elements that ensure smooth sailing. Not forgetting the magnificent sail, which catches the wind and propels us forward. So grab your sea legs and let’s uncover the secrets of sailboat rigging together.
Understanding the mast is crucial when rigging a sailboat. Here are the key components and steps to consider:
1. The mast supports the sails and rigging of the sailboat. It is made of aluminum or carbon fiber .
2. Before stepping the mast , ensure that the area is clear and the boat is stable. Have all necessary tools and equipment ready.
3. Inspect the mast for damage or wear. Check for corrosion , loose fittings , and cracks . Address any issues before proceeding.
4. To step the mast , carefully lift it into an upright position and insert the base into the mast step on the deck of the sailboat.
5. Secure the mast using the appropriate rigging and fasteners . Attach the standing rigging , such as shrouds and stays , to the mast and the boat’s hull .
Fact: The mast of a sailboat is designed to withstand wind resistance and the tension of the rigging for stability and safe sailing.
The boom is an essential part of sailboat rigging. It is a horizontal spar that stretches from the mast to the aft of the boat. Constructed with durable yet lightweight materials like aluminum or carbon fiber, the boom provides crucial support and has control over the shape and position of the sail. It is connected to the mast through a boom gooseneck , allowing it to pivot. One end of the boom is attached to the mainsail, while the other end is equipped with a boom vang or kicker, which manages the tension and angle of the boom. When the sail is raised, the boom is also lifted and positioned horizontally by using the topping lift or lazy jacks.
An incident serves as a warning that emphasizes the significance of properly securing the boom. In strong winds, an improperly fastened boom swung across the deck, resulting in damage to the boat and creating a safety hazard. This incident highlights the importance of correctly installing and securely fastening all rigging components, including the boom, to prevent accidents and damage.
3. Standing Rigging
When rigging a sailboat, the standing rigging plays a vital role in providing stability and support to the mast . It consists of several key components, including the mast itself, along with the shrouds , forestay , backstay , and intermediate shrouds .
The mast, a vertical pole , acts as the primary support structure for the sails and the standing rigging. Connected to the top of the mast are the shrouds , which are cables or wires that extend to the sides of the boat, providing essential lateral support .
The forestay is another vital piece of the standing rigging. It is a cable or wire that runs from the top of the mast to the bow of the boat, ensuring forward support . Similarly, the backstay , also a cable or wire, runs from the mast’s top to the stern of the boat, providing important backward support .
To further enhance the rig’s stability , intermediate shrouds are installed. These additional cables or wires are positioned between the main shrouds, as well as the forestay or backstay. They offer extra support , strengthening the standing rigging system.
Regular inspections of the standing rigging are essential to detect any signs of wear, such as fraying or corrosion . It is crucial to ensure that all connections within the rig are tight and secure, to uphold its integrity. Should any issues be identified, immediate attention must be given to prevent accidents or damage to the boat. Prioritizing safety is of utmost importance when rigging a sailboat, thereby necessitating proper maintenance of the standing rigging. This ensures a safe and enjoyable sailing experience.
Note: <p> tags have been kept intact.
4. Running Rigging
Running Rigging
When rigging a sailboat, the running rigging is essential for controlling the sails and adjusting their position. It is important to consider several aspects when dealing with the running rigging.
1. Choose the right rope: The running rigging typically consists of ropes with varying properties such as strength, stretch, and durability. Weather conditions and sailboat size should be considered when selecting the appropriate rope.
2. Inspect and maintain the running rigging: Regularly check for signs of wear, fraying, or damage. To ensure safety and efficiency, replace worn-out ropes.
3. Learn essential knot tying techniques: Having knowledge of knots like the bowline, cleat hitch, and reef knot is crucial for securing the running rigging and adjusting sails.
4. Understand different controls: The running rigging includes controls such as halyards, sheets, and control lines. Familiarize yourself with their functions and proper usage to effectively control sail position and tension.
5. Practice proper sail trimming: Adjusting the tension of the running rigging significantly affects sailboat performance. Mastering sail trimming techniques will help optimize sail shape and maximize speed.
By considering these factors and mastering running rigging techniques, you can enhance your sailing experience and ensure the safe operation of your sailboat.
The sail is the central component of sailboat rigging as it effectively harnesses the power of the wind to propel the boat.
When considering the sail, there are several key aspects to keep in mind:
– Material: Sails are typically constructed from durable and lightweight materials such as Dacron or polyester. These materials provide strength and resistance to various weather conditions.
– Shape: The shape of the sail plays a critical role in its overall performance. A well-shaped sail should have a smooth and aerodynamic profile, which allows for maximum efficiency in capturing wind power.
– Size: The size of the sail is determined by its sail area, which is measured in square feet or square meters. Larger sails have the ability to generate more power, but they require greater skill and experience to handle effectively.
– Reefing: Reefing is the process of reducing the sail’s size to adapt to strong winds. Sails equipped with reefing points allow sailors to decrease the sail area, providing better control in challenging weather conditions.
– Types: There are various types of sails, each specifically designed for different purposes. Common sail types include mainsails, jibs, genoas, spinnakers, and storm sails. Each type possesses its own unique characteristics and is utilized under specific wind conditions.
Understanding the sail and its characteristics is vital for sailors, as it directly influences the boat’s speed, maneuverability, and overall safety on the water.
Getting ready to rig a sailboat requires careful preparation and attention to detail. In this section, we’ll dive into the essential steps you need to take before setting sail. From checking the weather conditions to gathering the necessary tools and equipment, and inspecting the rigging components, we’ll ensure that you’re fully equipped to navigate the open waters with confidence. So, let’s get started on our journey to successfully rigging a sailboat!
1. Checking the Weather Conditions
Checking the weather conditions is crucial before rigging a sailboat for a safe and enjoyable sailing experience. Monitoring the wind speed is important in order to assess the ideal sailing conditions . By checking the wind speed forecast , you can determine if the wind is strong or light . Strong winds can make sailboat control difficult, while very light winds can result in slow progress.
Another important factor to consider is the wind direction . Assessing the wind direction is crucial for route planning and sail adjustment. Favorable wind direction helps propel the sailboat efficiently, making your sailing experience more enjoyable.
In addition to wind speed and direction, it is also important to consider weather patterns . Keep an eye out for impending storms or heavy rain. It is best to avoid sailing in severe weather conditions that may pose a safety risk. Safety should always be a top priority when venturing out on a sailboat.
Another aspect to consider is visibility . Ensure good visibility by checking for fog, haze, or any other conditions that may hinder navigation. Clear visibility is important for being aware of other boats and potential obstacles that may come your way.
Be aware of the local conditions . Take into account factors such as sea breezes, coastal influences, or tidal currents. These local factors greatly affect sailboat performance and safety. By considering all of these elements, you can have a successful and enjoyable sailing experience.
Here’s a true story to emphasize the importance of checking the weather conditions. One sunny afternoon, a group of friends decided to go sailing. Before heading out, they took the time to check the weather conditions. They noticed that the wind speed was expected to be around 10 knots, which was perfect for their sailboat. The wind direction was coming from the northwest, allowing for a pleasant upwind journey. With clear visibility and no approaching storms, they set out confidently, enjoying a smooth and exhilarating sail. This positive experience was made possible by their careful attention to checking the weather conditions beforehand.
2. Gathering the Necessary Tools and Equipment
To efficiently gather all of the necessary tools and equipment for rigging a sailboat, follow these simple steps:
- First and foremost, carefully inspect your toolbox to ensure that you have all of the basic tools such as wrenches, screwdrivers, and pliers.
- Make sure to check if you have a tape measure or ruler available as they are essential for precise measurements of ropes or cables.
- Don’t forget to include a sharp knife or rope cutter in your arsenal as they will come in handy for cutting ropes or cables to the desired lengths.
- Gather all the required rigging hardware including shackles, pulleys, cleats, and turnbuckles.
- It is always prudent to check for spare ropes or cables in case replacements are needed during the rigging process.
- If needed, consider having a sailing knife or marlinspike tool for splicing ropes or cables.
- For rigging a larger sailboat, it is crucial to have a mast crane or hoist to assist with stepping the mast.
- Ensure that you have a ladder or some other means of reaching higher parts of the sailboat, such as the top of the mast.
Once, during the preparation of rigging my sailboat, I had a moment of realization when I discovered that I had forgotten to bring a screwdriver . This unfortunate predicament occurred while I was in a remote location with no nearby stores. Being resourceful, I improvised by utilizing a multipurpose tool with a small knife blade, which served as a makeshift screwdriver. Although it was not the ideal solution, it allowed me to accomplish the task. Since that incident, I have learned the importance of double-checking my toolbox before commencing any rigging endeavor. This practice ensures that I have all of the necessary tools and equipment, preventing any unexpected surprises along the way.
3. Inspecting the Rigging Components
Inspecting the rigging components is essential for rigging a sailboat safely. Here is a step-by-step guide on inspecting the rigging components:
1. Visually inspect the mast, boom, and standing rigging for damage, such as corrosion, cracks, or loose fittings.
2. Check the tension of the standing rigging using a tension gauge. It should be within the recommended range from the manufacturer.
3. Examine the turnbuckles, clevis pins, and shackles for wear or deformation. Replace any damaged or worn-out hardware.
4. Inspect the running rigging, including halyards and sheets, for fraying, signs of wear, or weak spots. Replace any worn-out lines.
5. Check the sail for tears, wear, or missing hardware such as grommets or luff tape.
6. Pay attention to the connections between the standing rigging and the mast. Ensure secure connections without any loose or missing cotter pins or rigging screws.
7. Inspect all fittings, such as mast steps, spreader brackets, and tangs, to ensure they are securely fastened and in good condition.
8. Conduct a sea trial to assess the rigging’s performance and make necessary adjustments.
Regularly inspecting the rigging components is crucial for maintaining the sailboat’s rigging system’s integrity, ensuring safe sailing conditions, and preventing accidents or failures at sea.
Once, I went sailing on a friend’s boat without inspecting the rigging components beforehand. While at sea, a sudden gust of wind caused one of the shrouds to snap. Fortunately, no one was hurt, but we had to cut the sail loose and carefully return to the marina. This incident taught me the importance of inspecting the rigging components before sailing to avoid unforeseen dangers.
Step-by-Step Guide on How to Rig a Sailboat
Get ready to set sail with our step-by-step guide on rigging a sailboat ! We’ll take you through the process from start to finish, covering everything from stepping the mast to setting up the running rigging . Learn the essential techniques and tips for each sub-section, including attaching the standing rigging and installing the boom and sails . Whether you’re a seasoned sailor or a beginner, this guide will have you ready to navigate the open waters with confidence .
1. Stepping the Mast
To step the mast of a sailboat, follow these steps:
1. Prepare the mast: Position the mast near the base of the boat.
2. Attach the base plate: Securely fasten the base plate to the designated area on the boat.
3. Insert the mast step: Lower the mast step into the base plate and align it with the holes or slots.
4. Secure the mast step: Use fastening screws or bolts to fix the mast step in place.
5. Raise the mast: Lift the mast upright with the help of one or more crew members.
6. Align the mast: Adjust the mast so that it is straight and aligned with the boat’s centerline.
7. Attach the shrouds: Connect the shrouds to the upper section of the mast, ensuring proper tension.
8. Secure the forestay: Attach the forestay to the bow of the boat, ensuring it is securely fastened.
9. Final adjustments: Check the tension of the shrouds and forestay, making any necessary rigging adjustments.
Following these steps ensures that the mast is properly stepped and securely in place, allowing for a safe and efficient rigging process. Always prioritize safety precautions and follow manufacturer guidelines for your specific sailboat model.
2. Attaching the Standing Rigging
To attach the standing rigging on a sailboat, commence by preparing the essential tools and equipment, including wire cutters, crimping tools, and turnbuckles.
Next, carefully inspect the standing rigging components for any indications of wear or damage.
After inspection, fasten the bottom ends of the shrouds and stays to the chainplates on the deck.
Then, securely affix the top ends of the shrouds and stays to the mast using adjustable turnbuckles .
To ensure proper tension, adjust the turnbuckles accordingly until the mast is upright and centered.
Utilize a tension gauge to measure the tension in the standing rigging, aiming for around 15-20% of the breaking strength of the rigging wire.
Double-check all connections and fittings to verify their security and proper tightness.
It is crucial to regularly inspect the standing rigging for any signs of wear or fatigue and make any necessary adjustments or replacements.
By diligently following these steps, you can effectively attach the standing rigging on your sailboat, ensuring its stability and safety while on the water.
3. Installing the Boom and Sails
To successfully complete the installation of the boom and sails on a sailboat, follow these steps:
1. Begin by securely attaching the boom to the mast. Slide it into the gooseneck fitting and ensure it is firmly fastened using a boom vang or another appropriate mechanism.
2. Next, attach the main sail to the boom. Slide the luff of the sail into the mast track and securely fix it in place using sail slides or cars.
3. Connect the mainsheet to the boom. One end should be attached to the boom while the other end is connected to a block or cleat on the boat.
4. Proceed to attach the jib or genoa. Make sure to securely attach the hanks or furler line to the forestay to ensure stability.
5. Connect the jib sheets. One end of each jib sheet should be attached to the clew of the jib or genoa, while the other end is connected to a block or winch on the boat.
6. Before setting sail, it is essential to thoroughly inspect all lines and connections. Ensure that they are properly tensioned and that all connections are securely fastened.
During my own experience of installing the boom and sails on my sailboat, I unexpectedly encountered a strong gust of wind. As a result, the boom began swinging uncontrollably, requiring me to quickly secure it to prevent any damage. This particular incident served as a vital reminder of the significance of properly attaching and securing the boom, as well as the importance of being prepared for unforeseen weather conditions while rigging a sailboat.
4. Setting Up the Running Rigging
Setting up the running rigging on a sailboat involves several important steps. First, attach the halyard securely to the head of the sail. Then, connect the sheets to the clew of the sail. If necessary, make sure to secure the reefing lines . Attach the outhaul line to the clew of the sail and connect the downhaul line to the tack of the sail. It is crucial to ensure that all lines are properly cleated and organized. Take a moment to double-check the tension and alignment of each line. If you are using a roller furling system, carefully wrap the line around the furling drum and securely fasten it. Perform a thorough visual inspection of the running rigging to check for any signs of wear or damage. Properly setting up the running rigging is essential for safe and efficient sailing. It allows for precise control of the sail’s position and shape, ultimately optimizing the boat’s performance on the water.
Safety Considerations and Tips
When it comes to rigging a sailboat, safety should always be our top priority. In this section, we’ll explore essential safety considerations and share some valuable tips to ensure smooth sailing. From the importance of wearing a personal flotation device to securing loose ends and lines, and being cautious around overhead power lines, we’ll equip you with the knowledge and awareness needed for a safe and enjoyable sailing experience. So, let’s set sail and dive into the world of safety on the water!
1. Always Wear a Personal Flotation Device
When rigging a sailboat, it is crucial to prioritize safety and always wear a personal flotation device ( PFD ). Follow these steps to properly use a PFD:
- Select the appropriate Coast Guard-approved PFD that fits your size and weight.
- Put on the PFD correctly by placing your arms through the armholes and securing all the straps for a snug fit .
- Adjust the PFD for comfort , ensuring it is neither too tight nor too loose, allowing freedom of movement and adequate buoyancy .
- Regularly inspect the PFD for any signs of wear or damage, such as tears or broken straps, and replace any damaged PFDs immediately .
- Always wear your PFD when on or near the water, even if you are a strong swimmer .
By always wearing a personal flotation device and following these steps, you will ensure your safety and reduce the risk of accidents while rigging a sailboat. Remember, prioritize safety when enjoying water activities.
2. Secure Loose Ends and Lines
Inspect lines and ropes for frayed or damaged areas. Secure loose ends and lines with knots or appropriate cleats or clamps. Ensure all lines are properly tensioned to prevent loosening during sailing. Double-check all connections and attachments for security. Use additional safety measures like extra knots or stopper knots to prevent line slippage.
To ensure a safe sailing experience , it is crucial to secure loose ends and lines properly . Neglecting this important step can lead to accidents or damage to the sailboat. By inspecting, securing, and tensioning lines , you can have peace of mind knowing that everything is in place. Replace or repair any compromised lines or ropes promptly. Securing loose ends and lines allows for worry-free sailing trips .
3. Be Mindful of Overhead Power Lines
When rigging a sailboat, it is crucial to be mindful of overhead power lines for safety. It is important to survey the area for power lines before rigging the sailboat. Maintain a safe distance of at least 10 feet from power lines. It is crucial to avoid hoisting tall masts or long antenna systems near power lines to prevent contact. Lower the mast and tall structures when passing under a power line to minimize the risk of contact. It is also essential to be cautious in areas where power lines run over the water and steer clear to prevent accidents.
A true story emphasizes the importance of being mindful of overhead power lines. In this case, a group of sailors disregarded safety precautions and their sailboat’s mast made contact with a low-hanging power line, resulting in a dangerous electrical shock. Fortunately, no serious injuries occurred, but it serves as a stark reminder of the need to be aware of power lines while rigging a sailboat.
Some Facts About How To Rig A Sailboat:
- ✅ Small sailboat rigging projects can improve sailing performance and save money. (Source: stingysailor.com)
- ✅ Rigging guides are available for small sailboats, providing instructions and tips for rigging. (Source: westcoastsailing.net)
- ✅ Running rigging includes lines used to control and trim the sails, such as halyards and sheets. (Source: sailingellidah.com)
- ✅ Hardware used in sailboat rigging includes winches, blocks, and furling systems. (Source: sailingellidah.com)
- ✅ A step-by-step guide can help beginners rig a small sailboat for sailing. (Source: tripsavvy.com)
Frequently Asked Questions
1. how do i rig a small sailboat.
To rig a small sailboat, follow these steps: – Install or check the rudder, ensuring it is firmly attached. – Attach or check the tiller, the long steering arm mounted to the rudder. – Attach the jib halyard by connecting the halyard shackle to the head of the sail and the grommet in the tack to the bottom of the forestay. – Hank on the jib by attaching the hanks of the sail to the forestay one at a time. – Run the jib sheets by tying or shackling them to the clew of the sail and running them back to the cockpit. – Attach the mainsail by spreading it out and attaching the halyard shackle to the head of the sail. – Secure the tack, clew, and foot of the mainsail to the boom using various lines and mechanisms. – Insert the mainsail slugs into the mast groove, gradually raising the mainsail as the slugs are inserted. – Cleat the main halyard and lower the centerboard into the water. – Raise the jib by pulling down on the jib halyard and cleating it on the other side of the mast. – Tighten the mainsheet and one jibsheet to adjust the sails and start moving forward.
2. What are the different types of sailboat rigs?
Sailboat rigs can be classified into three main types: – Sloop rig: This rig has a single mast with a mainsail and a headsail, typically a jib or genoa. – Cutter rig: This rig has two headsails, a smaller jib or staysail closer to the mast, and a larger headsail, usually a genoa, forward of it, alongside a mainsail. – Ketch rig: This rig has two masts, with the main mast taller than the mizzen mast. It usually has a mainsail, headsail, and a mizzen sail. Each rig has distinct characteristics and is suitable for different sailing conditions and preferences.
3. What are the essential parts of a sailboat?
The essential parts of a sailboat include: – Mast: The tall vertical spar that supports the sails. – Boom: The horizontal spar connected to the mast, which extends outward and supports the foot of the mainsail. – Rudder: The underwater appendage that steers the boat. – Centerboard or keel: A retractable or fixed fin-like structure that provides stability and prevents sideways drift. – Sails: The fabric structures that capture the wind’s energy to propel the boat. – Running rigging: The lines or ropes used to control the sails and sailing equipment. – Standing rigging: The wires and cables that support the mast and reinforce the spars. These are the basic components necessary for the functioning of a sailboat.
4. What is a spinnaker halyard?
A spinnaker halyard is a line used to hoist and control a spinnaker sail. The spinnaker is a large, lightweight sail that is used for downwind sailing or reaching in moderate to strong winds. The halyard attaches to the head of the spinnaker and is used to raise it to the top of the mast. Once hoisted, the spinnaker halyard can be adjusted to control the tension and shape of the sail.
5. Why is it important to maintain and replace worn running rigging?
It is important to maintain and replace worn running rigging for several reasons: – Safety: Worn or damaged rigging can compromise the integrity and stability of the boat, posing a safety risk to both crew and vessel. – Performance: Worn rigging can affect the efficiency and performance of the sails, diminishing the boat’s speed and maneuverability. – Reliability: Aging or worn rigging is more prone to failure, which can lead to unexpected problems and breakdowns. Regular inspection and replacement of worn running rigging is essential to ensure the safe and efficient operation of a sailboat.
6. Where can I find sailboat rigging books or guides?
There are several sources where you can find sailboat rigging books or guides: – Online: Websites such as West Coast Sailing and Stingy Sailor offer downloadable rigging guides for different sailboat models. – Bookstores: Many bookstores carry a wide selection of boating and sailing books, including those specifically focused on sailboat rigging. – Sailing schools and clubs: Local sailing schools or yacht clubs often have resources available for learning about sailboat rigging. – Manufacturers: Some sailboat manufacturers, like Hobie Cat and RS Sailing, provide rigging guides for their specific sailboat models. Consulting these resources can provide valuable information and instructions for rigging your sailboat properly.
About the author
Leave a Reply Cancel reply
Your email address will not be published. Required fields are marked *
Save my name, email, and website in this browser for the next time I comment.
Latest posts

The history of sailing – from ancient times to modern adventures
History of Sailing Sailing is a time-honored tradition that has evolved over millennia, from its humble beginnings as a means of transportation to a beloved modern-day recreational activity. The history of sailing is a fascinating journey that spans cultures and centuries, rich in innovation and adventure. In this article, we’ll explore the remarkable evolution of…

Sailing Solo: Adventures and Challenges of Single-Handed Sailing
Solo Sailing Sailing has always been a pursuit of freedom, adventure, and self-discovery. While sailing with a crew is a fantastic experience, there’s a unique allure to sailing solo – just you, the wind, and the open sea. Single-handed sailing, as it’s often called, is a journey of self-reliance, resilience, and the ultimate test of…

Sustainable Sailing: Eco-Friendly Practices on the boat
Eco Friendly Sailing Sailing is an exhilarating and timeless way to explore the beauty of the open water, but it’s important to remember that our oceans and environment need our protection. Sustainable sailing, which involves eco-friendly practices and mindful decision-making, allows sailors to enjoy their adventures while minimizing their impact on the environment. In this…

- standing rigging
- rope and line
- cams, cleats and clutches
- head sail gear
- roller furling
- main sail control
- mast hardware
- eye straps and pad eyes
- fairleads and bulls eyes
- anchor and docking
- miscellaneous hardware
- Alexander Roberts
- My Wishlist
running rigging
- Customer Service
- Order Tracking
- Your Account
- Store Policies & Info
- Privacy Policy
- Helpful Links
- Payment Methods
Shopping Cart: 0 Items
Free Shipping Over $99* - 366 Day Returns - Dedicated Customer Support

- Call Us +1-503-285-5536
- Sign in & Register
- Recently Viewed
West Coast Sailing offers a full selection of marine grade sailing line and rigging including One Design rigging, pre cut line, line kits, and line by the foot for halyards, sheets, control lines, and more. Shop running rigging and standing rigging today from trusted brands including Marlow, Robline, Samson, Kingfisher, New England Ropes, and more.
- Qty in Cart

Laser / ILCA 8:1 Cunningham TecPRO (Complete)

Laser / ILCA Vang Complete TecPRO (Allen Vang Block)

J/80 Main Halyard w/ Shackle


J/70 Backstay Flicker

Thistle Main Halyard Tapered (6mm Excel)

Thistle Spinsheet Continuous Tapered (6mm Excel Racing)

Melges 24 4:1 Main Halyard Vectran

Melges 24 Jib Sheet (Continuous/Tapered)

J/24 Spinnaker Sheet (Ultra Lite)

J/22 Twings (Pair) with Ring
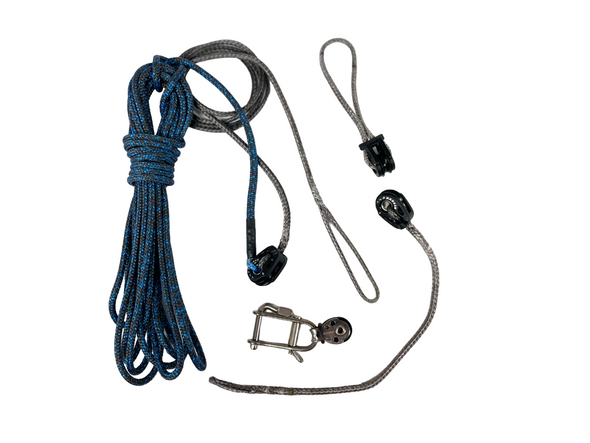
Laser / ILCA Outhaul TecPRO 6:1 (Complete)

10mm Marlow D2 Racing

8mm Marlow D2 Racing

Laser / ILCA Vang Control PRO

Laser / ILCA 8:1 Cunningham PRO (Complete)
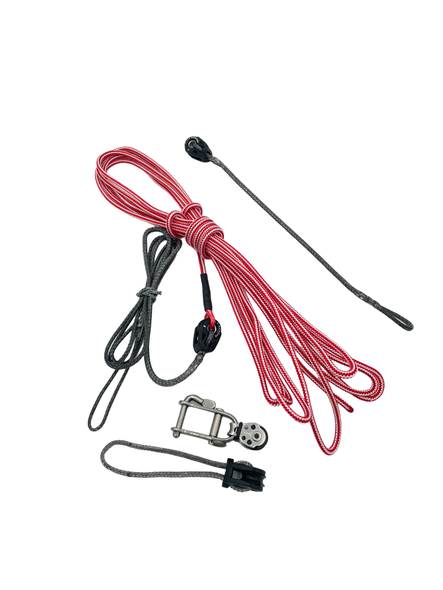
Laser / ILCA Outhaul PRO 6:1 (Complete)
- Total: items /
- Add all to cart
Adding your products to cart
Sailboat line & rigging - halyards, sheets, control lines & more.
Line is a critical part of any sailboat, from small dinghy to super yacht and everything in between. West Coast Sailing offers a wide variety of line and marine rope for every sailor from leading line manufacturers. Whether you're looking for a new control line for your Laser vang, jib sheet for your J24, replacement halyard for your cruising boat, or a high strength low stretch line for a high performance application, we've got what you need to get you back on the water. Shop by common application, diameter, material, and more with options available from Robline, Marlow, Alpha Ropes, and New England Ropes. All line sold by the foot with line kits for select boats and small diameter mini spools available.
Shop By Boat
West Coast Sailing offers custom rigging, line kits, and pre cut line for many popular one design dinghies and keelboats. These products make it simple to get the right line for your sailboat and you can be confident they will work great.
- Shop Line Kits
- Shop One Design Rigging
- Shop Pre Cut Line
Shop By Line Type
Line has come a long way in the past few decades, and current options offer great value and performance. We offer a variety of h igh tech Lines, which generally feature a non-stretch core for strength, durable cruising lines, which are typically polyester and less expensive but still strong and durable, or Dyneema, Spectra, & Vectran for non-stretch control line, halyard, and sheet applications. Shockcord bungee and floating Polypropylene also available. Scroll down this page for recommendations for line material based on your boat size and application.
- Shop by Line Type
Shop By Diameter
West Coast Sailing carries over 80 different lines from 6 of the best rope manufacturers in diameters ranging from 1mm all the way up to 12mm. Use our handy category filters to narrow in on the specific diameter of lines that work for your application, and then pick the one that meets your exact criteria for performance, color, or price.
- Shop by Line Diameter
Additional Line Options & Services
In addition to per foot line, pre cut line, line kits, and custom rigging, West Coast Sailing also offers mini spools, splicing equipment, and custom rigging services. If you can dream it, our team can build it!
- Shop Mini Spools
- Shop Splicing Tools
- Shop Custom Rigging
Line Fiber Type / Material Guide
Line application guide - dinghy, line application guide - racing, line application guide - performance cruising, line diameter guide.
Recommended Diameter by Application & Boat Length
If you are replacing an existing line, the easiest way to determine what diameter you need is to match what you already have. This can be done with a caliper or by close estimation with a tape measure. For example, if you've previously used a 7mm halyard and it has performed well, another 7mm line is likely a great choice. In most applications, there is some flexibility in the exact diameter that can be used. Most blocks, for example, have an 'ideal' diameter (ie, the line diameter that runs most effectively though the block's sheave) but also have a range so that you can run a slightly thinner or slightly thicker line. If you have a halyard that is getting hung up in your rig, stepping down 1-2mm might help the halyard run more efficiently. If you have a larger boat or rig and want to run a thinner halyard, consider a double braid line that features a Dyneema or Spectra core for strength. A similar approach can be applied to replacing sheets, control lines, and other line on your sailboat.
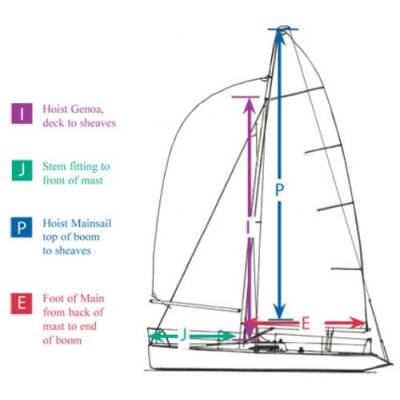
Double Braid vs Single Braid
Two terms you will often see in line descriptions are 'double braid' and 'single braid', which refer to the way the line is constructed. At the most basic level, a double braid line has a cover and a core whereas a single braid does not, but there are other important distinctions to consider when making a line selection.
Single Braids are made up of either 8 or 12 strands that are braided into a circular pattern, half clockwise and half counter clockwise. This produces a line that is supple, absorbs twists, and tends not to kink. There are two types of single braid lines: performance single braids and polyester/blended single braids. Performance single braids are made from fibers with very low stretch and designed to handle extreme loads - think Dyneema, Spectra, or Vectran. Polyester/blended single braids, sometimes called hollow braid, are soft and easy to grip, built for sheets and hand-adjusted control lines. These are less common than performance single braid lines but recommended in a few specific applications.
Double Braids , sometimes called braid on braid, have a braided core within a braided outer jacket or cover. This creates a strong, durable, smooth-running line that is easy to handle. Double braids are used for the vast majority of all running rigging on sailboats including sheets, halyards and control lines for both cruising or racing. There are two types to consider: polyester double braids and high-tech double braids. Polyester double braids, found most commonly on recreational and cruising sailboats, have a polyester cover with polyester core. These are low maintenance, affordable, and long-lasting, while offering relatively low stretch and high working loads. For additional strength and minimal stretch, consider high-tech double braids. These lines typically feature a Dyneema or Spectra core (non-stretch) inside a polyester or polyester/dyneema blend cover for additional durability. They are more expensive but often the go to choice for high performance racing boats.
Sailing Programs & Clubs - West Coast Sailing offers special program pricing on purchases for sailing programs, yacht clubs, and community sailing organizations. Visit our YC & Program Purchasing page for more details.
Subscribe To Our Newsletter
Sign up for our newsletter to receive exclusive discounts, new product announcements, and upcoming sales.
× You are using an outdated browser. Please upgrade your browser to improve your experience.
We Ship Worldwide! | FREE SHIPPING! for US Continental orders over $99. Click for details.

Shopping Cart
Your cart is currently empty..
FREE SHIPPING! for US Continental orders over $99 click for details
Sailboat Running Rigging

Running Rigging components include all hardware necessary to construct halyards, sheets and control lines for your sailboat like halyard shackles, shackle guards, spool shackles, thimbles and splicing services.
We at MAURIPRO Sailing are fully committed to being your Sailboat Running Rigging specialist not only providing the sailing community with a comprehensive and easy-to-use website, but also with all the appropriate technical information that you might need to select your sailboat hardware and equipment.
MAURIPRO Sailing, your direct access to Sailboat Running Rigging and all your other sailing and boating needs.
Copyright © 2024 MAURIPRO Sailing LLC.
JavaScript seems to be disabled in your browser. For the best experience on our site, be sure to turn on Javascript in your browser.
- Create an Account

- Dyneema Rope
- Marine Electronics
- All Categories
- Small Boat Lines
- Genoa Sheets
- Light Air Sheets
- Standing Rigging
- Spinnaker Guy
- Mechanical Windlasses
- Control Lines
- Electronics
Running Rigging
- Club Racing 5 item
- Cruising 3 item
- Racing 2 item
- $0.00 - $0.99 8 item
- $1.00 and above 1 item
- FSE Robline 1 item
- New England Ropes 3 item
- Samson 5 item
- Remove This Item

- Lines & Rigging
Sailboat Running Rigging
Sea Sure Felco C112 Wire Cutter

Sea Sure Handle & Head-2/2.5/3/4mm Copper/Ali
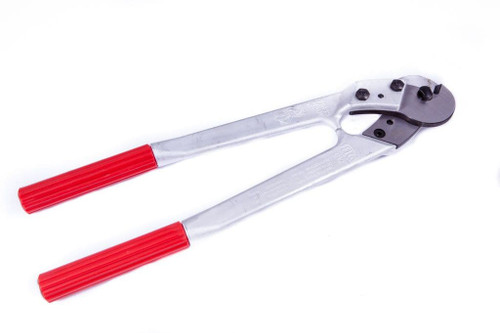
Sea Sure Felco C16 Wire Cutter
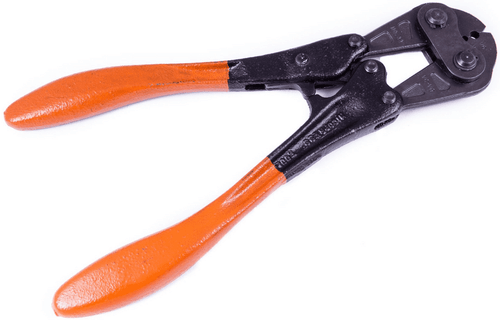
Sea Sure Handles & Head-2.5mm Copper & Aluminium

Sea Sure Handles & Head-3mm Copper & Aluminium

Sea Sure Handles & Head-4mm Copper & Aluminium

Sea Sure Handles & Head-5mm Copper & Aluminium

Sea Sure Handles & Spare Head-6mm Copper Ferrules

Sea Sure Handles with Head-1mm Copper Ferrules

Sea Sure Handles with Head-2mm Copper & Aluminium

Sea Sure Felco C108 Wire Cutters

Sea Sure Small Hand Tool / 2mm & 2.5mm - 32-VC-VG
Sea Sure 1/4"x3/4" Monel Pop Rivet - TLP/D/870BS

Sea Sure Felco C12 Wire Cutter

Sea Sure 1/4"x1/2" Monel Pop Rivet - TLP/D/850BS

Sea Sure 3/16"x3/4" Monel Pop Rivet - TLP/D/675BS

Sea Sure Long Arm Pop Rivet Gun Spiralux
Sea Sure 3/16"x5/8" Monel Pop Rivet - TLP/D/665

Sea Sure Felco C9 Wire Cutter

Sea Sure 3/16"x1/2" Monel Pop Rivet - TLP/D/650BS
- Rigging, Running and Standing
Running rigging for novices and old pros... at great prices
Featuring samson rope, need help running rigging calculator, know the sizes and lengths you need add shackles and splices from our running rigging builder, order right off the spool, need wire-to-rope halyards , want some personal help choosing rigging.

- Copyright 1998-2024 SB Owners, LLC. All rights reserved.

- Policies | Contact Us

Please verify you are a human
Access to this page has been denied because we believe you are using automation tools to browse the website.
This may happen as a result of the following:
- Javascript is disabled or blocked by an extension (ad blockers for example)
- Your browser does not support cookies
Please make sure that Javascript and cookies are enabled on your browser and that you are not blocking them from loading.
Reference ID: 97312c1a-f1fc-11ee-b45a-69da2541fc37
Powered by PerimeterX , Inc.
JIB FURLING GEAR
- CDI Flexible
- Furling Accessories
- Racing Foils
- Whisker and Spinnaker
MAIN SAIL FURLING and REEFING
- Boom Furlers
- Reefing and LazyJacks
MAIN SAIL TRACK SYSTEMS
Standing rigging.
- Swage Terminals and Toggles
- Turnbuckles
- Backstay Adjusters
- Inner Forestay Tools...
- Miscellaneous Hardware
- Measuring Guide
- Hardware and Wire
RUNNING RIGGING
- Rope Clutches
- Cam and Standard Cleats
- Pad Eyes, Eye Straps
- Rachet, Snatch, Wire
- Halyard Lift
- Accessories
- rigid vangs
- tackle vangs
GROUND TACKLE
Mast climbing.
- ATN Top Climber
RADAR MOUNTS AND REFLECTORS
Welcome to rigging only.
Our www.riggingandhardware.com shop on line site is now open for business. We now have most manufacture's parts up and running. Pricing is current on the riggingandhardware.com site. Pictures and selection guides are rather lacking at this time but we are working on them and will be loading more product and manufacturers asap. As always, don't hesitate to contact us with any questions or to place an order at [email protected] or call (508) 992-0434.

Our Mission
- We now stock and swage wire up to 5/8 diameter for sailboat standing rigging and architectural wire projects. Larger sizes are available.
- We now stock and swage wire up to 5/8 diameter for standing rigging and architectural projects. Larger sizes are available.
- Metric wire and swage fittings are available for standing rigging applications. We are able to provide swaged standing rigging assemblies as well as mechanical terminals (assembled or you assemble) to meet your needs at an affordable cost. Current stock is 8-10-12mm. Note the bulk of these fittings will have imperial pin and thread dimensions.
Return Policy
Customer comments.
- We thank you and your staff for your help and advise. We are enjoying sailing more with the furler. M.&R. G., Chicago
- All arrived safely and perfectly on time. The lifelines are almost too pretty to put on the boat and it's a damn pretty boat. The shrouds and backstay are superb and a perfect fit. If anyone ever wants a referral about Rigging Only tell them to contact me. R. A. , Curator, N. C.
- Just a quick note to tell you how grateful I am. The order was waiting for me when I arrived as promised. All the parts were of top quality and the prices were more than reasonable. I am recommending the services and products of Rigging Only to all my fellow charter captains of the Virgin Islands Charter League. Capt. G. F. USVI
- Due to your excellent quality, service, and prices on my previous order I would like to get a price quote and estimated turnaround time for replacing my current standing rigging... B. S. Gurnee, IL.
- Got them on time! Many Thanks! C. S. Lacombe, LA
Contact Information
FREE SHIPPING ON ALL ORDERS OF $150, UNDER 50LBS
- Shop Products ▼
- Order Status
- Shipping Return
- Request Quote

Welcome to US Rigging Supply, your premier destination for top-quality rigging supplies and solutions. At US Rigging, we pride ourselves on being a trusted source for a wide range of rigging products, from wire rope and slings to hoists and hardware. With a commitment to excellence and safety, we cater to the diverse needs of industries such as construction, maritime, and manufacturing. Whether you are a seasoned professional or a DIY enthusiast, our user-friendly platform offers a comprehensive selection of reliable rigging equipment, accompanied by expert guidance and resources. Explore our extensive catalog and experience unparalleled service as you embark on your rigging projects with confidence. At US Rigging, we elevate your lifting and rigging experience to new heights.
TRENDING ITEMS

Gripple No. 1 Express Wire Rope Grip Joiner

Gripple Gripple® Lockable Wire Rope Grip - For 1/8”
DuraBrite 316 Stainless Steel Eye Bolt

DuraBrite 316 Stainless Steel Eye Nuts

Gripple No. 2 - Express Wire Rope Grip

Gripple Gripple Replacement Standard Wire Rope Grip - No. 3 - WLL 200 lbs.

Safe-T-Strap 4' Low Rise Safety Strap w/ D-Ring

Gripple Gripple Standard Loop Hangers - No. 2 - WLL 100 lbs. HVAC, lighting, electrical - (SOLD IN PACKS)
Gripple Gripple Express Loop Pipe Hangers - XP 1 - WLL 25 lbs. - Ideal for signage, shop fitting, lighting, and other lightweight fixtures

DuraBrite 5/8" - Tactical 316 Stainless Steel Trigger Snap

Safe-T-Strap 4' Residential Choker Strap w/ D-Ring & Loop

SWAGE-IT Swage-Right Swager - Light-Duty, Single Cavity - 1/16" Wire Rope
U.S. Rigging Supply is your trusted partner for rope, safety and rigging products. Trusted for over 40 Years. U.S. Rigging Supply is a certified ISO 9001:2015 standard company.
SHOP ROPE BY CONSTRUCTION
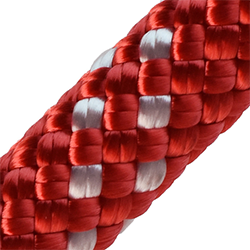
GEAR YOU WILL LOVE

Kong KNG-538-12

ProClimb Twist Lock Oval I-Beamer

ProClimb Triple Lock Oval I-Beamer

Swage-Right Deluxe SRS Hand-Swaging Tool Kit w/ Cutter
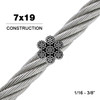
Swage-Right 7x19 | 304 Stainless Steel Guy Wire Rope (Aircraft Cable)

Pelican Rope 1/2" - Arborist-16™ Freedom Arborist Climbing Line

Pelican Rope 5/8" - 3 Strand Composite Vertical Lifeline - Hook & Thimble
ProClimb Twist Lock Modified D Steel Carabiner

ProClimb Copper Head Carabiner

ProClimb Large Aluminum Rope Pulley
Swage-Right Medium-Duty 6-Cavity Swager

Shop Arborist
U.S. Rigging Supply offers quantity price breaks on most items and special quotes for orders exceeding our price breaks. If you currently are or would like to become a distributor of our products, please call 888-260-7444 for current distributor pricing.
Recent Blog Posts
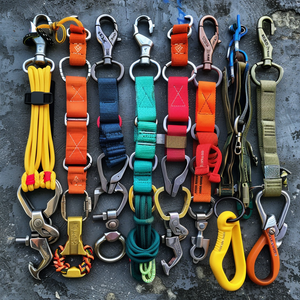
The Importance of Using Tool Lanyards on the Jobsite - ProClimb Self-Locking Tool Lanyards
Tool lanyards are an essential piece of safety equipment for any worker who works at heights. They c
Continue Reading
Why do we call it Guy Wire?
Have you been curious where the term "guy wire" came from? Perhaps you've wondered whether the corre
U.S. RIGGING CINEMA
Prolift Rigging
Industry expertise for industry leaders full-service industrial rigging , transport , and warehousing solutions to safely complete your mission-critical projects with exacting precision & uncompromising success.
Discover The Many Different Ways We Can Help You
Heavy Lifting and Rigging
Warehousing
Project Management
Crane Service
Project Buffering

ProLift Rigging
With a growing international footprint of strategically placed locations, ProLift is uniquely positioned to help you wherever your job site may be.
The Prolift Promise
ProLift Rigging is committed to helping you minimize risk in your projects by providing safe and innovative solutions to navigate both expected and unexpected obstacles. Our continuing promise is to always be an honest, transparent and professional partner, as we help meet mission-critical deadlines and deliver predictable outcomes to our clients.
Jesse Taylor, ProLift CEO
Featured Projects
Crane install with custom cantilever.
View Project
Phoenix Data Center Construction
Jack and slide transformer install, discover how prolift can help you.

- [ April 3, 2024 ] Authorities Release Name Of WSU Police Officer Who Fired Shot While Responding To Report Of A Man With A Knife Inside Dorm News
- [ April 2, 2024 ] “Human Rights 101: A Panel Discussion” Tomorrow News
- [ April 2, 2024 ] Virtual Reality Event for Teens Tomorrow News
- [ April 2, 2024 ] United Way of Whitman County Emergency Food Service Funds Available News
- [ April 2, 2024 ] Crop Acreage Forecast-Wheat Up Slightly-Garbs Up Significantly-More Lentils In WA News
Six Candidates Now Running For Three Moscow City Council Seats-Friday Last Day For Candidate Filing In Idaho
September 7, 2023 Evan Ellis News
Friday is the last day for candidate filing in Idaho for seats up for a vote this fall.
The race for Moscow City Council seats is getting more crowded as two candidates filed on Thursday. Incumbent Drew Davis filed for re-election and Evan Holmes filed for a seat. There are three Moscow City Council seats up for election in November. Incumbent Sandra Kelly is running for re-election. Bryce Blankenship, Joe Campbell and Nathan Tupper are also running for a seat. The top three vote getters will earn seats on Moscow City Council. One of the posts up for election is currently held by Maureen Laflin.
Elsewhere in Latah County Genesee Mayor John Hermann has filed for re-election.
There are dozens of small taxing district seats up for a vote this fall locally in Idaho. No candidates have filed yet for mayor in Bovill, Deary, Onaway, Potlatch and Troy. Positions up for a vote include school boards, city council seats, fire district commissions, parks and recreation district boards and cemetery boards. Candidate filing is done with each small taxing district office.

IMAGES
VIDEO
COMMENTS
Our sailboat rigging include mainsail halyards, spinnaker halyards, and Genoa halyards that are made from a double braid polyester line, double braid Dyneema line or Vectran. Our mainsheets are also made from durable double braid polyester and hybrid fibers with blend of Dyneema and Technora. This material has the best reputation in the industry.
1. 2. Fisheries Supply is your premier supplier of sailing and rigging rope from top brands like Samson, Marlow, Robline and New England Rope. We offer a full range of sailing lines to replace any or all the running rigging on your boat such as halyards, sailboat sheets or control lines. Whether you're a racer, a local cruiser, or an ocean ...
By Robin Iversen January 12, 2024. The running rigging on a sailboat consists of all the lines used to hoist, lower, and control the sails and sailing equipment. These lines usually have different colors and patterns to easily identify their function and location on the vessel. Looking at the spaghetti of lines with different colors and ...
Here is a step-by-step guide to help you make an informed decision: 1. Assess your sailing needs. Consider the size of your boat, the sailing conditions you typically encounter, and your rigging setup. This will help you determine the strength and durability requirements for your rigging rope. 2.
From a Spectra-cored double-braid to a classic Dacron single-braid rope, there are plenty of choices for for new sailing ropes. Marianne Lee. Replacing the running rigging on your sailboat seems like it should be fairly simple, and a decade or two ago, it was.
Short answer running rigging on a sailboat: Running rigging refers to the ropes and lines used for controlling the sails and other movable parts on a sailboat. It includes halyards, sheets, braces, and control lines. Properly rigged running rigging is essential for efficient sail handling and maneuvering of the boat. Understanding Running Rigging on a
Standing rigging keeps the mast in place, but it's the running rigging that handles all the action aboard a boat under sail. The many components in a modern running rigging system—sheets, outhauls, vang control, halyards—work in conjunction with wide range of blocks to keep friction to a minimum. Ralph Naranjo.
Short answer running rigging for sailboats: Running rigging refers to the set of lines or ropes used to control the sails on a sailboat. It includes halyards, sheets, and control lines that regulate sail positioning, trim, and hoisting. These essential components are crucial for maneuverability and sail adjustment during sailing. Introduction to Running Rigging for
If you're shopping for sailboat rigging lines, you need to check this out. Our collection of synthetic rope has the best prices on high-performance rigging lines, dyneema rope, and everything in between. Skip to content. FREE U.S. SHIP $199+ | $10 OFF $100+ WITH CODE SAVE10
Running Rigging. When rigging a sailboat, the running rigging is essential for controlling the sails and adjusting their position. It is important to consider several aspects when dealing with the running rigging. 1. Choose the right rope: The running rigging typically consists of ropes with varying properties such as strength, stretch, and ...
New England Ropes consistently provides the the industry leading polyester, dacron, dyneema, and vectran braids used for halyards, sheets, and control lines for use in sailboat running rigging. From casual cruising to the most competitive racing, you can count on New England Ropes to provide the perfect rope and line for your specific running ...
West Coast Sailing offers a full selection of marine grade sailing line and rigging including One Design rigging, pre cut line, line kits, and line by the foot for halyards, sheets, control lines, and more. Shop running rigging and standing rigging today from trusted brands including Marlow, Robline, Samson, Kingfisher, New England Ropes, and more.
Running Rigging components include all hardware necessary to construct halyards, sheets and control lines for your sailboat like halyard shackles, shackle guards, spool shackles, thimbles and splicing services. We at MAURIPRO Sailing are fully committed to being your Sailboat Running Rigging specialist not only providing the sailing community ...
Samson Ultra-Lite. $0.50. -. +. 9 Items. Sort By. Show per page. Online Ropes is the best place to buy sailboat running rigging. We carry dynema running rigging, Sailboat running rigging from New England ropes and Samson sailboat rigging.
sailing. rigging. running rigging. CONTACT WEST MARINE. Live Chat. 1-800-262-8464. Store Locator. Shop the best selection of Running Rigging from West Marine. Visit for products, prices, deals and more!
Rooster Women Sailing Gear. Rooster Jr Sailing Gear. Rooster Technical Casual. Rooster Waterwear. Rooster Ranges. Our sailboat running rigging includes sailboat mainsheets, sailboat halyards, and all major sailboat lines. Free shipping on $90+!
Running rigging for novices and old pros... at great prices Whether you're an old salt or a first-time sailboat owner, we can supply your rigging needs quickly, easily, and for less money. Featuring Samson Rope SailboatOwners.com features Samson, the number one name in high tech sailboat rigging. We feel that Samson's value is unmatched by any ...
West Marine's selection of boat rigging hardware encompasses all the most respected brands, including FSE Robline, Loos, New England Ropes, Ronstan, Samson Rope, Alexander Roberts, Alps Wire Rope, C. Sherman Johnson, Schaefer, Suncor and Edson Marine to name a few. Of course, for hard or complicated jobs, experienced professionals at West ...
Rigging Only is a full rigging service shop and sailing store owned and operated by riggers. Our technicians are trouble shooting, problem solving, and repairing rigging on boats like yours everyday. All running rigging, standing rigging, life lines, and wire splices, are made right here in our rigging shop and have been for 27 years.
SWAGE-IT Swage-Right Swager - Light-Duty, Single Cavity - 1/16" Wire Rope. Was: $19.99. 14 Reviews. U.S. Rigging Supply is your trusted partner for rope, safety and rigging products. Trusted for over 40 Years. U.S. Rigging Supply is a certified ISO 9001:2015 standard company.
The candidate filing period for seats up for a vote this year in Idaho ended on Friday. Six candidates are running for three Moscow City Council seats. Incumbents Sandra Kelly and Drew Davis are running for re-election. Bryce Blankenship, Joe Campbell, Evan Holmes and Nathan Tupper are also running for city council.
We provide full-service rigging, transportation, and warehousing solutions to streamline your business operations and increase your project success. Skip to main content Request Quote. Prolift Rigging (855) 900-9111 [email protected]. About Our Story; News; Projects; Services ...
Bryce Blankenship, Joe Campbell and Nathan Tupper are also running for a seat. The top three vote getters will earn seats on Moscow City Council. One of the posts up for election is currently held by Maureen Laflin. Elsewhere in Latah County Genesee Mayor John Hermann has filed for re-election.