No products in the cart.
Sailing Ellidah is supported by our readers. Buying through our links may earn us an affiliate commission at no extra cost to you.

The Standing Rigging On A Sailboat Explained
The standing rigging on a sailboat is a system of stainless steel wires that holds the mast upright and supports the spars.
In this guide, I’ll explain the basics of a sailboat’s hardware and rigging, how it works, and why it is a fundamental and vital part of the vessel. We’ll look at the different parts of the rig, where they are located, and their function.
We will also peek at a couple of different types of rigs and their variations to determine their differences. In the end, I will explain some additional terms and answer some practical questions I often get asked.
But first off, it is essential to understand what standing rigging is and its purpose on a sailboat.
The purpose of the standing rigging
Like I said in the beginning, the standing rigging on a sailboat is a system of stainless steel wires that holds the mast upright and supports the spars. When sailing, the rig helps transfer wind forces from the sails to the boat’s structure. This is critical for maintaining the stability and performance of the vessel.
The rig can also consist of other materials, such as synthetic lines or steel rods, yet its purpose is the same. But more on that later.
Since the rig supports the mast, you’ll need to ensure that it is always in appropriate condition before taking your boat out to sea. Let me give you an example from a recent experience.
Dismasting horrors
I had a company inspect the entire rig on my sailboat while preparing for an Atlantic crossing. The rigger didn’t find any issues, but I decided to replace the rig anyway because of its unknown age. I wanted to do the job myself so I could learn how it is done correctly.
Not long after, we left Gibraltar and sailed through rough weather for eight days before arriving in Las Palmas. We were safe and sound and didn’t experience any issues. Unfortunately, several other boats arriving before us had suffered rig failures. They lost their masts and sails—a sorrowful sight but also a reminder of how vital the rigging is on a sailboat.
The most common types of rigging on a sailboat
The most commonly used rig type on modern sailing boats is the fore-and-aft Bermuda Sloop rig with one mast and just one headsail. Closely follows the Cutter rig and the Ketch rig. They all have a relatively simple rigging layout. Still, there are several variations and differences in how they are set up.
A sloop has a single mast, and the Ketch has one main mast and an additional shorter mizzen mast further aft. A Cutter rig is similar to the Bermuda Sloop with an additional cutter forestay, allowing it to fly two overlapping headsails.
You can learn more about the differences and the different types of sails they use in this guide. For now, we’ll focus on the Bermuda rig.
The difference between standing rigging and running rigging
Sometimes things can get confusing as some of our nautical terms are used for multiple items depending on the context. Let me clarify just briefly:
The rig or rigging on a sailboat is a common term for two parts:
- The standing rigging consists of wires supporting the mast on a sailboat and reinforcing the spars from the force of the sails when sailing.
- The running rigging consists of the halyards, sheets, and lines we use to hoist, lower, operate, and control the sails on a sailboat.
Check out my guide on running rigging here !
The difference between a fractional and a masthead rig
A Bermuda rig is split into two groups. The Masthead rig and the Fractional rig.
The Masthead rig has a forestay running from the bow to the top of the mast, and the spreaders point 90 degrees to the sides. A boat with a masthead rig typically carries a bigger overlapping headsail ( Genoa) and a smaller mainsail. Very typical on the Sloop, Ketch, and Cutter rigs.
A Fractional rig has forestays running from the bow to 1/4 – 1/8 from the top of the mast, and the spreaders are swept backward. A boat with a fractional rig also has the mast farther forward than a masthead rig, a bigger mainsail, and a smaller headsail, usually a Jib. Very typical on more performance-oriented sailboats.
There are exceptions in regards to the type of headsail, though. Many performance cruisers use a Genoa instead of a Jib , making the difference smaller.
Some people also fit an inner forestay, or a babystay, to allow flying a smaller staysail.
Explaining the parts and hardware of the standing rigging
The rigging on a sailing vessel relies on stays and shrouds in addition to many hardware parts to secure the mast properly. And we also have nautical terms for each of them. Since a system relies on every aspect of it to be in equally good condition, we want to familiarize ourselves with each part and understand its function.
Forestay and Backstay
The forestay is a wire that runs from the bow to the top of the mast. Some boats, like the Cutter rig, can have several additional inner forestays in different configurations.
The backstay is the wire that runs from the back of the boat to the top of the mast. Backstays have a tensioner, often hydraulic, to increase the tension when sailing upwind. Some rigs, like the Cutter, have running backstays and sometimes checkstays or runners, to support the rig.
The primary purpose of the forestay and backstay is to prevent the mast from moving fore and aft. The tensioner on the backstay also allows us to trim and tune the rig to get a better shape of the sails.
The shrouds are the wires or lines used on modern sailboats and yachts to support the mast from sideways motion.
There are usually four shrouds on each side of the vessel. They are connected to the side of the mast and run down to turnbuckles attached through toggles to the chainplates bolted on the deck.
- Cap shrouds run from the top of the mast to the deck, passing through the tips of the upper spreaders.
- Intermediate shrouds run from the lower part of the mast to the deck, passing through the lower set of spreaders.
- Lower shrouds are connected to the mast under the first spreader and run down to the deck – one fore and one aft on each side of the boat.
This configuration is called continuous rigging. We won’t go into the discontinuous rigging used on bigger boats in this guide, but if you are interested, you can read more about it here .
Shroud materials
Shrouds are usually made of 1 x 19 stainless steel wire. These wires are strong and relatively easy to install but are prone to stretch and corrosion to a certain degree. Another option is using stainless steel rods.
Rod rigging
Rod rigging has a stretch coefficient lower than wire but is more expensive and can be intricate to install. Alternatively, synthetic rigging is becoming more popular as it weighs less than wire and rods.
Synthetic rigging
Fibers like Dyneema and other aramids are lightweight and provide ultra-high tensile strength. However, they are expensive and much more vulnerable to chafing and UV damage than other options. In my opinion, they are best suited for racing and regatta-oriented sailboats.
Wire rigging
I recommend sticking to the classic 316-graded stainless steel wire rigging for cruising sailboats. It is also the most reasonable of the options. If you find yourself in trouble far from home, you are more likely to find replacement wire than another complex rigging type.
Relevant terms on sailboat rigging and hardware
The spreaders are the fins or wings that space the shrouds away from the mast. Most sailboats have at least one set, but some also have two or three. Once a vessel has more than three pairs of spreaders, we are probably talking about a big sailing yacht.
A turnbuckle is the fitting that connects the shrouds to the toggle and chainplate on the deck. These are adjustable, allowing you to tension the rig.
A chainplate is a metal plate bolted to a strong point on the deck or side of the hull. It is usually reinforced with a backing plate underneath to withstand the tension from the shrouds.
The term mast head should be distinct from the term masthead rigging. Out of context, the mast head is the top of the mast.
A toggle is a hardware fitting to connect the turnbuckles on the shrouds and the chainplate.
How tight should the standing rigging be?
It is essential to periodically check the tension of the standing rigging and make adjustments to ensure it is appropriately set. If the rig is too loose, it allows the mast to sway excessively, making the boat perform poorly.
You also risk applying a snatch load during a tack or a gybe which can damage the rig. On the other hand, if the standing rigging is too tight, it can strain the rig and the hull and lead to structural failure.
The standing rigging should be tightened enough to prevent the mast from bending sideways under any point of sail. If you can move the mast by pulling the cap shrouds by hand, the rigging is too loose and should be tensioned. Once the cap shrouds are tightened, follow up with the intermediates and finish with the lower shrouds. It is critical to tension the rig evenly on both sides.
The next you want to do is to take the boat out for a trip. Ensure that the mast isn’t bending over to the leeward side when you are sailing. A little movement in the leeward shrouds is normal, but they shouldn’t swing around. If the mast bends to the leeward side under load, the windward shrouds need to be tightened. Check the shrouds while sailing on both starboard and port tack.
Once the mast is in a column at any point of sail, your rigging should be tight and ready for action.
If you feel uncomfortable adjusting your rig, get a professional rigger to inspect and reset it.
How often should the standing rigging be replaced on a sailboat?
I asked the rigger who produced my new rig for Ellidah about how long I could expect my new rig to last, and he replied with the following:
The standing rigging should be replaced after 10 – 15 years, depending on how hard and often the boat has sailed. If it is well maintained and the vessel has sailed conservatively, it will probably last more than 20 years. However, corrosion or cracked strands indicate that the rig or parts are due for replacement regardless of age.
If you plan on doing extended offshore sailing and don’t know the age of your rig, I recommend replacing it even if it looks fine. This can be done without removing the mast from the boat while it is still in the water.
How much does it cost to replace the standing rigging?
The cost of replacing the standing rigging will vary greatly depending on the size of your boat and the location you get the job done. For my 41 feet sloop, I did most of the installation myself and paid approximately $4700 for the entire rig replacement.
Can Dyneema be used for standing rigging?
Dyneema is a durable synthetic fiber that can be used for standing rigging. Its low weight, and high tensile strength makes it especially popular amongst racers. Many cruisers also carry Dyneema onboard as spare parts for failing rigging.
How long does dyneema standing rigging last?
Dyneema rigging can outlast wire rigging if it doesn’t chafe on anything sharp. There are reports of Dyneema rigging lasting as long as 15 years, but manufacturers like Colligo claim their PVC shrink-wrapped lines should last 8 to 10 years. You can read more here .
Final words
Congratulations! By now, you should have a much better understanding of standing rigging on a sailboat. We’ve covered its purpose and its importance for performance and safety. While many types of rigs and variations exist, the hardware and concepts are often similar. Now it’s time to put your newfound knowledge into practice and set sail!
Or, if you’re not ready just yet, I recommend heading over to my following guide to learn more about running rigging on a sailboat.
Sharing is caring!
Skipper, Electrician and ROV Pilot
Robin is the founder and owner of Sailing Ellidah and has been living on his sailboat since 2019. He is currently on a journey to sail around the world and is passionate about writing his story and helpful content to inspire others who share his interest in sailing.
Very well written. Common sense layout with just enough photos and sketches. I enjoyed reading this article.
Thank you for the kind words.
Leave a Reply Cancel reply
Your email address will not be published. Required fields are marked *

Beginner’s Guide: How To Rig A Sailboat – Step By Step Tutorial
Alex Morgan
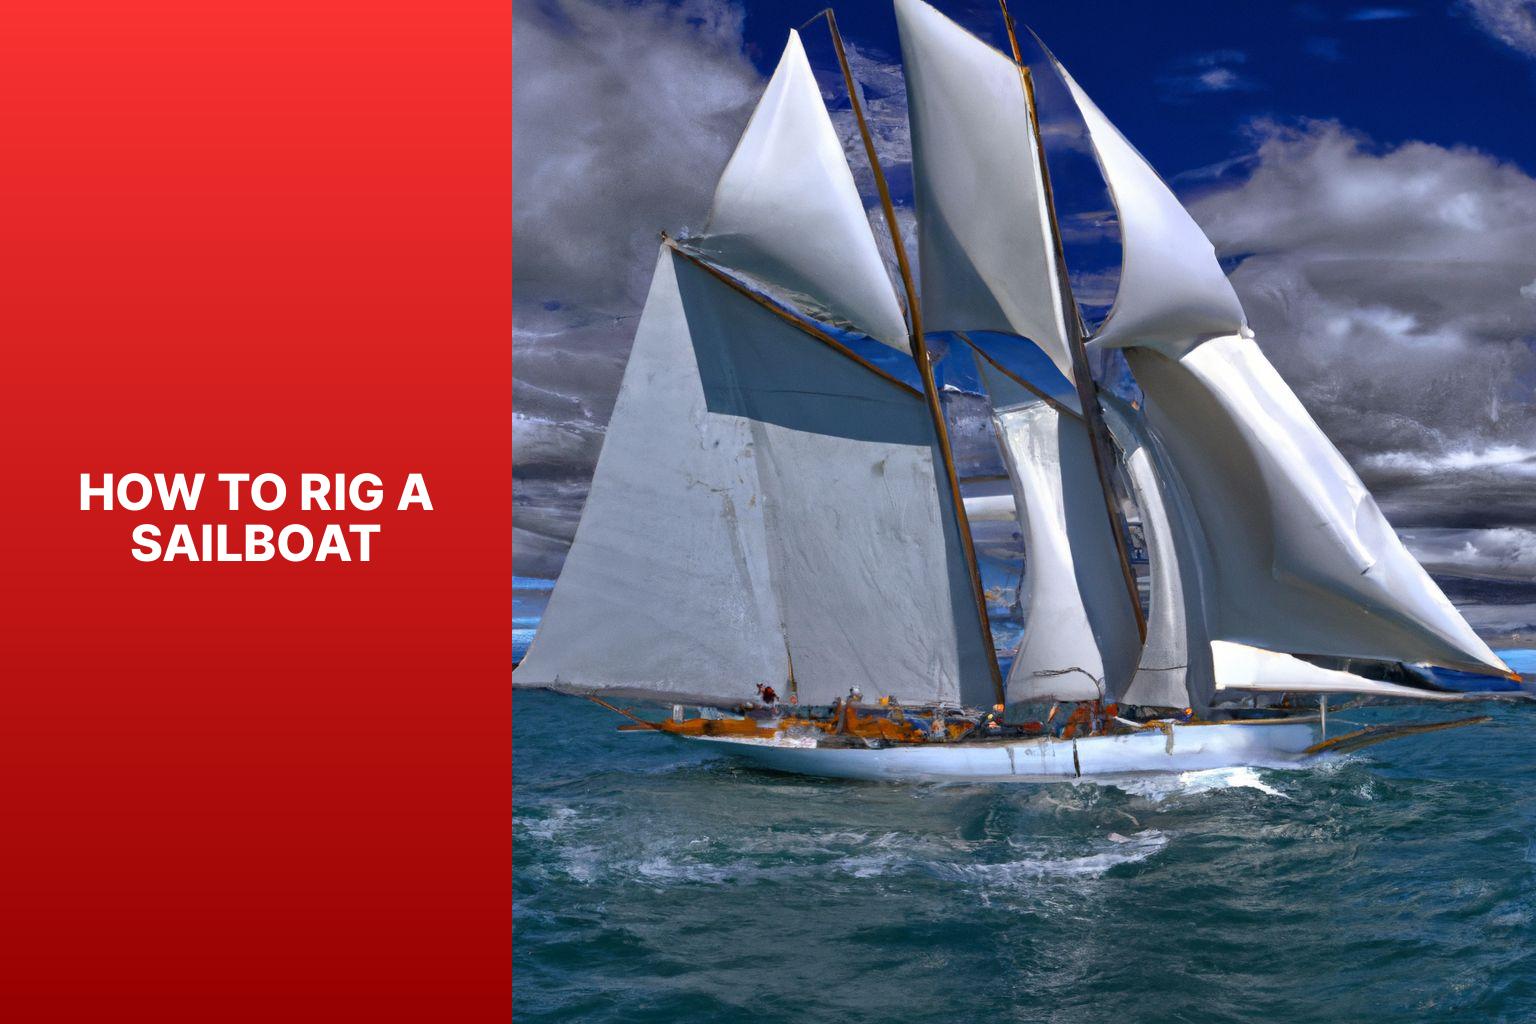
Rigging a sailboat is a crucial process that ensures the proper setup and functioning of a sailboat’s various components. Understanding the process and components involved in rigging is essential for any sailor or boat enthusiast. In this article, we will provide a comprehensive guide on how to rig a sailboat.
Introduction to Rigging a Sailboat
Rigging a sailboat refers to the process of setting up the components that enable the sailboat to navigate through the water using wind power. This includes assembling and positioning various parts such as the mast, boom, standing rigging, running rigging, and sails.
Understanding the Components of a Sailboat Rigging
Before diving into the rigging process, it is important to have a good understanding of the key components involved. These components include:
The mast is the tall vertical spar that provides vertical support to the sails and holds them in place.
The boom is the horizontal spar that runs along the bottom edge of the sail and helps control the shape and position of the sail.
- Standing Rigging:
Standing rigging consists of the wires and cables that support and stabilize the mast, keeping it upright.
- Running Rigging:
Running rigging refers to the lines and ropes used to control the sails, such as halyards, sheets, and control lines.
Preparing to Rig a Sailboat
Before rigging a sailboat, there are a few important steps to take. These include:
- Checking the Weather Conditions:
It is crucial to assess the weather conditions before rigging a sailboat. Unfavorable weather, such as high winds or storms, can make rigging unsafe.
- Gathering the Necessary Tools and Equipment:
Make sure to have all the necessary tools and equipment readily available before starting the rigging process. This may include wrenches, hammers, tape, and other common tools.
- Inspecting the Rigging Components:
In the upcoming sections of this article, we will provide a step-by-step guide on how to rig a sailboat, as well as important safety considerations and tips to keep in mind. By following these guidelines, you will be able to rig your sailboat correctly and safely, allowing for a smooth and enjoyable sailing experience.
Key takeaway:
- Rigging a sailboat maximizes efficiency: Proper rigging allows for optimized sailing performance, ensuring the boat moves smoothly through the water.
- Understanding sailboat rigging components: Familiarity with the various parts of a sailboat rigging, such as the mast, boom, and standing and running riggings, is essential for effective rigging setup.
- Importance of safety in sailboat rigging: Ensuring safety is crucial during the rigging process, including wearing a personal flotation device, securing loose ends and lines, and being mindful of overhead power lines.
Get ready to set sail and dive into the fascinating world of sailboat rigging! We’ll embark on a journey to understand the various components that make up a sailboat’s rigging. From the majestic mast to the nimble boom , and the intricate standing rigging to the dynamic running rigging , we’ll explore the crucial elements that ensure smooth sailing. Not forgetting the magnificent sail, which catches the wind and propels us forward. So grab your sea legs and let’s uncover the secrets of sailboat rigging together.
Understanding the mast is crucial when rigging a sailboat. Here are the key components and steps to consider:
1. The mast supports the sails and rigging of the sailboat. It is made of aluminum or carbon fiber .
2. Before stepping the mast , ensure that the area is clear and the boat is stable. Have all necessary tools and equipment ready.
3. Inspect the mast for damage or wear. Check for corrosion , loose fittings , and cracks . Address any issues before proceeding.
4. To step the mast , carefully lift it into an upright position and insert the base into the mast step on the deck of the sailboat.
5. Secure the mast using the appropriate rigging and fasteners . Attach the standing rigging , such as shrouds and stays , to the mast and the boat’s hull .
Fact: The mast of a sailboat is designed to withstand wind resistance and the tension of the rigging for stability and safe sailing.
The boom is an essential part of sailboat rigging. It is a horizontal spar that stretches from the mast to the aft of the boat. Constructed with durable yet lightweight materials like aluminum or carbon fiber, the boom provides crucial support and has control over the shape and position of the sail. It is connected to the mast through a boom gooseneck , allowing it to pivot. One end of the boom is attached to the mainsail, while the other end is equipped with a boom vang or kicker, which manages the tension and angle of the boom. When the sail is raised, the boom is also lifted and positioned horizontally by using the topping lift or lazy jacks.
An incident serves as a warning that emphasizes the significance of properly securing the boom. In strong winds, an improperly fastened boom swung across the deck, resulting in damage to the boat and creating a safety hazard. This incident highlights the importance of correctly installing and securely fastening all rigging components, including the boom, to prevent accidents and damage.
3. Standing Rigging
When rigging a sailboat, the standing rigging plays a vital role in providing stability and support to the mast . It consists of several key components, including the mast itself, along with the shrouds , forestay , backstay , and intermediate shrouds .
The mast, a vertical pole , acts as the primary support structure for the sails and the standing rigging. Connected to the top of the mast are the shrouds , which are cables or wires that extend to the sides of the boat, providing essential lateral support .
The forestay is another vital piece of the standing rigging. It is a cable or wire that runs from the top of the mast to the bow of the boat, ensuring forward support . Similarly, the backstay , also a cable or wire, runs from the mast’s top to the stern of the boat, providing important backward support .
To further enhance the rig’s stability , intermediate shrouds are installed. These additional cables or wires are positioned between the main shrouds, as well as the forestay or backstay. They offer extra support , strengthening the standing rigging system.
Regular inspections of the standing rigging are essential to detect any signs of wear, such as fraying or corrosion . It is crucial to ensure that all connections within the rig are tight and secure, to uphold its integrity. Should any issues be identified, immediate attention must be given to prevent accidents or damage to the boat. Prioritizing safety is of utmost importance when rigging a sailboat, thereby necessitating proper maintenance of the standing rigging. This ensures a safe and enjoyable sailing experience.
Note: <p> tags have been kept intact.
4. Running Rigging
Running Rigging
When rigging a sailboat, the running rigging is essential for controlling the sails and adjusting their position. It is important to consider several aspects when dealing with the running rigging.
1. Choose the right rope: The running rigging typically consists of ropes with varying properties such as strength, stretch, and durability. Weather conditions and sailboat size should be considered when selecting the appropriate rope.
2. Inspect and maintain the running rigging: Regularly check for signs of wear, fraying, or damage. To ensure safety and efficiency, replace worn-out ropes.
3. Learn essential knot tying techniques: Having knowledge of knots like the bowline, cleat hitch, and reef knot is crucial for securing the running rigging and adjusting sails.
4. Understand different controls: The running rigging includes controls such as halyards, sheets, and control lines. Familiarize yourself with their functions and proper usage to effectively control sail position and tension.
5. Practice proper sail trimming: Adjusting the tension of the running rigging significantly affects sailboat performance. Mastering sail trimming techniques will help optimize sail shape and maximize speed.
By considering these factors and mastering running rigging techniques, you can enhance your sailing experience and ensure the safe operation of your sailboat.
The sail is the central component of sailboat rigging as it effectively harnesses the power of the wind to propel the boat.
When considering the sail, there are several key aspects to keep in mind:
– Material: Sails are typically constructed from durable and lightweight materials such as Dacron or polyester. These materials provide strength and resistance to various weather conditions.
– Shape: The shape of the sail plays a critical role in its overall performance. A well-shaped sail should have a smooth and aerodynamic profile, which allows for maximum efficiency in capturing wind power.
– Size: The size of the sail is determined by its sail area, which is measured in square feet or square meters. Larger sails have the ability to generate more power, but they require greater skill and experience to handle effectively.
– Reefing: Reefing is the process of reducing the sail’s size to adapt to strong winds. Sails equipped with reefing points allow sailors to decrease the sail area, providing better control in challenging weather conditions.
– Types: There are various types of sails, each specifically designed for different purposes. Common sail types include mainsails, jibs, genoas, spinnakers, and storm sails. Each type possesses its own unique characteristics and is utilized under specific wind conditions.
Understanding the sail and its characteristics is vital for sailors, as it directly influences the boat’s speed, maneuverability, and overall safety on the water.
Getting ready to rig a sailboat requires careful preparation and attention to detail. In this section, we’ll dive into the essential steps you need to take before setting sail. From checking the weather conditions to gathering the necessary tools and equipment, and inspecting the rigging components, we’ll ensure that you’re fully equipped to navigate the open waters with confidence. So, let’s get started on our journey to successfully rigging a sailboat!
1. Checking the Weather Conditions
Checking the weather conditions is crucial before rigging a sailboat for a safe and enjoyable sailing experience. Monitoring the wind speed is important in order to assess the ideal sailing conditions . By checking the wind speed forecast , you can determine if the wind is strong or light . Strong winds can make sailboat control difficult, while very light winds can result in slow progress.
Another important factor to consider is the wind direction . Assessing the wind direction is crucial for route planning and sail adjustment. Favorable wind direction helps propel the sailboat efficiently, making your sailing experience more enjoyable.
In addition to wind speed and direction, it is also important to consider weather patterns . Keep an eye out for impending storms or heavy rain. It is best to avoid sailing in severe weather conditions that may pose a safety risk. Safety should always be a top priority when venturing out on a sailboat.
Another aspect to consider is visibility . Ensure good visibility by checking for fog, haze, or any other conditions that may hinder navigation. Clear visibility is important for being aware of other boats and potential obstacles that may come your way.
Be aware of the local conditions . Take into account factors such as sea breezes, coastal influences, or tidal currents. These local factors greatly affect sailboat performance and safety. By considering all of these elements, you can have a successful and enjoyable sailing experience.
Here’s a true story to emphasize the importance of checking the weather conditions. One sunny afternoon, a group of friends decided to go sailing. Before heading out, they took the time to check the weather conditions. They noticed that the wind speed was expected to be around 10 knots, which was perfect for their sailboat. The wind direction was coming from the northwest, allowing for a pleasant upwind journey. With clear visibility and no approaching storms, they set out confidently, enjoying a smooth and exhilarating sail. This positive experience was made possible by their careful attention to checking the weather conditions beforehand.
2. Gathering the Necessary Tools and Equipment
To efficiently gather all of the necessary tools and equipment for rigging a sailboat, follow these simple steps:
- First and foremost, carefully inspect your toolbox to ensure that you have all of the basic tools such as wrenches, screwdrivers, and pliers.
- Make sure to check if you have a tape measure or ruler available as they are essential for precise measurements of ropes or cables.
- Don’t forget to include a sharp knife or rope cutter in your arsenal as they will come in handy for cutting ropes or cables to the desired lengths.
- Gather all the required rigging hardware including shackles, pulleys, cleats, and turnbuckles.
- It is always prudent to check for spare ropes or cables in case replacements are needed during the rigging process.
- If needed, consider having a sailing knife or marlinspike tool for splicing ropes or cables.
- For rigging a larger sailboat, it is crucial to have a mast crane or hoist to assist with stepping the mast.
- Ensure that you have a ladder or some other means of reaching higher parts of the sailboat, such as the top of the mast.
Once, during the preparation of rigging my sailboat, I had a moment of realization when I discovered that I had forgotten to bring a screwdriver . This unfortunate predicament occurred while I was in a remote location with no nearby stores. Being resourceful, I improvised by utilizing a multipurpose tool with a small knife blade, which served as a makeshift screwdriver. Although it was not the ideal solution, it allowed me to accomplish the task. Since that incident, I have learned the importance of double-checking my toolbox before commencing any rigging endeavor. This practice ensures that I have all of the necessary tools and equipment, preventing any unexpected surprises along the way.
3. Inspecting the Rigging Components
Inspecting the rigging components is essential for rigging a sailboat safely. Here is a step-by-step guide on inspecting the rigging components:
1. Visually inspect the mast, boom, and standing rigging for damage, such as corrosion, cracks, or loose fittings.
2. Check the tension of the standing rigging using a tension gauge. It should be within the recommended range from the manufacturer.
3. Examine the turnbuckles, clevis pins, and shackles for wear or deformation. Replace any damaged or worn-out hardware.
4. Inspect the running rigging, including halyards and sheets, for fraying, signs of wear, or weak spots. Replace any worn-out lines.
5. Check the sail for tears, wear, or missing hardware such as grommets or luff tape.
6. Pay attention to the connections between the standing rigging and the mast. Ensure secure connections without any loose or missing cotter pins or rigging screws.
7. Inspect all fittings, such as mast steps, spreader brackets, and tangs, to ensure they are securely fastened and in good condition.
8. Conduct a sea trial to assess the rigging’s performance and make necessary adjustments.
Regularly inspecting the rigging components is crucial for maintaining the sailboat’s rigging system’s integrity, ensuring safe sailing conditions, and preventing accidents or failures at sea.
Once, I went sailing on a friend’s boat without inspecting the rigging components beforehand. While at sea, a sudden gust of wind caused one of the shrouds to snap. Fortunately, no one was hurt, but we had to cut the sail loose and carefully return to the marina. This incident taught me the importance of inspecting the rigging components before sailing to avoid unforeseen dangers.
Step-by-Step Guide on How to Rig a Sailboat
Get ready to set sail with our step-by-step guide on rigging a sailboat ! We’ll take you through the process from start to finish, covering everything from stepping the mast to setting up the running rigging . Learn the essential techniques and tips for each sub-section, including attaching the standing rigging and installing the boom and sails . Whether you’re a seasoned sailor or a beginner, this guide will have you ready to navigate the open waters with confidence .
1. Stepping the Mast
To step the mast of a sailboat, follow these steps:
1. Prepare the mast: Position the mast near the base of the boat.
2. Attach the base plate: Securely fasten the base plate to the designated area on the boat.
3. Insert the mast step: Lower the mast step into the base plate and align it with the holes or slots.
4. Secure the mast step: Use fastening screws or bolts to fix the mast step in place.
5. Raise the mast: Lift the mast upright with the help of one or more crew members.
6. Align the mast: Adjust the mast so that it is straight and aligned with the boat’s centerline.
7. Attach the shrouds: Connect the shrouds to the upper section of the mast, ensuring proper tension.
8. Secure the forestay: Attach the forestay to the bow of the boat, ensuring it is securely fastened.
9. Final adjustments: Check the tension of the shrouds and forestay, making any necessary rigging adjustments.
Following these steps ensures that the mast is properly stepped and securely in place, allowing for a safe and efficient rigging process. Always prioritize safety precautions and follow manufacturer guidelines for your specific sailboat model.
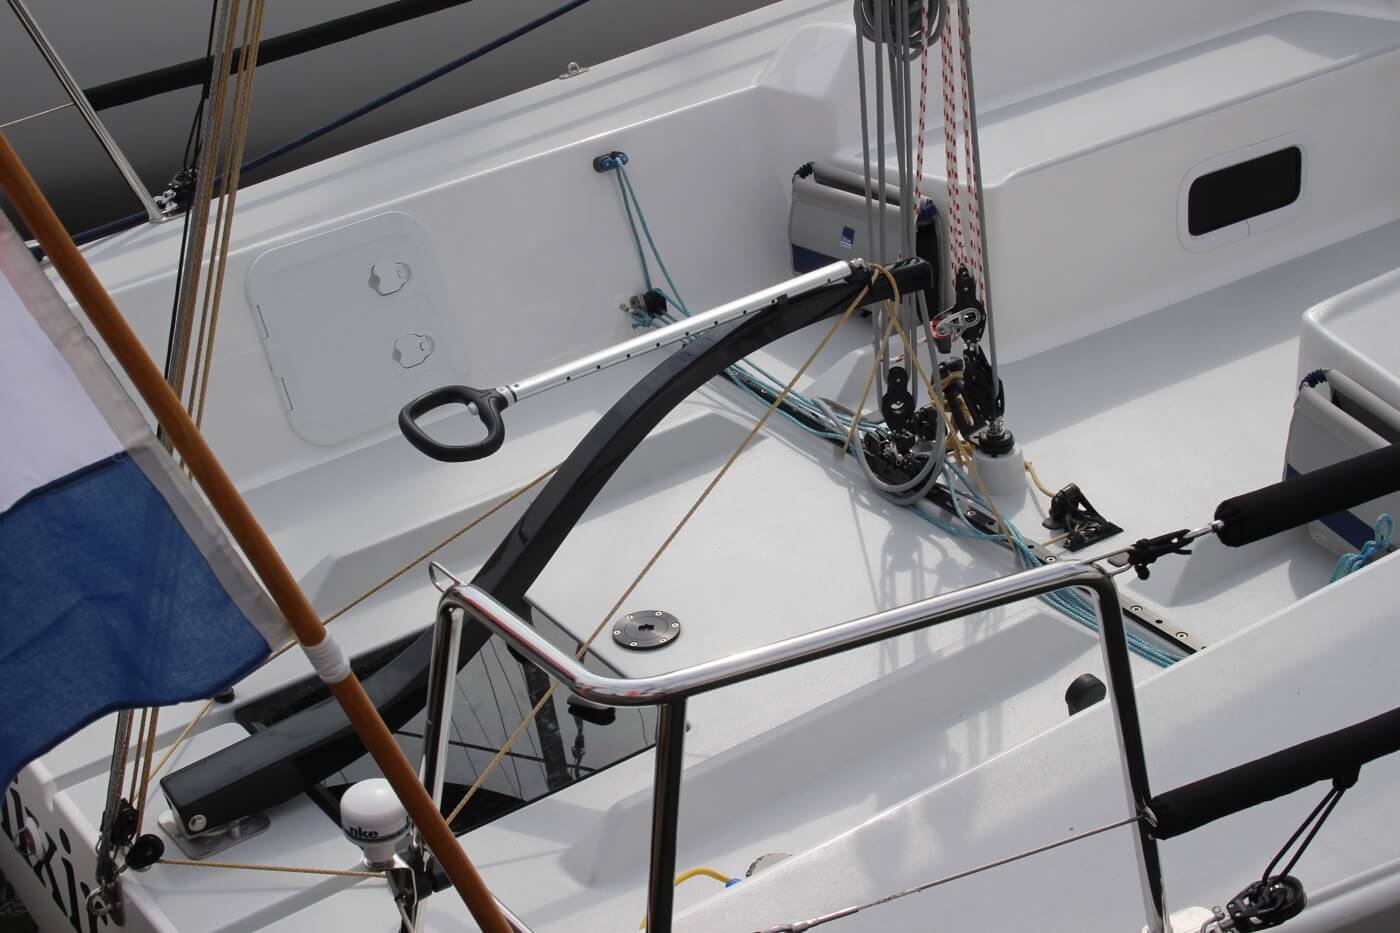
2. Attaching the Standing Rigging
To attach the standing rigging on a sailboat, commence by preparing the essential tools and equipment, including wire cutters, crimping tools, and turnbuckles.
Next, carefully inspect the standing rigging components for any indications of wear or damage.
After inspection, fasten the bottom ends of the shrouds and stays to the chainplates on the deck.
Then, securely affix the top ends of the shrouds and stays to the mast using adjustable turnbuckles .
To ensure proper tension, adjust the turnbuckles accordingly until the mast is upright and centered.
Utilize a tension gauge to measure the tension in the standing rigging, aiming for around 15-20% of the breaking strength of the rigging wire.
Double-check all connections and fittings to verify their security and proper tightness.
It is crucial to regularly inspect the standing rigging for any signs of wear or fatigue and make any necessary adjustments or replacements.
By diligently following these steps, you can effectively attach the standing rigging on your sailboat, ensuring its stability and safety while on the water.
3. Installing the Boom and Sails
To successfully complete the installation of the boom and sails on a sailboat, follow these steps:
1. Begin by securely attaching the boom to the mast. Slide it into the gooseneck fitting and ensure it is firmly fastened using a boom vang or another appropriate mechanism.
2. Next, attach the main sail to the boom. Slide the luff of the sail into the mast track and securely fix it in place using sail slides or cars.
3. Connect the mainsheet to the boom. One end should be attached to the boom while the other end is connected to a block or cleat on the boat.
4. Proceed to attach the jib or genoa. Make sure to securely attach the hanks or furler line to the forestay to ensure stability.
5. Connect the jib sheets. One end of each jib sheet should be attached to the clew of the jib or genoa, while the other end is connected to a block or winch on the boat.
6. Before setting sail, it is essential to thoroughly inspect all lines and connections. Ensure that they are properly tensioned and that all connections are securely fastened.
During my own experience of installing the boom and sails on my sailboat, I unexpectedly encountered a strong gust of wind. As a result, the boom began swinging uncontrollably, requiring me to quickly secure it to prevent any damage. This particular incident served as a vital reminder of the significance of properly attaching and securing the boom, as well as the importance of being prepared for unforeseen weather conditions while rigging a sailboat.
4. Setting Up the Running Rigging
Setting up the running rigging on a sailboat involves several important steps. First, attach the halyard securely to the head of the sail. Then, connect the sheets to the clew of the sail. If necessary, make sure to secure the reefing lines . Attach the outhaul line to the clew of the sail and connect the downhaul line to the tack of the sail. It is crucial to ensure that all lines are properly cleated and organized. Take a moment to double-check the tension and alignment of each line. If you are using a roller furling system, carefully wrap the line around the furling drum and securely fasten it. Perform a thorough visual inspection of the running rigging to check for any signs of wear or damage. Properly setting up the running rigging is essential for safe and efficient sailing. It allows for precise control of the sail’s position and shape, ultimately optimizing the boat’s performance on the water.
Safety Considerations and Tips
When it comes to rigging a sailboat, safety should always be our top priority. In this section, we’ll explore essential safety considerations and share some valuable tips to ensure smooth sailing. From the importance of wearing a personal flotation device to securing loose ends and lines, and being cautious around overhead power lines, we’ll equip you with the knowledge and awareness needed for a safe and enjoyable sailing experience. So, let’s set sail and dive into the world of safety on the water!
1. Always Wear a Personal Flotation Device
When rigging a sailboat, it is crucial to prioritize safety and always wear a personal flotation device ( PFD ). Follow these steps to properly use a PFD:
- Select the appropriate Coast Guard-approved PFD that fits your size and weight.
- Put on the PFD correctly by placing your arms through the armholes and securing all the straps for a snug fit .
- Adjust the PFD for comfort , ensuring it is neither too tight nor too loose, allowing freedom of movement and adequate buoyancy .
- Regularly inspect the PFD for any signs of wear or damage, such as tears or broken straps, and replace any damaged PFDs immediately .
- Always wear your PFD when on or near the water, even if you are a strong swimmer .
By always wearing a personal flotation device and following these steps, you will ensure your safety and reduce the risk of accidents while rigging a sailboat. Remember, prioritize safety when enjoying water activities.
2. Secure Loose Ends and Lines
Inspect lines and ropes for frayed or damaged areas. Secure loose ends and lines with knots or appropriate cleats or clamps. Ensure all lines are properly tensioned to prevent loosening during sailing. Double-check all connections and attachments for security. Use additional safety measures like extra knots or stopper knots to prevent line slippage.
To ensure a safe sailing experience , it is crucial to secure loose ends and lines properly . Neglecting this important step can lead to accidents or damage to the sailboat. By inspecting, securing, and tensioning lines , you can have peace of mind knowing that everything is in place. Replace or repair any compromised lines or ropes promptly. Securing loose ends and lines allows for worry-free sailing trips .
3. Be Mindful of Overhead Power Lines
When rigging a sailboat, it is crucial to be mindful of overhead power lines for safety. It is important to survey the area for power lines before rigging the sailboat. Maintain a safe distance of at least 10 feet from power lines. It is crucial to avoid hoisting tall masts or long antenna systems near power lines to prevent contact. Lower the mast and tall structures when passing under a power line to minimize the risk of contact. It is also essential to be cautious in areas where power lines run over the water and steer clear to prevent accidents.
A true story emphasizes the importance of being mindful of overhead power lines. In this case, a group of sailors disregarded safety precautions and their sailboat’s mast made contact with a low-hanging power line, resulting in a dangerous electrical shock. Fortunately, no serious injuries occurred, but it serves as a stark reminder of the need to be aware of power lines while rigging a sailboat.
Some Facts About How To Rig A Sailboat:
- ✅ Small sailboat rigging projects can improve sailing performance and save money. (Source: stingysailor.com)
- ✅ Rigging guides are available for small sailboats, providing instructions and tips for rigging. (Source: westcoastsailing.net)
- ✅ Running rigging includes lines used to control and trim the sails, such as halyards and sheets. (Source: sailingellidah.com)
- ✅ Hardware used in sailboat rigging includes winches, blocks, and furling systems. (Source: sailingellidah.com)
- ✅ A step-by-step guide can help beginners rig a small sailboat for sailing. (Source: tripsavvy.com)
Frequently Asked Questions
1. how do i rig a small sailboat.
To rig a small sailboat, follow these steps: – Install or check the rudder, ensuring it is firmly attached. – Attach or check the tiller, the long steering arm mounted to the rudder. – Attach the jib halyard by connecting the halyard shackle to the head of the sail and the grommet in the tack to the bottom of the forestay. – Hank on the jib by attaching the hanks of the sail to the forestay one at a time. – Run the jib sheets by tying or shackling them to the clew of the sail and running them back to the cockpit. – Attach the mainsail by spreading it out and attaching the halyard shackle to the head of the sail. – Secure the tack, clew, and foot of the mainsail to the boom using various lines and mechanisms. – Insert the mainsail slugs into the mast groove, gradually raising the mainsail as the slugs are inserted. – Cleat the main halyard and lower the centerboard into the water. – Raise the jib by pulling down on the jib halyard and cleating it on the other side of the mast. – Tighten the mainsheet and one jibsheet to adjust the sails and start moving forward.
2. What are the different types of sailboat rigs?
Sailboat rigs can be classified into three main types: – Sloop rig: This rig has a single mast with a mainsail and a headsail, typically a jib or genoa. – Cutter rig: This rig has two headsails, a smaller jib or staysail closer to the mast, and a larger headsail, usually a genoa, forward of it, alongside a mainsail. – Ketch rig: This rig has two masts, with the main mast taller than the mizzen mast. It usually has a mainsail, headsail, and a mizzen sail. Each rig has distinct characteristics and is suitable for different sailing conditions and preferences.
3. What are the essential parts of a sailboat?
The essential parts of a sailboat include: – Mast: The tall vertical spar that supports the sails. – Boom: The horizontal spar connected to the mast, which extends outward and supports the foot of the mainsail. – Rudder: The underwater appendage that steers the boat. – Centerboard or keel: A retractable or fixed fin-like structure that provides stability and prevents sideways drift. – Sails: The fabric structures that capture the wind’s energy to propel the boat. – Running rigging: The lines or ropes used to control the sails and sailing equipment. – Standing rigging: The wires and cables that support the mast and reinforce the spars. These are the basic components necessary for the functioning of a sailboat.
4. What is a spinnaker halyard?
A spinnaker halyard is a line used to hoist and control a spinnaker sail. The spinnaker is a large, lightweight sail that is used for downwind sailing or reaching in moderate to strong winds. The halyard attaches to the head of the spinnaker and is used to raise it to the top of the mast. Once hoisted, the spinnaker halyard can be adjusted to control the tension and shape of the sail.
5. Why is it important to maintain and replace worn running rigging?
It is important to maintain and replace worn running rigging for several reasons: – Safety: Worn or damaged rigging can compromise the integrity and stability of the boat, posing a safety risk to both crew and vessel. – Performance: Worn rigging can affect the efficiency and performance of the sails, diminishing the boat’s speed and maneuverability. – Reliability: Aging or worn rigging is more prone to failure, which can lead to unexpected problems and breakdowns. Regular inspection and replacement of worn running rigging is essential to ensure the safe and efficient operation of a sailboat.
6. Where can I find sailboat rigging books or guides?
There are several sources where you can find sailboat rigging books or guides: – Online: Websites such as West Coast Sailing and Stingy Sailor offer downloadable rigging guides for different sailboat models. – Bookstores: Many bookstores carry a wide selection of boating and sailing books, including those specifically focused on sailboat rigging. – Sailing schools and clubs: Local sailing schools or yacht clubs often have resources available for learning about sailboat rigging. – Manufacturers: Some sailboat manufacturers, like Hobie Cat and RS Sailing, provide rigging guides for their specific sailboat models. Consulting these resources can provide valuable information and instructions for rigging your sailboat properly.
About the author

Leave a Reply Cancel reply
Your email address will not be published. Required fields are marked *
Save my name, email, and website in this browser for the next time I comment.
Latest posts

The history of sailing – from ancient times to modern adventures
History of Sailing Sailing is a time-honored tradition that has evolved over millennia, from its humble beginnings as a means of transportation to a beloved modern-day recreational activity. The history of sailing is a fascinating journey that spans cultures and centuries, rich in innovation and adventure. In this article, we’ll explore the remarkable evolution of…

Sailing Solo: Adventures and Challenges of Single-Handed Sailing
Solo Sailing Sailing has always been a pursuit of freedom, adventure, and self-discovery. While sailing with a crew is a fantastic experience, there’s a unique allure to sailing solo – just you, the wind, and the open sea. Single-handed sailing, as it’s often called, is a journey of self-reliance, resilience, and the ultimate test of…

Sustainable Sailing: Eco-Friendly Practices on the boat
Eco Friendly Sailing Sailing is an exhilarating and timeless way to explore the beauty of the open water, but it’s important to remember that our oceans and environment need our protection. Sustainable sailing, which involves eco-friendly practices and mindful decision-making, allows sailors to enjoy their adventures while minimizing their impact on the environment. In this…
Sailboat Parts Explained: Illustrated Guide (with Diagrams)
When you first get into sailing, there are a lot of sailboat parts to learn. Scouting for a good guide to all the parts, I couldn't find any, so I wrote one myself.
Below, I'll go over each different sailboat part. And I mean each and every one of them. I'll walk you through them one by one, and explain each part's function. I've also made sure to add good illustrations and clear diagrams.
This article is a great reference for beginners and experienced sailors alike. It's a great starting point, but also a great reference manual. Let's kick off with a quick general overview of the different sailboat parts.
General Overview
The different segments
You can divide up a sailboat in four general segments. These segments are arbitrary (I made them up) but it will help us to understand the parts more quickly. Some are super straightforward and some have a bit more ninja names.
Something like that. You can see the different segments highlighted in this diagram below:

The hull is what most people would consider 'the boat'. It's the part that provides buoyancy and carries everything else: sails, masts, rigging, and so on. Without the hull, there would be no boat. The hull can be divided into different parts: deck, keel, cabin, waterline, bilge, bow, stern, rudder, and many more.
I'll show you those specific parts later on. First, let's move on to the mast.

Sailboats Explained
The mast is the long, standing pole holding the sails. It is typically placed just off-center of a sailboat (a little bit to the front) and gives the sailboat its characteristic shape. The mast is crucial for any sailboat: without a mast, any sailboat would become just a regular boat.
I think this segment speaks mostly for itself. Most modern sailboats you see will have two sails up, but they can carry a variety of other specialty sails. And there are all kinds of sail plans out there, which determine the amount and shape of sails that are used.
The Rigging
This is probably the most complex category of all of them.
Rigging is the means with which the sails are attached to the mast. The rigging consists of all kinds of lines, cables, spars, and hardware. It's the segment with the most different parts.
The most important parts
If you learn anything from this article, here are the most important parts of any sailboat. You will find all of these parts in some shape or form on almost any sailboat.

Okay, we now have a good starting point and a good basic understanding of the different sailboat parts. It's time for the good stuff. We're going to dive into each segment in detail.
Below, I'll go over them one by one, pointing out its different parts on a diagram, listing them with a brief explanation, and showing you examples as well.
After reading this article, you'll recognize every single sailboat part and know them by name. And if you forget one, you're free to look it up in this guide.

On this page:
The hull is the heart of the boat. It's what carries everything: the mast, the sails, the rigging, the passengers. The hull is what provides the sailboat with its buoyancy, allowing it to stay afloat.
Sailboats mostly use displacement hulls, which is a shape that displaces water when moving through it. They are generally very round and use buoyancy to support its own weight. These two characteristics make sure it is a smooth ride.
There are different hull shapes that work and handle differently. If you want to learn more about them, here's the Illustrated Guide to Boat Hull Types (with 11 Examples ). But for now, all we need to know is that the hull is the rounded, floating part of any sailboat.
Instead of simply calling the different sides of a hull front, back, left and right , we use different names in sailing. Let's take a look at them.

The bow is the front part of the hull. It's simply the nautical word for 'front'. It's the pointy bit that cuts through the water. The shape of the bow determines partially how the boat handles.
The stern is the back part of the hull. It's simply the nautical word for 'back'. The shape of the stern partially determines the stability and speed of the boat. With motorboats, the stern lies deep inside the water, and the hull is flatter aft. Aft also means back. This allows it to plane, increasing the hull speed. For sailboats, stability is much more important, so the hull is rounded throughout, increasing its buoyancy and hydrodynamic properties.
The transom is the backplate of the boat's hull. It's the most aft (rear) part of the boat.
Port is the left side of a sailboat.
Starboard is the right side of a sailboat
The bilges are the part where the bottom and the sides of the hull meet. On sailboats, these are typically very round, which helps with hydrodynamics. On powerboats, they tend to have an angle.
The waterline is the point where the boat's hull meets the water. Generally, boat owners paint the waterline and use antifouling paint below it, to protect it from marine growth.
The deck is the top part of the boat's hull. In a way, it's the cap of the boat, and it holds the deck hardware and rigging.
Displacement hulls are very round and smooth, which makes them very efficient and comfortable. But it also makes them very easy to capsize: think of a canoe, for example.
The keel is a large fin that offsets the tendency to capsize by providing counterbalance. Typically, the keel carries ballast in the tip, creating a counterweight to the wind's force on the sails.
The rudder is the horizontal plate at the back of the boat that is used to steer by setting a course and maintaining it. It is connected to the helm or tiller.
Tiller or Helm
- The helm is simply the nautical term for the wheel.
- The tiller is simply the nautical term for the steering stick.
The tiller or helm is attached to the rudder and is used to steer the boat. Most smaller sailboats (below 30') have a tiller, most larger sailboats use a helm. Large ocean-going vessels tend to have two helms.
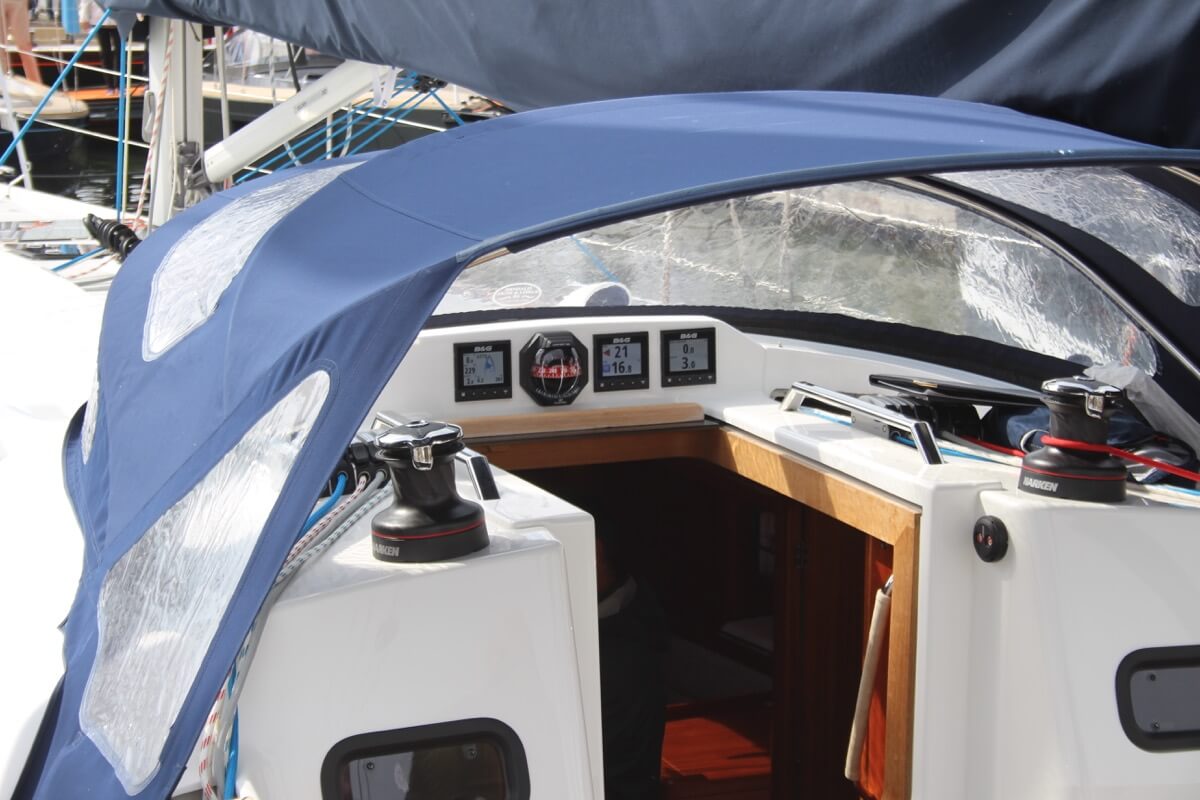
The cockpit is the recessed part in the deck where the helmsman sits or stands. It tends to have some benches. It houses the outside navigation and systems interfaces, like the compass, chartplotter, and so on. It also houses the mainsheet traveler and winches for the jib. Most boats are set up so that the entire vessel can be operated from the cockpit (hence the name). More on those different parts later.
Most larger boats have some sort of roofed part, which is called the cabin. The cabin is used as a shelter, and on cruising sailboats you'll find the galley for cooking, a bed, bath room, and so on.
The mast is the pole on a sailboat that holds the sails. Sailboats can have one or multiple masts, depending on the mast configuration. Most sailboats have only one or two masts. Three masts or more is less common.
The boom is the horizontal pole on the mast, that holds the mainsail in place.
The sails seem simple, but actually consist of many moving parts. The parts I list below work for most modern sailboats - I mean 90% of them. However, there are all sorts of specialty sails that are not included here, to keep things concise.

The mainsail is the largest sail on the largest mast. Most sailboats use a sloop rigging (just one mast with one bermuda mainsail). In that case, the main is easy to recognize. With other rig types, it gets more difficult, since there can be multiple tall masts and large sails.
If you want to take a look at the different sail plans and rig types that are out there, I suggest reading my previous guide on how to recognize any sailboat here (opens in new tab).
Sail sides:
- Leech - Leech is the name for the back side of the sail, running from the top to the bottom.
- Luff - Luff is the name for the front side of the sail, running from the top to the bottom.
- Foot - Foot is the name for the lower side of the sail, where it meets the boom.
Sail corners:
- Clew - The clew is the lower aft (back) corner of the mainsail, where the leech is connected to the foot. The clew is attached to the boom.
- Tack - The tack is the lower front corner of the mainsail
- Head - The head is the top corner of the mainsail
Battens are horizontal sail reinforcers that flatten and stiffen the sail.
Telltales are small strings that show you whether your sail trim is correct. You'll find telltales on both your jib and mainsail.
The jib is the standard sized headsail on a Bermuda Sloop rig (which is the sail plan most modern sailboats use).
As I mentioned: there are all kinds, types, and shapes of sails. For an overview of the most common sail types, check out my Guide on Sail Types here (with photos).
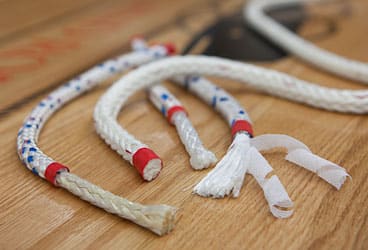
The rigging is what is used to attach your sails and mast to your boat. Rigging, in other words, mostly consists of all kinds of lines. Lines are just another word for ropes. Come to think of it, sailors really find all kinds of ways to complicate the word rope ...
Two types of rigging
There are two types of rigging: running and standing rigging. The difference between the two is very simple.
- The running rigging is the rigging on a sailboat that's used to operate the sails. For example, the halyard, which is used to lower and heave the mainsail.
- The standing rigging is the rigging that is used to support the mast and sail plan.
Standing Rigging

Here are the different parts that belong to the standing rigging:
- Forestay or Headstay - Line or cable that supports the mast and is attached to the bow of the boat. This is often a steel cable.
- Backstay - Line or cable that supports the mast and is attached to the stern of the boat. This is often a steel cable.
- Sidestay or Shroud - Line or cable that supports the mast from the sides of the boat. Most sailboats use at least two sidestays (one on each side).
- Spreader - The sidestays are spaced to steer clear from the mast using spreaders.
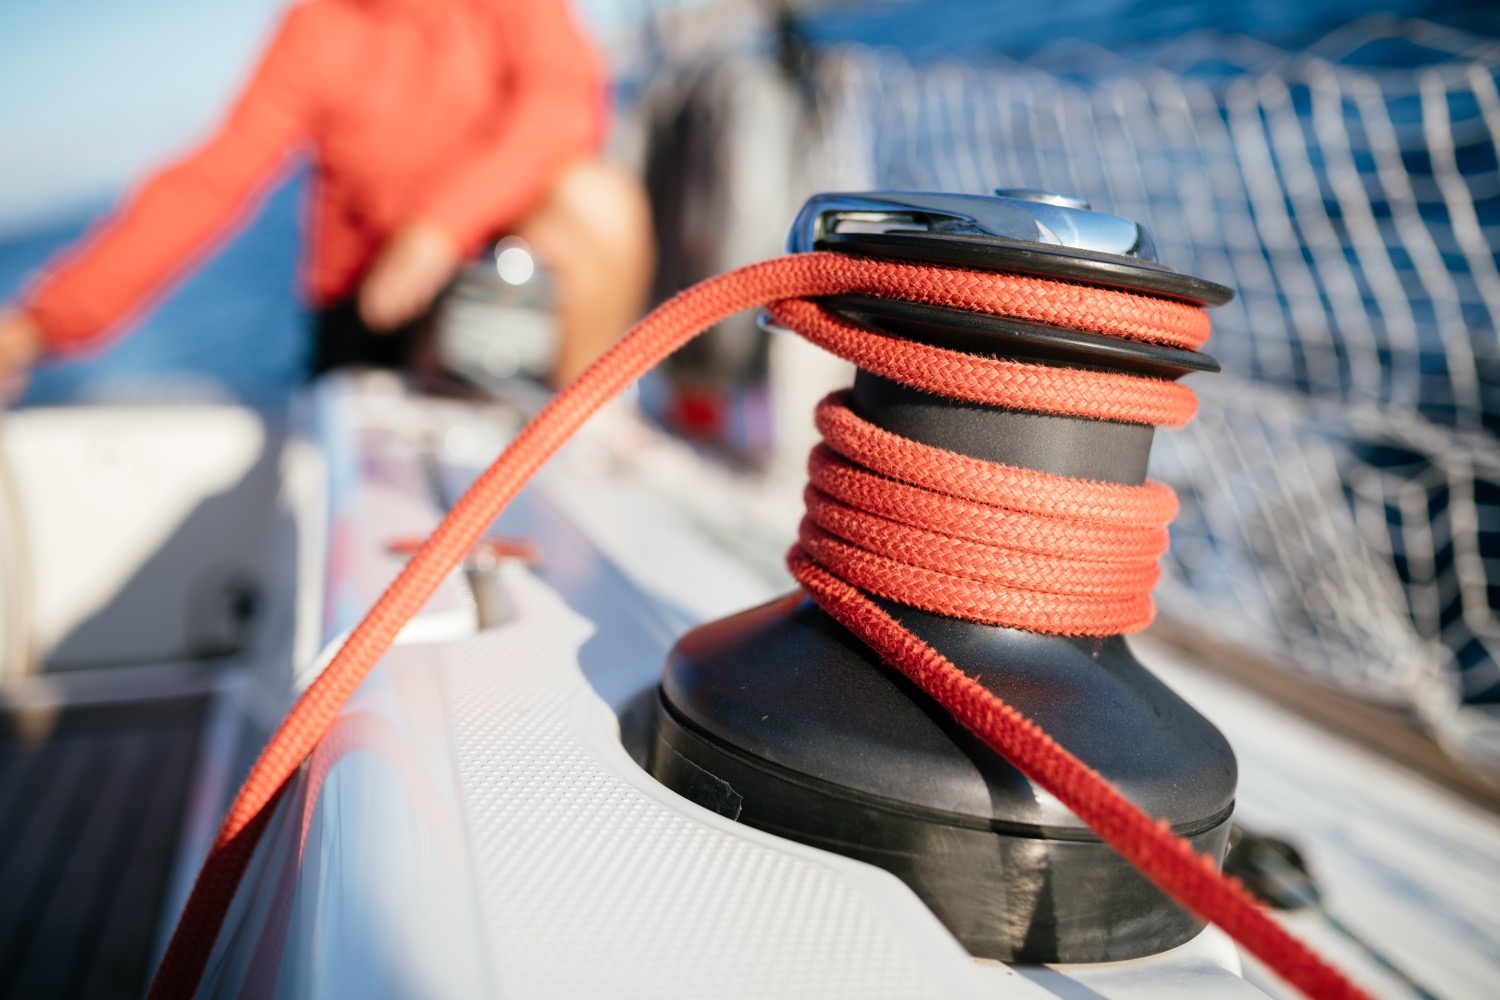
Running Rigging: different words for rope
Ropes play a big part in sailing, and especially in control over the sails. In sailboat jargon, we call ropes 'lines'. But there are some lines with a specific function that have a different name. I think this makes it easier to communicate with your crew: you don't have to define which line you mean. Instead, you simply shout 'mainsheet!'. Yeah, that works.
Running rigging consists of the lines, sheets, and hardware that are used to control, raise, lower, shape and manipulate the sails on a sailboat. Rigging varies for different rig types, but since most sailboats are use a sloop rig, nearly all sailboats use the following running rigging:

- Halyards -'Halyard' is simply the nautical name for lines or ropes that are used to raise and lower the mainsail. The halyard is attached to the top of the mainsail sheet, or the gaffer, which is a top spar that attaches to the mainsail. You'll find halyards on both the mainsail and jib.
- Sheets - 'Sheet' is simply the nautical term for lines or ropes that are used to set the angle of the sail.
- Mainsheet - The line, or sheet, that is used to set the angle of the mainsail. The mainsheet is attached to the Mainsheet traveler. More on that under hardware.
- Jib Sheet - The jib mostly comes with two sheets: one on each side of the mast. This prevents you from having to loosen your sheet, throwing it around the other side of the mast, and tightening it. The jib sheets are often controlled using winches (more on that under hardware).
- Cleats are small on-deck hooks that can be used to tie down sheets and lines after trimming them.
- Reefing lines - Lines that run through the mainsail, used to put a reef in the main.
- The Boom Topping Lift is a line that is attached to the aft (back) end of the boom and runs to the top of the mast. It supports the boom whenever you take down the mainsail.
- The Boom Vang is a line that places downward tension on the boom.
There are some more tensioning lines, but I'll leave them for now. I could probably do an entire guide on the different sheets on a sailboat. Who knows, perhaps I'll write it.
This is a new segment, that I didn't mention before. It's a bit of an odd duck, so I threw all sorts of stuff into this category. But they are just as important as all the other parts. Your hardware consists of cleats, winches, traveler and so on. If you don't know what all of this means, no worries: neither did I. Below, you'll find a complete overview of the different parts.
Deck Hardware

Just a brief mention of the different deck hardware parts:
- Pulpits are fenced platforms on the sailboat's stern and bow, which is why they are called the bow pulpit and stern pulpit here. They typically have a solid steel framing for safety.
- Stanchons are the standing poles supporting the lifeline , which combined for a sort of fencing around the sailboat's deck. On most sailboats, steel and steel cables are used for the stanchons and lifelines.
Mainsheet Traveler
The mainsheet traveler is a rail in the cockpit that is used to control the mainsheet. It helps to lock the mainsheet in place, fixing the mainsails angle to the wind.
If you're interested in learning more about how to use the mainsheet traveler, Matej has written a great list of tips for using your mainsheet traveler the right way . It's a good starting point for beginners.
Winches are mechanical or electronic spools that are used to easily trim lines and sheets. Most sailboats use winches to control the jib sheets. Modern large sailing yachts use electronic winches for nearly all lines. This makes it incredibly easy to trim your lines.
You'll find the compass typically in the cockpit. It's the most old-skool navigation tool out there, but I'm convinced it's also one of the most reliable. In any way, it definitely is the most solid backup navigator you can get for the money.
Want to learn how to use a compass quickly and reliably? It's easy. Just read my step-by-step beginner guide on How To Use a Compass (opens in new tab .
Chartplotter
Most sailboats nowadays use, besides a compass and a map, a chartplotter. Chartplotters are GPS devices that show a map and a course. It's very similar to your normal car navigation.
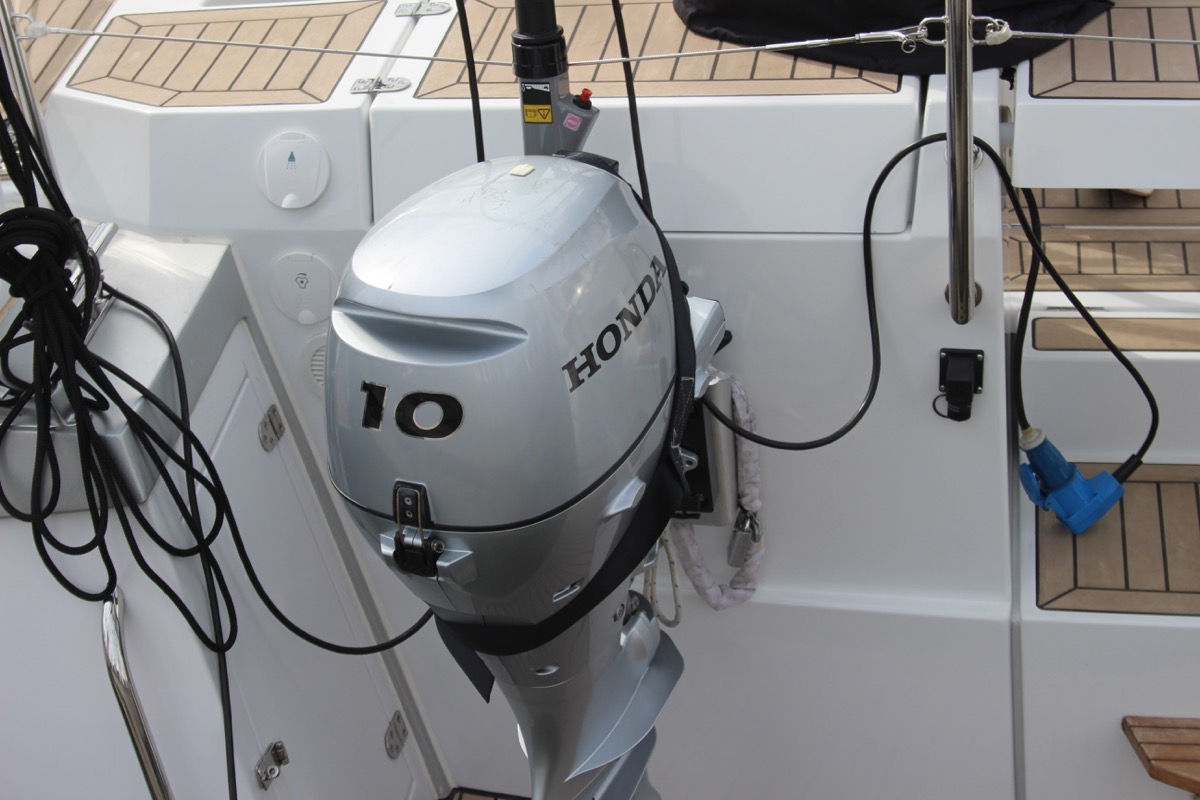
Outboard motor
Most sailboats have some sort of motor to help out when there's just the slightest breeze. These engines aren't very big or powerful, and most sailboats up to 32' use an outboard motor. You'll find these at the back of the boat.
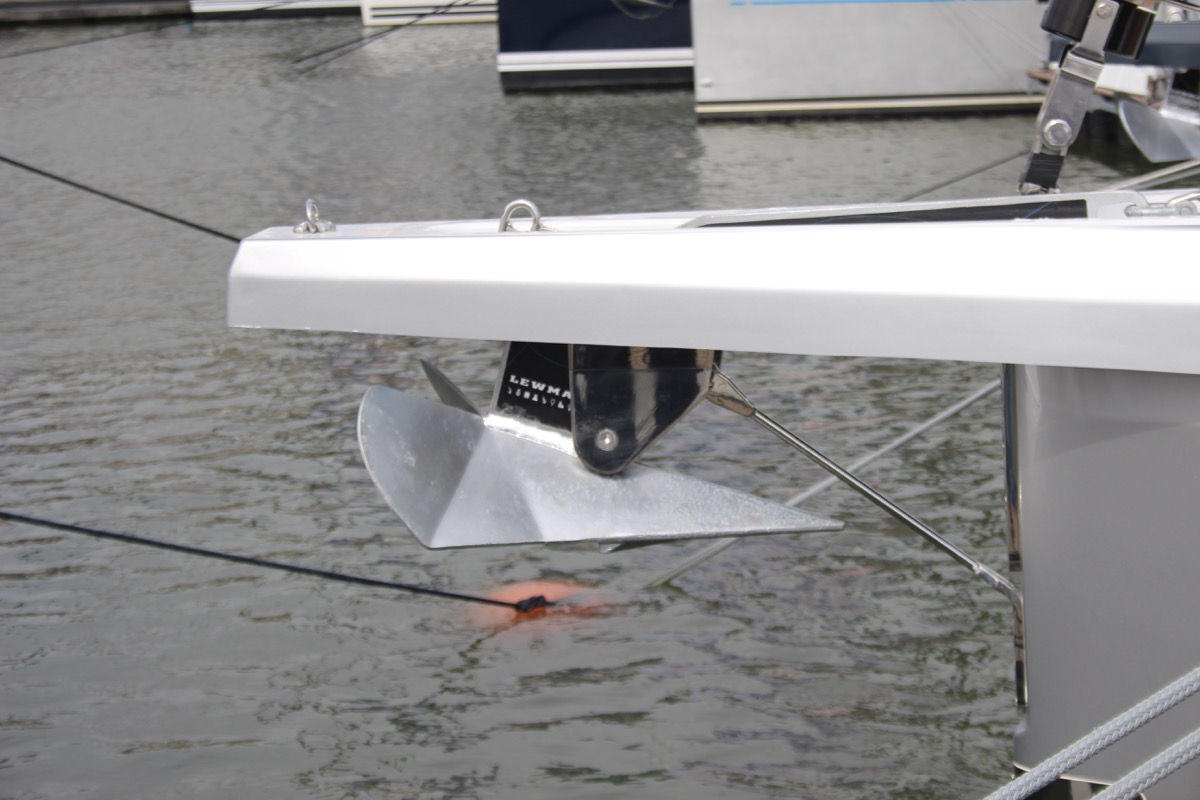
Most sailboats carry 1 - 3 anchors: one bow anchor (the main one) and two stern anchors. The last two are optional and are mostly used by bluewater cruisers.
I hope this was helpful, and that you've gained a good understanding of the different parts involved in sailing. I wanted to write a good walk-through instead of overwhelming you with lists and lists of nautical terms. I hope I've succeeded. If so, I appreciate any comments and tips below.
I've tried to be as comprehensive as possible, without getting into the real nitty gritty. That would make for a gigantic article. However, if you feel I've left something out that really should be in here, please let me know in the comments below, so I can update the article.
I own a small 20 foot yacht called a Red witch made locally back in the 70s here in Western Australia i found your article great and enjoyed reading it i know it will be a great help for me in my future leaning to sail regards John.
David Gardner
İ think this is a good explanation of the difference between a ”rope” and a ”line”:
Rope is unemployed cordage. In other words, when it is in a coil and has not been assigned a job, it is just a rope.
On the other hand, when you prepare a rope for a specific task, it becomes employed and is a line. The line is labeled by the job it performs; for example, anchor line, dock line, fender line, etc.
Hey Mr. Buckles
I am taking on new crew to race with me on my Flying Scot (19ft dingy). I find your Sailboat Parts Explained to be clear and concise. I believe it will help my new crew learn the language that we use on the boat quickly without being overwhelmed.
PS: my grandparents were from Friesland and emigrated to America.
Thank you Shawn for the well written, clear and easy to digest introductory article. Just after reading this first article I feel excited and ready to set sails and go!! LOL!! Cheers! Daniel.
steve Balog
well done, chap
Great intro. However, the overview diagram misidentifies the cockpit location. The cockpit is located aft of the helm. Your diagram points to a location to the fore of the helm.
William Thompson-Ambrose
An excellent introduction to the basic anatomy and function of the sailboat. Anyone who wants to start sailing should consider the above article before stepping aboard! Thank-you
James Huskisson
Thanks for you efforts mate. We’ve all got to start somewhere. Thanks for sharing. Hoping to my first yacht. 25ft Holland. Would love to cross the Bass Strait one day to Tasmania. 👌 Cheers mate
Alan Alexander Percy
thankyou ijust aquired my first sailboat at 66yrs of age its down at pelican point a beautifull place in virginia usa my sailboat is a redwing 30 if you are ever in the area i wouldnt mind your guidance and superior knowledge of how to sail but iam sure your fantastic article will help my sailboat is wings 30 ft
Thanks for quick refresher course. Having sailed in California for 20+ years I now live in Spain where I have to take a spanish exam for a sailboat license. Problem is, it’s only in spanish. So a lot to learn for an old guy like me.
Very comprehensive, thank you
Your article really brought all the pieces together for me today. I have been adventuring my first sailing voyage for 2 months from the Carolinas and am now in Eleuthera waiting on weather to make the Exumas!!! Great job and thanks
Helen Ballard
I’ve at last found something of an adventure to have in sailing, so I’m starting at the basics, I have done a little sailing but need more despite being over 60 life in the old dog etc, thanks for your information 😊
Barbara Scott
I don’t have a sailboat, neither do l plan to literally take to the waters. But for mental exercise, l have decided to take to sailing in my Bermuda sloop, learning what it takes to become a good sailor and run a tight ship, even if it’s just imaginary. Thank you for helping me on my journey to countless adventures and misadventures, just to keep it out of the doldrums! (I’m a 69 year old African American female who have rediscovered why l enjoyed reading The Adventures of Robert Louis Stevenson as well as his captivating description of sea, wind, sailboat,and sailor).
Great article and very good information source for a beginner like me. But I didn’t find out what I had hoped to, which is, what are all those noisy bits of kit on top of the mast? I know the one with the arrow is a weather vane, but the rest? Many thanks, Jay.
Louis Cohen
The main halyard is attached to the head of the mainsail, not the to the mainsheet. In the USA, we say gaff, not gaffer. The gaff often has its own halyard separate from the main halyard.
Other than that it’s a nice article with good diagrams.
A Girl Who Has an Open Sail Dream
Wow! That was a lot of great detail! Thank you, this is going to help me a lot on my project!
Hi, good info, do u know a book that explains all the systems on a candc 27,
Emma Delaney
As a hobbyist, I was hesitant to invest in expensive CAD software, but CADHOBBY IntelliCAD has proven to be a cost-effective alternative that delivers the same quality and performance.
https://www.cadhobby.com/
Leave a comment
You may also like, guide to understanding sail rig types (with pictures).
There are a lot of different sail rig types and it can be difficult to remember what's what. So I've come up with a system. Let me explain it in this article.

The Ultimate Guide to Sail Types and Rigs (with Pictures)

The Illustrated Guide To Boat Hull Types (11 Examples)

How To Live On a Boat For Free: How I'd Do It

How To Live on a Sailboat: Consider These 5 Things
Own your first boat within a year on any budget.
A sailboat doesn't have to be expensive if you know what you're doing. If you want to learn how to make your sailing dream reality within a year, leave your email and I'll send you free updates . I don't like spam - I will only send helpful content.
Ready to Own Your First Boat?
Just tell us the best email address to send your tips to:
- BOAT OF THE YEAR
- Newsletters
- Sailboat Reviews
- Boating Safety
- Sailing Totem
- Charter Resources
- Destinations
- Galley Recipes
- Living Aboard
- Sails and Rigging
- Maintenance
Guide to Sailing Ropes
- By Jen Brett
- Updated: June 16, 2020
Replacing the running rigging on your sailboat seems like it should be fairly simple, and a decade or two ago, it was. As with electronics, safety gear, and even sails, technology has significantly improved cordage. The downside to all these improvements is that not only are there more options than ever, but you may feel like you need a materials-science degree in order to choose the right sailing ropes for your new jib halyard. Here, we’ll take a look at the types of sailing ropes and what the newer, high-tech materials can do for your boat.
When it comes time to choose new sailing rope for the lines aboard your boat, you’ll need to consider the type of sailing that you’ll be doing (a year in the tropics? racing to Bermuda?), the hardware that you currently have (clutches, sheaves), what qualities you feel are important (soft hand, ease in splicing, weight, durability), and your budget. The type of sails you have is another consideration. “If you’ve already made the investment in laminate sails, then you should really consider upgrading your running rigging to a low-stretch material,” says Brian Fisher of Rig Pro, in Portsmouth, Rhode Island. “But even if you have Dacron sails, you can benefit from a cordage upgrade.”
Starting at the top, you should check over your sheaves before replacing your halyards, and if you’re going from wire to rope halyards, you’ll need to change to rope sheaves. (Wire halyards use a V-shaped sheave; rope sheaves are U-shaped.) While you’re aloft, look for any sharp edges that could chafe through your new line, especially if you’re going from wire to rope halyards.
What’s the best halyard rope? There are plenty of choices for new halyards, from basic polyester double-braid to all the high-tech materials. Whatever you choose will probably be a compromise between such factors as amount of stretch, cost, weight, and ease of handling.
Long the workhorse on many a cruising boat, polyester (Dacron) double-braid is still a good choice for many onboard applications. Polyester is long lasting, resistant to ultraviolet radiation, and costs a fraction of high-tech rope; however, it’s somewhat stretchy and heavier than more modern materials, and if there’s one area on board that could benefit from an upgrade to lightweight low-stretch line, it’s the halyards.
Most cruising boats have a roller-furling headsail , and many have in-mast furling mainsails as well. Since these remain hoisted for possibly months at a time, a lightweight low-stretch line will offer better halyard tension and sail shape over the long run. This is true for non-roller-furling sails as well, especially if you’re heading out on a long passage where the sails will be set for a while. Here Fisher recommends using a Spectra/Dyneema-cored line, since it’s extremely strong, lightweight, and doesn’t absorb water. An alternative would be a Vectran-cored line, which stretches even less and doesn’t creep; however, it’s heavier than Spectra/Dyneema and absorbs water. When switching from polyester to a high-tech line, it’s usually possible to downsize the line by a few millimeters since these fibers are so strong. This is a definite advantage for bigger cruising boats, since polyester line can be quite bulky at larger diameters.
If the price tag of Spectra/Dyneema-cored or Vectran-cored line is a little steep, all the major rope manufacturers currently make “mid-level” blended-core ropes that would be well suited to the cruising environment (and easier on the wallet). A few examples are New England Ropes’ VPC, with a Vectran and polyolefin core, and T-900, with a Dyneema and Technora core; and Yale’s Vizzion, with a braided composite core of Vectran LCP and filament olefin.
Both high-tech lines and the mid-level blends typically have polyester covers, which provides extra UV protection and a nice hand, although there are also covers available that blend the polyester with materials such as Technora, for its abrasion-resistant and heat-dissipating qualities. If weight saving is a major issue aboard your boat, note that many of the high-tech ropes available are core dependent, and the cover can be stripped off. On the majority of cruising boats, however, the effect would be negligible.
Like halyards, sheets are an area where Spectra/Dyneema-cored lines can improve performance and even your sailing experience. “Since you can downsize your line when you switch from polyester, you end up with smaller, lighter piles in your cockpit and less weight pulling at your sail,” says Fisher. He offers an example of genoa halyards on an Oyster 46, which are 69 feet long. In this application, polyester double-braid lines would measure 3/4-inch in diameter, with a breaking strength of 16,000 pounds and a weight of 11 pounds. A Spectra/Dyneema-cored line would have a 1/2-inch diameter, a breaking strength of 20,000 pounds, and a weight of only 4.6 pounds. And only the polyester cover would absorb water, offering additional weight savings as well as more pleasant tacking.
It’s worth noting that if you’re replacing your running rigging, the time’s right to inspect your deck hardware, too. Since polyester line has more give, it absorbs more of the load from the sails. If you make the switch to high-tech line, be sure that your deck hardware is appropriately sized and reinforced.
Spinnaker sheets are well suited for a high-tech upgrade as well, since a lightweight, small-diameter line that’s also very strong will offer better performance. Examples of good choices for this application are Samson’s WarpSpeed, featuring a Dyneema core and a polyester cover, and New England Ropes’ Flight Line, which has a Dyneema core and a polypropylene cover.
Rope construction for the mainsheet is much a matter of personal preference. Single-braid is usually softer, has a nice hand, and doesn’t kink, but it could snag more than a double-braid line and doesn’t have the additional abrasion resistance of a cover. Yale Cordage’s Ph.D. rope is a single-braid construction made from polyester-coated Spectra. According to Yale, the polyester coating gives the rope a nice feel and good grip on winches, while the Spectra core gives it strength and weight savings.
All the Rest
While halyards and sheets have been the focus here, there are plenty of other places aboard that could benefit from a high-tech sailing rope makeover: runners, the outhaul, the traveler, the boom vang, even lifelines. If a major high-tech cordage upgrade is in your future, it may be wise to consult with a rigger to ensure that the chosen material is suitable to the application on your particular boat and that your lines are appropriately sized. “I’ve seen several situations in which customers have forgotten to take into account proper line size with regard to the winches and rope clutches on their boats,” notes Andrew Spiro of The Ship’s Store and Rigging, in Portsmouth, Rhode Island. “It’s simple, but just because you can use a smaller-diameter line with the same strength, they forget that the winches and clutches are limited to certain sizes. The result is often slipping.”
Always on the forefront of technology, raceboats have been using high-tech fibers for years in many applications on board, even standing rigging, and as these fibers have improved and their acceptance has grown, more and more wire is being traded out in favor of these lightweight alternatives. Cruisers can also reap benefit from these advances.
Jen Brett is CW’s senior editor.
Rope Guide for Sailboats
Aramids (Twaron, Technora, Kevlar): Like other high-tech fibers, aramids are strong and stretch little, but they also have the benefit of being resistant to heat. You’ll find aramids in both double-braid cores as well as blended with other fibers in the covers.
Colligo Dux: A relative newcomer to sailboat rigging, Colligo Dux is pre-stretched and heat-treated Dyneema. This process, however, produces an extremely strong rope with virtually no creep that is suitable for service in standing rigging.
H.M.P.E. (Dyneema, Spectra, Amsteel): High-modulus polyethylene has many benefits for running-rigging applications: It’s very strong, lightweight, doesn’t absorb water, has decent resistance to ultraviolet radiation, and it can float. On the downside, it has more creep (see “Rope Speak,” page 80) than other high-tech fibers.
L.C.P. (Vectran): Liquid-crystal polymer fiber possesses high-strength and low-stretch qualities and suffers virtually no creep. L.C.P. is one of the strongest core materials, although it doesn’t have the U.V. resistance of H.M.P.E., and it’s a little bit heavier.
Nylon: Strong yet stretchy nylon is commonly used in applications for which shock absorption is important, such as in dock lines and anchor lines.
P.B.O. (Zylon): Polybenzoxazole is extremely low stretch and high strength. It’s also ungodly expensive and lacks the durability that most cruisers desire. As such, P.B.O. is usually only found on high-end raceboats.
Polyester (Dacron): For decades, polyester has been the go-to rope for cruising-boat halyards and sheets. It’s cost efficient, strong, and resists ultraviolet radiation.
Polypropylene: Usually used in applications like ski and dinghy tow ropes, polypropylene is lightweight and can float. Alone, polypropylene isn’t usually seen in cruising-boat lines since it’s very susceptible to UV degradation, but it’s sometimes combined with other fibers that benefit from its lightweight, low-cost qualities.
- More: DIY Sailboat Projects , Gear , How To , sail handling , sails & rigging , sails and rigging
- More How To

7 Boating Safety Tips for Summer Cruising

How to Prep for a Diesel You Can Depend On

Anchoring in Paradise

Cruising with a Pet

For Sale: A Freshwater Find

For Sale: 2002 Hylas 46

Generators Not Included
- Digital Edition
- Customer Service
- Privacy Policy
- Email Newsletters
- Cruising World
- Sailing World
- Salt Water Sportsman
- Sport Fishing
- Wakeboarding
Better Sailing

What is Sailboat Rigging?
The domain of rigging is an essential matter for the safety and good performance of your sailboat. Nowadays, the type of rigging is still evolving. Generally, rigging is depending on the type of sail used or the number of masts. As a basic rule, the replacement of the standing rig should be done every 10 years, except for multihulls or regattas, and rod or composite fiber rigging. A good set of rigging is of great importance in order to ensure navigation without causing any damage. A useful tip is to perform often thorough checks of the state of the rigging of your sailboat. Like this, you will prevent any possible damages from happening. So, let’s examine what exactly is sailboat rigging.
Standing and Running Rigging
Standing rigging supports your sailboat’s mast. The standing rigging consists of all the stainless steel wires that are used to support the mast. Moreover, standing rigging includes the rods, wires, and fixed lines that support the masts or bowsprit on a sailing vessel. In addition, all these reinforce the spars against wind loads transferred from the sails. On the other hand, running rigging is the rigging for controlling and shaping the sails on a sailboat. Running rigging consists of the main and jib sheet, the boom vang, the downhaul, and the jib halyard.
The subdivision of running rigging concerns the jeers, lifts, and halyards (halyards). This supporting equipment raises or lowers the sails and also controls the lower corners of the sails, i.e. the tacks and sheets. Over the centuries and up until nowadays, the history of sailboats rigging is still developing. What we’ve learned by now is that the combination of square and fore-and-aft sails in a full-rigged ship creates a highly complex, and mutually reliant set of components.
Wire Rigging
Wire rigging is the most common form of standing rigging on sailboats today. Furthermore, the style of the wire used is made of stainless steel, which is also a common wire style. What is advantageous with wire is that it’s quite affordable, especially when using swage fittings. The wire has also a long life expectancy, about 10 to 20 years, depending on use and the region you’re sailing to. However, wire rigging is more elastic than rod and synthetic rigging, thus it offers the lowest performance.
Rod Rigging
The rod rigging composition is of high-quality materials that provide low stretching. Moreover, it has a very long lifespan and great breaking strength, much more than that of its wire counterpart. Its life expectancy is attributed to the design, which is a mono strand, as well as to its composition that makes it very corrosion resistant.
Synthetic Rigging
Synthetic rigging is a new type of rigging and just like a rod, has minimum breaking strength. Nowadays, synthetic rigging offers low stretch performance features (that may vary depending on construction type), which are quite good for sailboats, among others. However, synthetic rigging will not last as long as the metal components. Most of the time, metal wire and rod are far better than synthetic rigging.
Based on the two rig types which are square-rigged and fore-and-aft, let’s divide the fore-and-aft rigs into three groups:
- Lateen Rig has a three-sided mainsail on a long yard.
- Bermuda rig which has a three-sided mainsail.
- Gaff rig is the head of the mainsail and has a four-sided mainsail.

Parts of a Sailboat Rigging and Terminology
Cruising sailboats will usually have their mast supported by 1 x 19 stainless steel wire. However, there are some racing sailboats that may choose rod rigging. Why? That’s because rod rigging has a stretch coefficient that is some 20% less than wire. The downside is that it’s more difficult to install and adjust, as well as less flexible with a shorter life span. So, let’s move on and see the parts of the sailboat’s rigging and their terminology:
- Forestay and Backstay : Forestay and backstay support the mast fore and aft. The forestay keeps the mast from falling backward. It attaches at the top of the mast. The backstay is important for the sail’s control because it directly affects the headsail and mainsail.
- Cap Shrouds and Lower Shrouds : These parts hold the mast steady athwartship. The shrouds are attached to the masthead and via chainplates to the hull. Moreover, forward and aft lower shrouds provide further support. The lower shrouds are always connected to the mast, just under the first spreader, and at the other end to the hull.
- Spreaders : In general, spreaders keep the shrouds away from the mast. What is of high importance, in terms of stability, is their length and fore-and-aft angle. The rigs of cruising boats may have up to three pairs of spreaders, depending on a number of factors such as the sailboat’s size and type. Keep in mind that the more spreaders a sailboat has then the lighter the mast section can be. Last but not least, the spreaders must be robust in order to withstand the compression loads of the shrouds.
- Masts and Booms : Masts are tall spars that carry the sails, navigate the sailboat, and control its position. Sailboat booms are horizontal spars to which the foot of a sail is bent. The booms attach to the lower part of the mast. There are some sailboats with unstayed masts, like the junk rig and catboat rigs. They have no standing rigging at all, and neither stays to support them. For example, a Bermuda rig has a single mast and just one headsail, thus a relatively simple rigging layout. On the other hand, schooners or ketches have a really complex rigging, i.e. with multi-spreader rigs. Apparently, the mast on a sailboat is an important component.
- Chainplates, Toggles, and Turnbuckles : These important components of sailboat rigging attach the shrouds to the hull. The chainplate is a metal plate that fastens to a strong point in the hull. Toggles are comprised of stainless steel fittings that absorb non-linear loads, located between the shrouds and the chainplate. Turnbuckles (or rigging screws) are also stainless steel materials that allow the shroud tension to adjust better.
- Parts of Running Rigging : As mentioned above, running rigging has to do about shaping, supporting, and stabilizing the sails on a sailing boat. Therefore, the necessary materials for running rigging are numerous and need further explanation. Some of these materials are: The topping lifts, the halyards, the outhauls and downhauls, the boom vangs, the sheets, and more.
Sailboat Rigging – Summary
So, what is sailboat rigging? Sailboat rigging concerns the wires, lines, and ropes that hold the rig and control the sails. To be more accurate, this means the tensioned stays and shrouds that support the mast. Rigging has to do about the booms, masts, yards, sails, stays, and cordage. Same way with cars, sailboats also have an engine, but in the form of sails. This is the standing and running rigging. When we refer to standing rigging this means that the stays and shrouds are supported by the mast. On the other hand, running rigging refers to rope halyards, sheets, and other control lines. Depending on the type of your sailboat, this sail-engine might be old, new, or maybe somewhere in between.

Peter is the editor of Better Sailing. He has sailed for countless hours and has maintained his own boats and sailboats for years. After years of trial and error, he decided to start this website to share the knowledge.
Related Posts

Sailing with Friends: Tie Knots, Navigate the Seas and Create Unforgettable Memories

Atlantic vs Pacific: Which is More Dangerous for Sailing?

Lagoon Catamaran Review: Are Lagoon Catamarans Good?

Best Inboard Boat Engine Brands
- Buyer's Guide
- Destinations
- Maintenance
- Sailing Info
Hit enter to search or ESC to close.
Standing Rigging (or ‘Name That Stay’)
Published by rigworks on november 19, 2019.
Question: When your riggers talk about standing rigging, they often use terms I don’t recognize. Can you break it down for me?
From the Rigger: Let’s play ‘Name that Stay’…

Forestay (1 or HS) – The forestay, or headstay, connects the mast to the front (bow) of the boat and keeps your mast from falling aft.
- Your forestay can be full length (masthead to deck) or fractional (1/8 to 1/4 from the top of the mast to the deck).
- Inner forestays, including staysail stays, solent stays and baby stays, connect to the mast below the main forestay and to the deck aft of the main forestay. Inner forestays allow you to hoist small inner headsails and/or provide additional stability to your rig.
Backstay (2 or BS) – The backstay runs from the mast to the back of the boat (transom) and is often adjustable to control forestay tension and the shape of the sails.
- A backstay can be either continuous (direct from mast to transom) or it may split in the lower section (7) with “legs” that ‘V’ out to the edges of the transom.
- Backstays often have hydraulic or manual tensioners built into them to increase forestay tension and bend the mast, which flattens your mainsail.
- Running backstays can be removable, adjustable, and provide additional support and tuning usually on fractional rigs. They run to the outer edges of the transom and are adjusted with each tack. The windward running back is in tension and the leeward is eased so as not to interfere with the boom and sails.
- Checkstays, useful on fractional rigs with bendy masts, are attached well below the backstay and provide aft tension to the mid panels of the mast to reduce mast bend and provide stabilization to reduce the mast from pumping.
Shrouds – Shrouds support the mast from side to side. Shrouds are either continuous or discontinuous .
Continuous rigging, common in production sailboats, means that each shroud (except the lowers) is a continuous piece of material that connects to the mast at some point, passes through the spreaders without terminating, and continues to the deck. There may be a number of continuous shrouds on your boat ( see Figure 1 ).
- Cap shrouds (3) , sometimes called uppers, extend from masthead to the chainplates at the deck.
- Intermediate shrouds (4) extend from mid-mast panel to deck.
- Lower shrouds extend from below the spreader-base to the chainplates. Fore- (5) and Aft-Lowers (6) connect to the deck either forward or aft of the cap shroud.
Discontinuous rigging, common on high performance sailboats, is a series of shorter lengths that terminate in tip cups at each spreader. The diameter of the wire/rod can be reduced in the upper sections where loads are lighter, reducing overall weight. These independent sections are referred to as V# and D# ( see Figure 2 ). For example, V1 is the lowest vertical shroud that extends from the deck to the outer tip of the first spreader. D1 is the lowest diagonal shroud that extends from the deck to the mast at the base of the first spreader. The highest section that extends from the upper spreader to the mast head may be labeled either V# or D#.
A sailboat’s standing rigging is generally built from wire rope, rod, or occasionally a super-strong synthetic fibered rope such as Dyneema ® , carbon fiber, kevlar or PBO.
- 1×19 316 grade stainless steel Wire Rope (1 group of 19 wires, very stiff with low stretch) is standard on most sailboats. Wire rope is sized/priced by its diameter which varies from boat to boat, 3/16” through 1/2″ being the most common range.
- 1×19 Compact Strand or Dyform wire, a more expensive alternative, is used to increase strength, reduce stretch, and minimize diameter on high performance boats such as catamarans. It is also the best alternative when replacing rod with wire.
- Rod rigging offers lower stretch, longer life expectancy, and higher breaking strength than wire. Unlike wire rope, rod is defined by its breaking strength, usually ranging from -10 to -40 (approx. 10k to 40k breaking strength), rather than diameter. So, for example, we refer to 7/16” wire (diameter) vs. -10 Rod (breaking strength).
- Composite Rigging is a popular option for racing boats. It offers comparable breaking strengths to wire and rod with a significant reduction in weight and often lower stretch.
Are your eyes crossing yet? This is probably enough for now, but stay tuned for our next ‘Ask the Rigger’. We will continue this discussion with some of the fittings/connections/hardware associated with your standing rigging.
Related Posts
Ask the Rigger
Do your masthead sheaves need replacing.
Question: My halyard is binding. What’s up? From the Rigger: Most boat owners do not climb their masts regularly, but our riggers spend a lot of time up there. And they often find badly damaged Read more…
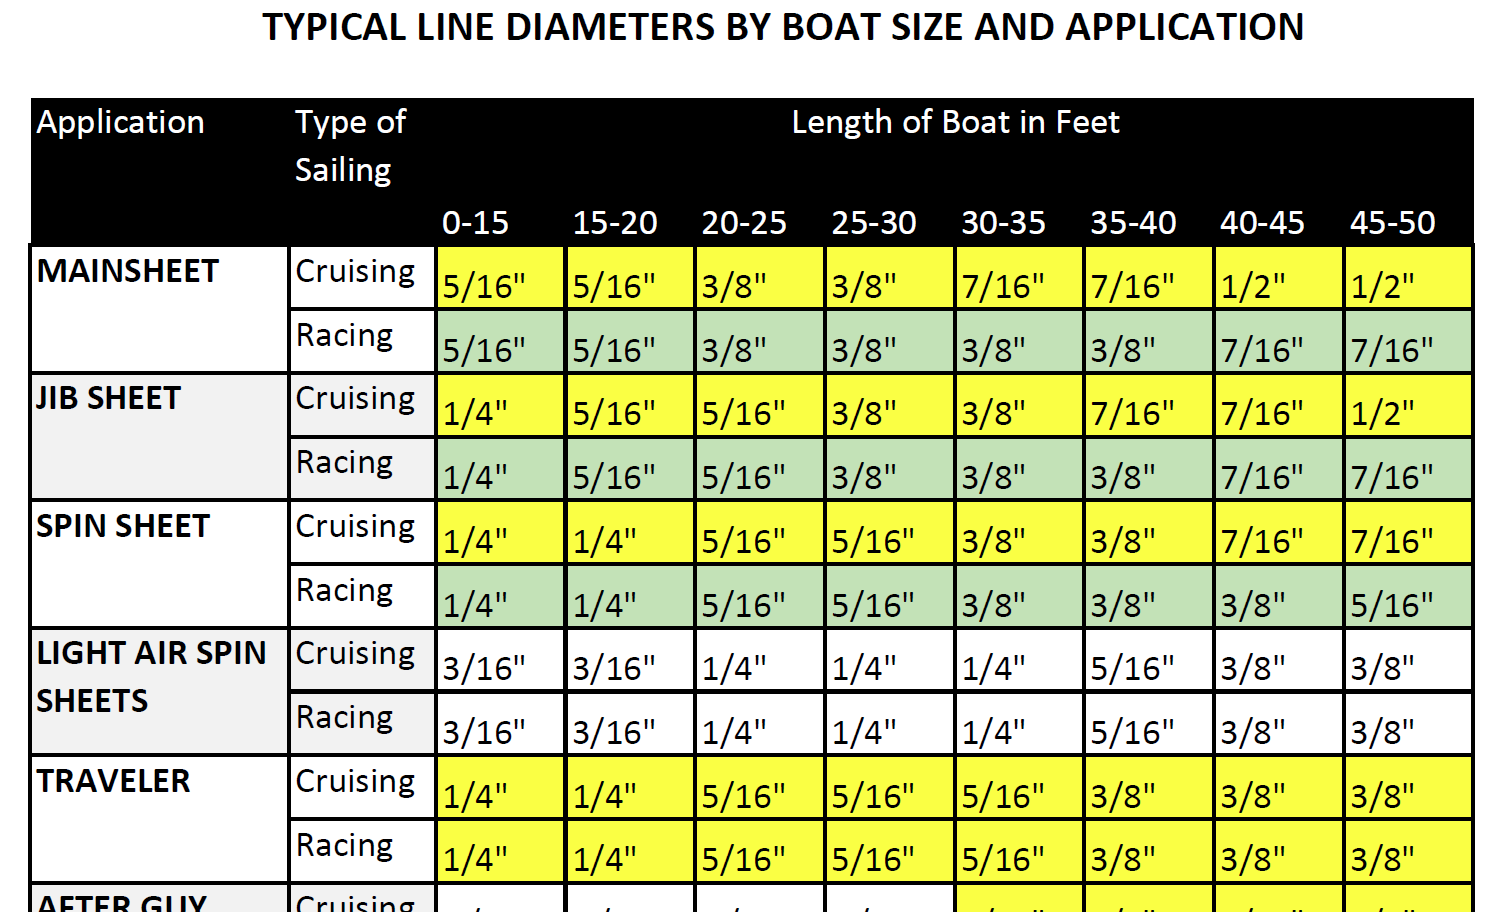
Selecting Rope – Length, Diameter, Type
Question: Do you have guidelines for selecting halyards, sheets, etc. for my sailboat? From the Rigger: First, if your old rope served its purpose but needs replacing, we recommend duplicating it as closely as possible Read more…
Copyright 1996 - 2024, Rig-Rite, Inc. Disclaimer Web Site maintained by The WATER Group
The Ultimate Guide to Sailboat Rigging Rope

What is sailboat rigging rope?
Sailboat rigging rope is the lifeline of a sailboat , connecting the sails to the mast and allowing the boat to harness the power of the wind.
Essentially, it is a specialized type of rope that is designed to withstand the forces and stresses encountered while sailing.
Why is a rope called a line on a boat?
In nautical terms, a line refers to a rope that has a specific purpose or is used for a particular function.
For example, a halyard line is used to hoist a sail, while a sheet line controls the position of the sail.
By using the word “line” instead of “rope,” sailors were able to clearly communicate their intentions and actions on a boat.
What ropes are used for ship rigging?
When it comes to sailboat rigging ropes, there are a variety of types available, each with its own unique characteristics and applications.
Let’s explore some of the most common types and their uses.
Polyester ropes.
Polyester ropes are popular for their durability, strength, and resistance to UV rays and saltwater corrosion. They are suitable for a wide range of applications, from halyards and sheets to control lines and running rigging.
Dyneema ropes
Dyneema ropes, also known as high-performance ropes, are incredibly strong and lightweight. They are perfect for high-load applications such as rigging and running backstays, where strength and low stretch are crucial.
Sta-Set ropes
Sta-Set ropes are made from polyester and are known for their flexibility and ease of handling. They are commonly used for general-purpose applications like halyards, sheets, and control lines.
Wire ropes, made from stainless steel, provide excellent strength and resistance to abrasion. They are commonly used for standing rigging , such as shrouds and stays, where stiffness and stability are required.
Vectran ropes
Vectran ropes offer high strength and low stretch properties, making them suitable for applications that require minimal elongation, such as halyards and control lines.
- Boat Rigging: Everything You Need to Know
- Line or Rope of Your Boats (explained)
- Choosing The Right Mooring Lines Or Dock Lines For Your Boat
- What’s the Difference Between a Spring line, a Breast line, and a Dock Line?
Which type of rope used in rigging is the strongest?
- One of the strongest types of rope used in rigging is Dyneema.
This high-performance rope is incredibly strong and lightweight, making it perfect for high-load applications. Its low stretch characteristics also contribute to its strength, ensuring minimal elongation under heavy loads.
- Stainless steel wire ropes are also known for their exceptional strength.
Made from corrosion-resistant stainless steel, these ropes provide excellent tensile strength and resistance to abrasion.
What are the three ropes on a boat?
On a sailboat, three primary ropes play essential roles in controlling and maneuvering the boat.
The first rope is called the halyard, and it is used to raise and lower the sails.
The halyard connects to the top of the sail and allows you to adjust its position and tension. Common options for Halyard include polyester, nylon, and dyneema.
The second rope is known as the sheet. Sheets are used to control the angle and position of the sails in relation to the wind.
There are typically separate sheets for the main sail and jib or genoa. By adjusting the tension and angle of the sheets, you can optimize the sail’s performance and power.
Common options for sheets include polyester, nylon, and blended ropes.
Control line
The third rope is the control line.
Control lines are used for various purposes, such as adjusting the shape of the sails, controlling the boom, or operating the boat’s various systems.
They are typically found on larger boats with more complex rigging setups.
Generally, control lines need to be strong and durable, with good grip and flexibility. Common options include polyester, nylon, and braided ropes.
How do i choose a rigging rope?
Here is a step-by-step guide to help you make an informed decision:
1. Assess your sailing needs
Consider the size of your boat, the sailing conditions you typically encounter, and your rigging setup. This will help you determine the strength and durability requirements for your rigging rope .
2. Research different rope materials
Look into the characteristics and benefits of materials like polyester, Dyneema, and stainless steel. Understand how each material performs in terms of strength, UV resistance, and corrosion resistance.
3. Determine the appropriate size
Based on your boat size and rigging setup, identify the ideal thickness and strength of rope needed. Larger boats and high-performance rigs will generally require thicker and stronger ropes, while smaller boats may benefit from lighter options.
4. Consider flexibility and handling
Ensure that the rope you choose is easy to work with and provides a good grip. It should be flexible enough to maneuver but not overly stretchy.
5. Consult with experts
If you’re unsure about any aspect of choosing a rigging rope, don’t hesitate to seek advice from professionals or experienced sailors. They can provide valuable insights and help you make the best decision for your specific needs.
What size rope do i need for my boat?
The size of the rope you need will depend on the size of your boat, the specific rigging setup, and the intended use of the rope.
For example a 20 foot sailboat , you would typically need a halyard rope that is around 5/16 to 3/8 inches in diameter. The length of the rope should be long enough to reach from the masthead to the cockpit, allowing for proper hoisting and trimming of the sails.
Generally, a sheet rope with a diameter of 5/16 inch or 3/8 inch should suffice for most sailboats. As a general guideline, the length of the rope should be at least twice the length of your boat. This will allow for proper handling and maneuvering of the sail.
Why is a line called a sheet?
The term “sheet” likely comes from the old English word “sceata,” which means corner or border. The ropes were called sheets because they controlled the corners or edges of the sail.
Over time, the term “sheet” became associated with any rope that controls the position or angle of a sail.
How long should boat lines be?
Boat lines are ropes used for various purposes, such as docking, anchoring, and securing the boat.
A general guideline is to ensure that boat lines are at least 2-3 times the length of your boat. This will provide enough length to handle different docking scenarios and ensure the safety of your vessel.
It’s also a good idea to have a variety of lengths available to accommodate different situations.
Common Problems and Solutions for Sailboat Rigging Ropes
Here are some common problems you may encounter with sailboat rigging ropes and their troubleshooting solutions:
1. Fraying or wear
If you notice any signs of fraying, it’s important to replace the rope immediately to avoid accidents. Regularly inspect your ropes for wear and tear and replace them as needed.
2. Tangling or kinking
To prevent tangling or kinking, always store your rigging ropes neatly coiled and avoid knots or tangles. If your rope becomes tangled, carefully untangle it to restore its proper function.
3. Stiffness or difficulty in maneuvering
If your rope becomes stiff or difficult to maneuver, it may need lubrication. Apply a suitable lubricant to the moving parts of the rope to restore smooth operation.
4. Slippage
If your rope slips or loses tension, you may need to adjust the knot or connection. Ensure that all knots are properly tied and secure, and adjust the tension as needed.
5. Corrosion or rust
Stainless steel wire ropes are resistant to corrosion, but they can still develop rust over time. Regularly inspect your stainless steel ropes for any signs of rust and replace them if necessary.
6. Overloading
Avoid overloading your ropes beyond their recommended weight limits. Be aware of the maximum load capacity of your ropes and use appropriate ropes for heavier loads.

- New Sailboats
- Sailboats 21-30ft
- Sailboats 31-35ft
- Sailboats 36-40ft
- Sailboats Over 40ft
- Sailboats Under 21feet
- used_sailboats
- Apps and Computer Programs
- Communications
- Fishfinders
- Handheld Electronics
- Plotters MFDS Rradar
- Wind, Speed & Depth Instruments
- Anchoring Mooring
- Running Rigging
- Sails Canvas
- Standing Rigging
- Diesel Engines
- Off Grid Energy
- Cleaning Waxing
- DIY Projects
- Repair, Tools & Materials
- Spare Parts
- Tools & Gadgets
- Cabin Comfort
- Ventilation
- Footwear Apparel
- Foul Weather Gear
- Mailport & PS Advisor
- Inside Practical Sailor Blog
- Activate My Web Access
- Reset Password
- Customer Service

- Free Newsletter
Pearson Rhodes 41/Rhodes Bounty II Used Sailboat Review

Hallberg Rassy 42 Used Sailboat Review

How to Perform Your Own Pre-Buy Inspection

Beneteau 323 Used Boat Review

How Does the Gulf Stream Influence our Weather?

Can You Run a Marine Air-Conditioner on Battery Power?

Preparing Yourself for Solo Sailing

Your New Feature-Packed VHF Radio

Practical Sailor Classic: The Load on Your Rode

Anchor Rodes for Smaller Sailboats

Ground Tackle Inspection Tips

Shoe Goo II Excels for Quick Sail Repairs

What Oil Analysis Reveals About Your Engine

An Unusual Sailboat Shines a Light On A Sustainable Future

Is It Time to Get an Electric Dinghy Motor?

Bottom Paint 30-Month Update

Battle of the Teak Cleaners — Snappy Teak-Nu vs. Star Brite

New Seacocks for the Offshore Sailor

Bottom Paint Care

Are E-bikes Worth the Extra Weight and Cost?

How to Handle the Head

How to Select Crew for a Passage or Delivery

Preparing A Boat to Sail Solo

Re-sealing the Seams on Waterproof Fabrics

Waxing and Polishing Your Boat

Reducing Engine Room Noise

Tricks and Tips to Forming Do-it-yourself Rigging Terminals

Marine Toilet Maintenance Tips

Learning to Live with Plastic Boat Bits
- Sailboat Reviews
DIY Survey Checklist for Used-boat Buying
Before hiring a professional surveyor, look for these danger signs..

Photos by Frank Lanier
Boat buying is an exciting, maddening exercise that can test the tolerance of even the most patient sailor. Much of the maddening part has to do with trying to ferret out a boats problems before buying (and making them your own). Obviously, you should consult a reputable surveyor prior to purchase, but who can afford to have every promising boat surveyed?
The easiest way to narrow down the list of potential deals is by doing your own pre-survey inspection. Below are some of the major areas of boat inspection any buyer would want to become intimate with, as well as some common problems associated with each.
As the single most expensive piece of gear onboard, the engine deserves particular scrutiny. It is a hard lesson to learn that after purchasing that deal of a lifetime, the boat requires an engine rebuild or replacement.
How an engine looks can offer valuable clues about its overall condition. Thats not to say a shiny, seemingly new engine will be trouble free, but if its a real mess on the outside, chances are the owner hasn’t exactly been a stickler for regularly scheduled maintenance.
Start by looking for obvious problems such as leaks, excessive rust, broken or missing components, and other signs of neglect. For freshwater-cooled systems, check the coolant level and properties. Lack of antifreeze should raise red flags (due to possible leaks) as should coolant with a rusty color or an unusual amount of solids.
A lot can be told by simply pulling the dipstick and checking the oil. A slightly low level might be OK, but higher than normal levels could indicate trouble, particularly if milky or frothy; both are an indication that water, antifreeze, or transmission fluid is present, signs you could be facing anything from a blown gasket to a cracked block.
Rub a little engine oil between your fingers. If it feels abrasive or has a burnt odor, be concerned about bearing wear; however, it could also simply mean the oil hasn’t been changed regularly. Wipe the dipstick on a clean white cloth or napkin. Oil thats thick initially, but then starts to spread out over the cloth is an indication of fuel contamination.
Taking oil samples to a lab for testing is a more scientific way to analyze oil condition, but its normally most useful in tracking issues over the engines lifetime, rather than for spot-checking. Still, a one-shot oil analysis can show unusual wear and the presence of water, antifreeze, or diesel fuel. Think of it as a blood test for the engine-it may not predict a heart attack, but it can indicate the high cholesterol that could lead to engine failure.
As for transmissions and reduction gears, dark and sluggish fluid or oil with a burned smell may indicate drive cone problems and a costly rebuild in the near future. After running the engine in gear a bit, use the dipstick to get a transmission fluid sample. Put this on a piece of paper, and inspect it under a bright light or in direct sunlight for metallic specks-a sign of significant transmission wear. Inserting a long, thin magnet (the kind mechanics use to retrieve dropped bolts) through the dipstick opening and sweeping the bottom of the gearbox may produce interesting results as well.
Note how difficult the engine is to start. Depending on whether its gas or diesel, hard starting could be a sign of weak batteries, faulty plugs, or even a bad fuel pump.
Does it run smoothly at idle and under load, or does it idle unevenly and stall out when placed in gear? Rough running can be caused by anything from clogged fuel filters to compression problems, and engines idling at more than 800 rpm may have been intentionally set to idle high to mask problems.
Verify proper oil pressure and operating temperature while the engine is running. Low oil pressure could be due to anything from faulty oil pumps to cam bearing failure. High water temperatures may be something as simple as a bad impeller, but could also be caused by corroded manifolds or exhaust risers.
Finally, read the smoke signals the engine is sending. A well-maintained engine may smoke when initially cranked or while idling, but not when warmed up or under load. Smoke color can also provide an indication of problems (blue for burning oil, black for incomplete combustion, white for water vapor, etc.).
Bottom line: Remember that hour meters mean nothing (they can easily be swapped out by an unscrupulous seller) and that an owner should eagerly provide invoices if claiming overhauls or major work has been done. Engines are a big-ticket item, so always weigh the cost of repair or replacement versus walking away.
Water intrusion into cored decking likely causes more boat damage every year than sinkings, groundings, and fires combined. Cored construction simply describes an inner and outer skin of fiberglass with some other material sandwiched between them. Most all decks will be cored, typically with end-grain balsa, plywood, or maybe one of the more high-tech foam variations.
The prime directive with cored construction is keeping water out. Wet wood coring can rot, allowing the cored deck to separate, drastically reducing structural integrity. Long-term water exposure causes problems with foam-cored decks as well – core separation, freeze damage (due to expansion and contraction), and even disintegration in some cases.
Moisture intrusion into cored decking is typically caused by a combination of failed caulking and improper installation of deck-mounted hardware (cleats, lifeline stanchions, winches, etc.). Any penetration into a cored panel must be properly sealed to prevent water entry and the damage it can cause.
The first step (literally) in finding deck problems can be as simple as walking on the suspicious spots. Soft spots, oil-canning (flexing), or even water squishing from deck fittings are all indicators of a potentially expensive repair. Drips and brownish stains belowdecks are also common signs of water-soaked decks and rotting core.
Sound out the decks by tapping them with a small, plastic-headed hammer or the end of screwdriver handle. Sharp, crisp sounds while tapping are what you want, while dull thuds can be an indication of delamination. Moisture meters such as those available from JR Overseas ( www.jroverseas.com ) are also a helpful tool for sniffing out soggy decks.
Repair options are based on the cores condition, which is determined by taking a core sample (ideally by drilling a small hole in an inconspicuous place from the inside) and looking for moisture or rot. If the coring is rotten or damaged, it must be replaced. If wet, but not damaged and there is no delamination, attempts to dry out the core can be made. Just keep in mind that it is very difficult to remove all water and that any remaining moisture will likely cause future problems. Core replacement is the only sure cure.
Bottom line: While repair costs will be directly related to the size of the delaminated area, even a minor core replacement is a time-consuming project. If faced with a large amount of deck repair, move on to the next boat or be prepared to expend a significant amount of time, money, and effort to make it right.

except where noted
Standing rigging
Most sailors immediately think wire when they hear the term standing rigging, but thats only one part of the story. Your pre-survey inspection should encompass several different components, from chainplates and turnbuckles to cotter pins and terminal ends. Here are three primary standing rigging components along with possible issues to watch out for.
Wire: Broken yarns or strands (aka fishhooks) are a clear indication that rigging wire is nearing the end of its service life, even if the other strands appear good. You can check for broken strands by wrapping toilet paper around the wire and carefully running it up and down while looking for snags or shredding of the paper.
Nicks and scratches that affect multiple strands or one strand deeply should also be noted as possible cause for replacement, as should kinks, flat spots, proud strands and corrosion, particularly where the wire enters a swage fitting.
Floppy shrouds or stays should also be inspected to determine the cause of the looseness, which can indicate anything from a much needed rig tune-up to a failed mast step.
Terminal fittings: Of the various wire terminal fittings found on sailboats, swage fittings are the most common source of terminal failures.
Each should be checked carefully for signs of fatigue, proud strands (a common indication of broken strands in the swage), cracks, and corrosion. A small, handheld magnifying glass can be very helpful during this inspection. Pay close attention to lower terminals, which are particularly susceptible to corrosion as a result of salt-laden water running down the wire and inside the fitting.
Bent or banana-shaped fittings (the result of improper compression of the fitting onto the wire) are also items of concern that will need to be addressed.
Chainplates: Chainplates should be checked carefully for issues such as movement, rust, cracks, deformation of the clevis pin hole, and improper lead angle. Chainplates that penetrate the deck will often leak (due to movement and/or caulking failure), and the damage this causes, both to the interior of the vessel and the chainplate itself, can be significant.
Where chainplates are bolted to a bulkhead or other interior structure, look for discoloration, delamination, and rot due to water intrusion. Chainplates can also be compromised due to crevice corrosion, even though the metal above and below the deck appears to be in excellent condition. Crevice corrosion occurs when stainless steel is continually exposed to stagnant, anaerobic water, such as that found in a saturated wood or cored deck. This is one reason why chainplates that are glassed in or otherwise inaccessible for routine inspection are undesirable.
Bottom line: While the life expectancy of wire rigging is determined by a myriad of factors (where the vessel is located, type of stainless, amount of use, etc.), the general rule of thumb is that it should be replaced every eight to 10 years, sooner if extenuating circumstances such as offshore passages, extended cruising, racing, etc, are in the mix. While an owner may offer assurances or hazy recollections of rigging replacement, unless these improvements are properly documented, the best policy is to assume the rigging is original and plan your purchase strategy accordingly.
While steel hulls rust and wood hulls rot, blisters are what make a fiberglass boat owners hair stand on end. The Cliffs Notes version of how blisters form is simple: Water-soluble chemicals inside the laminate exert an osmotic pull on water molecules outside the hull, drawing them through the gelcoat. Once inside, the water molecules and soluble chemicals join to create a solution with larger molecules that are unable to pass back though the gelcoat. As water molecules continue to enter, pressure increases to the point that the gelcoat is pushed outward, forming a blister.
Some makes and models seem to be more susceptible to blistering than others (presumably due to factors ranging from resins used to layup schedules), but all fiberglass boats are at some risk. Location also plays a factor in some cases (i.e. relocating a vessel from cool to tropical waters, fresh to salt, etc).
The best time to spot blisters is just after the boat is hauled, preferably after the hull has been power washed and is still wet. Blisters can depressurize in a matter of hours once the vessel is hauled (minutes in some cases), making them all but impossible to spot (something to consider if inspecting a boat thats been hauled for a while).
Blisters will typically appear as circular bumps or dome-like protrusions while sighting along the hull. Sometimes water trapped between the bottom paint and gelcoat forms bumps that can be mistaken for blisters. With the owners permission, try pressing a suspected blister with a rubber gloved finger (wear goggles, as they can be under considerable pressure). If the fluid that comes out has a chemical smell, chances are its a blister.
Although hull blisters are often viewed with much dread, finding one or two blisters on an older vessel is no more serious than the occasional gouge to the hull. In these cases, spot treatment of individual blisters as they occur (grinding out to good material, barrier coating, and filling in and fairing with a suitable epoxy mixture) will normally suffice.
Far worse is the dreaded pimple rash or boat pox, where the entire bottom is covered with hundreds or thousands of blisters. Repairs in this case can involve removal of the entire gelcoat and the outermost skin-out mat to reach good laminate, then adding additional laminate to return the hull to original strength. Its an expensive repair that many yards will gladly perform, but rarely guarantee will prevent future blister formation.
Bottom line: Although rarely structurally significant, blisters may very well have a negative impact on a vessels resale value, depending on the knowledge and perceptions of a potential buyer.
Electrical systems
After years of additions, removals, misguided MacGyver-like installations, and overall abuse, probably no other system harbors greater potential for starting a fire on a used boat than the electrical system. This is just one reason both DC and AC systems deserve a thorough inspection.
Start with the batteries, which should be located in liquid tight / acid-proof containers (to contain electrolyte spills) and secured against movement (no more than one inch in any direction). Be on the lookout for equipment hard-wired without any fuse directly to the battery (a potential fire hazard) as well as crowded post syndrome (more than four wires connected to a single battery post).
Verify AC wiring is multi-strand, marine grade wire, not residential style, solid strand wire (aka ROMEX). Solid wire is not recommended for use onboard, as it is susceptible to breakage due to vibration. Your inspection should also verify that AC outlets located in the galley, head, machinery spaces, and on all weather decks are protected with ground-fault circuit interrupt (GFCI), another important safety requirement.
Check the condition of wire runs for both AC and DC systems. They should be neat, well organized, and labeled. Problems include unsupported wires, dead ends (cut wires no longer in use), corrosion, and lack of chafe protection (especially where wires pass through a bulkhead).
Youll also want to keep an eye out for electrical tape joints and household twist-on type connectors, two sure signs that Jethro has been doing a little weekend electrical work.
Bottom line: If the electrical systems are maxed out or rife with problems, play it safe by getting an estimate to make it right from a competent marine electrician before negotiating with the owner.
The more you know about potential problems and how to spot them, the more comfortable and productive your boat-buying experience will be. While the above inspection list can’t replace the practiced eye of a professional marine surveyor, it can help the average Joe make an informed decision on whether to pass or pursue the purchase of that potential dream boat.

- Society of Accredited Marine Surveyors
- National Association of Marine Surveyors
- “Inspecting the Aging Sailboat,” by Don Casey
RELATED ARTICLES MORE FROM AUTHOR
You made a great point when you said that I should be on the lookout for any boats with some amateurishly fixed wiring. What with how old some used boats can be someone may have thought it better to fix old electrical components themselves rather than hire a professional which could be a potential hazard. I’m buying a boat for our family trips, and since kids will often be on board I wouldn’t want any wiring to stick out and potentially harm them or even worse, start a fire on the boat. Hopefully, I can find a good dealer that will provide me with quality used boats for sale where I won’t have to worry about matters like that.
Thanks for the informative article, Darrell.
LEAVE A REPLY Cancel reply
Log in to leave a comment
Latest Videos

The No Expense Spared Antigua 60 Cruising Sailboat Soolaimon

How To Buy Sails – With Joe Cooper

Bavaria C42: What You Should Know | Boat Tour

Universal Diesel Engines – What You Should Know
- Privacy Policy
- Do Not Sell My Personal Information
- Online Account Activation
- Privacy Manager
- Rigging/Sails
Sailboat Rigging Parts: A Comprehensive Guide
by Emma Sullivan | Aug 5, 2023 | Sailboat Maintenance
Short answer sailboat rigging parts:
Sailboat rigging parts are the various components used to support and control the sails on a sailboat. They include standing rigging (such as shrouds and stays) which provide stability, and running rigging (such as sheets and halyards) which allow for adjustment of the sails. These parts are crucial for safe and efficient sailing.
Understanding Sailboat Rigging Parts: A Comprehensive Guide
Sailing can be an exhilarating experience, with the wind in your hair and the ocean at your fingertips. But have you ever wondered how a sailboat is able to harness the power of the wind? The answer lies in its rigging parts.
In this comprehensive guide, we will delve into the world of sailboat rigging parts, explaining their functions, types, and importance in ensuring a smooth sailing experience. So grab your sea legs and get ready to dive deeper into this intriguing topic!
Mast: Let’s start from the top – quite literally. The mast is the vertical spar that supports your boat’s sails . Think of it as the backbone of your entire rigging system. Without a sturdy mast, your sails wouldn’t be able to catch any wind . Masts are typically made from aluminum or carbon fiber for strength and durability.
Boom: Now let’s move downwards towards the boom – no, not a loud sound but yet another essential part of sailboat rigging! The boom is a horizontal spar attached to the lower part of the mast. Its primary function is to hold out and control the foot or bottom edge of your mainsail when it’s extended.
Standing Rigging: The standing rigging refers to all those components that help support the mast – keeping it upright against various forces such as wind pressure and waves. These include shrouds (sideways cables on each side of masts) and forestays (forward-facing cable attaching to bow). Both are crucial for maintaining stability and preventing your mast from flopping overboard!
Running Rigging: Unlike standing rigging, running rigging allows you to adjust specific areas of your sail according to weather conditions and boat maneuvering. Running riggings include halyards (cables used to hoist sails), sheets (lines controlling angles and tension), downhauls (used for tensioning sails downwards), and many others. Mastery of running rigging is essential in optimizing your sail’s performance .
Winches: Now, what good are all these elaborate rigging parts if you don’t have any means to control them effectively? This is where winches come into play – ultimately making your life as a sailor much easier. Winches are mechanical devices that allow you to apply force and tension on lines easily. They give you the advantage of leveraging your strength, especially when it comes to hoisting heavy sails or adjusting line tensions during maneuvers .
Blocks: Here’s a little tidbit for you – blocks are small yet mighty companions in sailboat rigging! Blocks, often made with stainless steel or strong composite materials, act as pulleys throughout your rigging system. They help redirect lines in different directions, ensuring smooth movement with minimum friction. A good set of blocks guarantees efficient performance and saves lots of effort!
Cleats: Let’s not overlook the unsung heroes – cleats! Cleats provide secure attachment points for lines and serve as anchors when needed. With proper cleating techniques, you can adjust tension or lock lines quickly without hassle. These small but mighty pieces keep everything precisely where they should be.
Understanding the intricacies of sailboat rigging requires continuous learning and practice over time. But once you grasp the roles each part plays in the grand symphony of sailing, you’ll unlock a world of possibilities on the water.
So whether you’re preparing for your first sailing adventure or well-versed in navigating the high seas, knowing these sailboat rigging parts will undoubtedly enhance your understanding and appreciation for this beautiful sport.
Remember, knowledge is power – especially when combined with the wind at your back and a sail full of confidence!
How to Choose the Right Sailboat Rigging Parts for Your Vessel
When it comes to sailing, having the right sailboat rigging parts is essential for a smooth and successful journey on the high seas. Whether you’re a seasoned sailor or just starting out, choosing the right rigging parts for your vessel can make all the difference in performance and safety. In this blog post, we will guide you through the process of selecting the perfect rigging parts for your sailboat, ensuring that every aspect of your sailing experience is elevated to new heights.
Firstly, it’s important to understand the various types of sailboat rigging parts available in the market. The most common types include turnbuckles, shackles, blocks, and cleats. Each of these components plays a crucial role in controlling and adjusting your sails while providing stability to your vessel . Therefore, it’s critical to consider factors such as size, material quality, and durability when making your selection.
Size matters! Before diving headfirst into purchasing rigging parts for your boat, take measurements of every component that requires replacement or upgrade. Comparing these dimensions with industry standards will help ensure that each part fits seamlessly into its designated place. Moreover, having properly sized rigging parts not only enhances overall performance but also minimizes stress and strain on other vital elements of your sailboat.
Material quality is another significant factor that should be considered when choosing rigging parts. Opt for high-quality materials like stainless steel or titanium that are resistant to corrosion and sea-water damage. These materials offer superior strength and longevity compared to their counterparts made from inferior metals such as aluminum or galvanized steel. Investing in top-notch materials may come at a higher upfront cost but will pay off in terms of durability and maintenance savings in the long run.
Durability is key when it comes to sailboat rigging parts since they bear substantial loads during navigation. It’s crucial to select components designed to withstand both intense weather conditions and wear-and-tear over time. Look for manufacturers with a solid reputation for producing reliable and long-lasting rigging parts. Reading customer reviews or seeking advice from experienced sailors can provide valuable insights into the durability of various brands in the market.
Additionally, consider the specific needs of your sailboat and sailing style while choosing rigging parts. For example, if you’re an adventurous sailor who frequently participates in regattas, opt for high-performance rigging parts with features like low-friction blocks and adjustable turnbuckles. On the other hand, if you enjoy leisurely cruises, focus on parts that prioritize comfort and ease of handling. Tailoring your choices to suit your individual requirements ensures that you can fully enjoy every moment on board without compromising safety or functionality.
Lastly, don’t underestimate the importance of aesthetics! While it may not directly impact performance, having sleek and visually appealing rigging parts adds a touch of elegance to your sailboat. Opting for well-designed components not only enhances the overall appearance but also reflects your attention to detail and passion for sailing.
In conclusion, choosing the right sailboat rigging parts is a task that deserves careful consideration. By taking into account factors such as size, material quality, durability, specific needs, and aesthetics; you can elevate your sailing experience to new heights. Remember to consult with experts or experienced sailors when in doubt and invest in top-quality components that will keep you sailing smoothly for years to come. Happy sailing!
Step-by-Step Installation Guide for Sailboat Rigging Parts
Title: A Nautical Masterclass: A Foolproof Guide to Installing Sailboat Rigging Parts
Introduction: Setting sail on the open sea is an exhilarating experience for any sailing enthusiast. However, before you can embark on your nautical adventure, it’s crucial to ensure that your sailboat rigging parts are installed correctly for optimal performance and safety. In this step-by-step installation guide, we’ll take you through each meticulous stage of the process, ensuring your rigging parts are professionally and securely installed.
Step 1: Preparation – Inspecting Your Rigging Parts: Before diving into the installation process, it’s essential to conduct a thorough inspection of all rigging parts. Look out for any signs of wear and tear, rust, or damage that may compromise their functionality or structural integrity. Replacing any faulty components at this stage will save you from troubles later on.
Step 2: Documentation – Know Your Components: Familiarize yourself with each sailboat rigging part and its purpose. Whether it’s shrouds, stays, turnbuckles, or clevis pins – understanding the role they play in ensuring stability and control over your sails is crucial . Exploring comprehensive resources like manufacturer manuals or online forums can provide valuable insights into specific installations.
Step 3: Proper Tools – Equip Yourself Like a Pro: To successfully install sailboat rigging parts, having the right tools at your disposal is paramount. Ensure you have a variety of wrenches (box-end and open-end), wire cutters, pliers, electrical tape, cotter pins or rings as per requirements, and quality marine-grade lubricants for ease of assembly.
Step 4: Removing Old Rigging Components: If you’re replacing existing rigging parts rather than installing them from scratch on a new boat build, carefully remove any old components while documenting their placements along with measurements if needed. This documentation will help ensure accurate placement during the reinstallation process.
Step 5: Planning – Diagram and Label: Create a detailed diagram or use labels to mark the location of each sailboat rigging part on your boat. This step helps you keep track of where each component belongs, avoiding confusion during installation. It also assures consistency should you need future replacements or repairs.
Step 6: Expert Connections – Assembling Your Rigging Parts: Gather all the necessary components and begin assembling them in proper order as indicated by manufacturer guidelines. Use appropriate connectors such as turnbuckles, clevis pins, or cotter rings to secure connections tightly. Pay meticulous attention to detail, ensuring that each connection is snug but not overtightened to allow for natural movement when sailing.
Step 7: Adjustments – Fine-Tuning for Optimal Sail Performance: Once all rigging parts are securely connected, it’s time for fine-tuning your setup. Start with tensioning the shrouds by adjusting their length evenly. Aim for an optimal balance where they provide sufficient support without excessively straining your mast or stays. Additionally, ensure turnbuckles are adjusted symmetrically on both sides for uniform tension throughout the rigging system.
Conclusion: Installing sailboat rigging parts demands precision, knowledge, and a keen eye for detail. By following this step-by-step guide, you’re well on your way to achieving a sturdy and reliable rigging system on your sailboat. Remember to prioritize safety above all else while enjoying countless ventures across the shimmering seas!
Frequently Asked Questions about Sailboat Rigging Parts Answered
Welcome to our blog! Today, we will be answering some frequently asked questions about sailboat rigging parts. Sailboat rigging is a vital component of any sailing vessel, and understanding the different parts involved can greatly enhance your sailing experience. So, let’s dive right in and address these popular queries!
1. What are the primary sailboat rigging parts? The primary sailboat rigging parts include the mast, boom, standing rigging (such as shrouds and stays), running rigging (halyards and sheets), blocks or pulleys, turnbuckles, cleats, winches, and various fittings. Each of these components has its specific purpose in controlling the sails’ position and tension.
2. How do I properly maintain sailboat rigging parts? Maintaining your sailboat rigging parts is crucial for their longevity and overall performance on the water. Regular inspections for rust or corrosion should be done, along with lubrication of moving parts using appropriate marine-grade lubricants. Additionally, replacing worn-out lines or damaged hardware promptly ensures safety while sailing .
3. Are all sailboat rigs created equal? Absolutely not! Sailboats come in different sizes and designs, necessitating varying types of rigs . From sloop rigs with a single mast to ketches with two masts to schooners with multiple masts—each configuration demands specific types of rigging parts tailored to the vessel’s characteristics.
4. Can I upgrade my current sailboat rigging? Certainly! Upgrading your sailboat’s rigging can enhance performance and make handling sails easier. However, it requires careful consideration of factors such as boat design, sailing conditions where you usually venture out to sea, budget constraints, etc. Consulting a professional rigger would give valuable insights into what upgrades would better suit your needs.
5. Is stainless steel always the best choice for standing rigging? Stainless steel is widely used due to its excellent corrosion resistance and strength. However, depending on the sailboat’s design and specific application, other materials like carbon fiber or high-performance synthetic fibers might be more suitable alternatives. Factors such as weight, flexibility, and cost must be weighed when choosing the optimal material for your standing rigging.
6. How often should I replace my running rigging? Running rigging is subject to wear and tear due to constant use and exposure to elements. While there isn’t a fixed timeframe for replacement, regular inspections of lines for fraying, stretching, or degradation are necessary. If signs of damage are visible or if the lines no longer hold their shape properly, it may be time for replacement.
7. Can I mix different brands of sailboat rigging parts? While it’s generally recommended to stick with one brand for consistency in design and quality, mixing different brands is not uncommon. However, it is important to ensure compatibility between various components by considering factors such as load capabilities, dimensions, and fitting types.
8. What tools do I need for sailboat rigging repairs? Having basic tools like wrenches (adjustable or socket), wire cutters, swaging tool (for crimping fittings), tape measure or calipers (for measuring lengths), spare shackles/pins/connectors would prove invaluable during sailboat rigging repairs or adjustments onboard.
We hope these answers provided you with insights into the world of sailboat rigging parts! Remember that proper maintenance of your rig ensures a safe and enjoyable sailing experience. If you require any further guidance or have specific queries related to your vessel’s rigging setup, reach out to our expert team who can assist you in making informed decisions tailored to your needs!
Essential Sailboat Rigging Parts Every Sailor Should Know About
Title: Essential Sailboat Rigging Parts Every Sailor Should Know About
Introduction: Sailing, an exhilarating activity that combines skill, strategy, and a deep connection with nature. As a sailor, understanding your rigging is essential in ensuring smooth sailing experiences. In this blog post, we will explore the key sailboat rigging parts that every sailor should be acquainted with. From essential components to clever solutions, let’s delve into the intriguing world of sailboat rigging.
1. Standing Rigging: The backbone of your sailboat’s mast support, standing rigging consists of wires or synthetic lines that keep the mast securely in place. Made up of stays (front and side) and shrouds (side and back), standing rigging offers stability against wind forces while allowing controlled movement for optimized performance .
2. Running Rigging: Unlike standing rigging which holds the mast in place, running rigging plays a pivotal role in adjusting sails for speed and maneuverability. Components like halyards (ropes used to raise/lower sails), sheets (lines controlling the angle of sails), and control lines (used for fine-tuning various aspects) are all part of this dynamic system. Understanding their functions empowers sailors to harness wind power effectively.
3. Masthead Fittings: Atop your sailboat’s mast lies a world hidden from plain sight – masthead fittings. These crucial elements determine your ability to achieve efficient sail trim through mechanisms such as sheaves (pulleys guiding halyards), tangs (sturdy attachments for stays/shrouds), and spinnaker halyard blocks offering controlled hoisting abilities even when battling relentless gusts.
4. Harken Batten Car Systems: A testament to innovation in technology comes in the form of Harken batten car systems – clever solutions that enhance sail control efficiency during races or leisurely cruises alike. With these ingenious fittings, sailors can fine-tune the camber of their mainsails to adapt swiftly to changing wind conditions, ensuring optimal speed and performance .
5. Blocks and Pulleys: Imagine rigging as the intricate web that connects your actions to the boat ‘s responses. Blocks and pulleys – humble yet indispensable components within this web – enable mechanical advantage for efficient sail handling. Cleverly designed blocks from leading manufacturers like Ronstan or Harken offer low friction, high load capabilities, making sheeting in or easing out sails a breeze even under immense pressure.
6. Tensioning Devices: Maintaining proper tension in standing rigging is crucial for safety and optimal sailing performance . Turnbuckles (mechanical devices with threaded shafts) allow precise adjustment of stays and shrouds’ tension, ensuring the mast remains upright yet flexible enough to respond to various forces encountered at sea.
7. Mast Steps or Mast Climbing Systems: For those daring sailors who venture up masts either for maintenance or picturesque views, mast steps or climbing systems are saviors. Conveniently installed on the mast exterior, these stepping mechanisms provide secure footing during ascents or descents—no acrobatics required!
Conclusion: Mastering sailboat rigging parts unlocks a world of possibilities for every sailor embarking on an adventure across vast waters. From understanding standing and running rigging’s intricacies to embracing innovative solutions like batten car systems and advanced blocks, each element plays a vital role in achieving excellent sailing experiences. So whether you’re cruising leisurely or chasing racing glory, enrich your knowledge of these essential rigging parts—your sailboat will thank you with smooth glides through the open seas !
Troubleshooting Common Issues with Sailboat Rigging Parts: Tips and Solutions
Introduction:
Sailboat rigging plays a crucial role in the performance and safety of your vessel. From the mast to the lines, each component needs to be properly maintained and functional. However, like any equipment, problems can arise. In this blog post, we will explore some common issues that sailors face with sailboat rigging parts and provide you with practical tips and solutions to troubleshoot them effectively.
1. Stiff or Difficult-to-Use Lines: One of the most frustrating issues sailors encounter is when their lines become stiff or hard to handle. This can be caused by a variety of factors such as dirt buildup, saltwater corrosion, or UV damage. To address this problem, start by thoroughly cleaning the lines with mild soap and water. Rinse them off carefully and allow them to dry completely before applying a suitable lubricant specifically designed for marine applications. Additionally, consider investing in high-quality UV-resistant lines that are less prone to degradation over time.
2. Stretched or Slacking Shrouds: Shrouds are essential components of sailboat rigging that provide support for the mast. Over time, they may stretch or slacken due to constant tension and stress during sailing trips. To troubleshoot this issue, start by inspecting the turnbuckles on both ends of each shroud for any signs of wear or damage; if necessary, replace them accordingly. Next, adjust the tension by tightening or loosening the turnbuckle until reaching the desired level indicated in your boat’s manual or consulting a professional rigger if unsure.
3. Leaking Stay Plates: Stay plates serve as structural reinforcement for boat masts by connecting them securely to the deck or hull through various fittings known as chainplates. Sometimes these chainplates develop leaks due to worn-out sealants or cracks caused by age or impact. To address leaking stay plate issues effectively, first remove any corroded fittings and replace all sealants with specialized marine-grade products. Gently inspect the chainplates for any signs of cracks or excessive wear, and if necessary, consult with a specialized technician to assess whether replacement is needed.
4. Blockage in Winches and Blocks: Winches and blocks are critical mechanisms for manipulating sailboat rigging lines. Nonetheless, they can become clogged or jammed due to various reasons like dirt, saltwater residue, or worn-out bearings. Regular maintenance is key to preventing blockage issues. Start by cleaning winches and blocks with fresh water after each sailing trip, removing any debris present. Inspecting bearings for smooth rotation is essential; if you notice resistance or grinding sounds, they may need lubrication or replacement. Always refer to your specific winch manufacturer’s instructions for proper care.
5. Corroding Mast Fittings: Mast fittings are exposed to the harshest elements while sailing – from rain and saltwater spray to extreme sunlight exposure. Consequently, these fittings may experience significant corrosion over time. To combat corrosion effectively, conduct regular inspections of all mast fittings using a magnifying glass to identify even minor signs of damage or rust build-up on screws, bolts, rivets, or other fastening components. If corrosion is detected early enough, it can be addressed by thoroughly cleaning the affected area and applying an appropriate anti-corrosion treatment or protective coating.
Conclusion:
Addressing common issues with sailboat rigging parts does not have to be a daunting task when armed with practical tips and solutions such as those outlined above. By paying attention to regular maintenance routines and addressing problems promptly, sailors can ensure their sailboat rigging remains reliable and safe for many future adventures on the open water. Remember that it is always prudent to consult qualified professionals for advice if you encounter any challenges beyond your expertise in sailboat rigging troubleshooting.
Happy sailing!
Recent Posts

- Sailboat Gear and Equipment
- Sailboat Lifestyle
- Sailboat Maintenance
- Sailboat Racing
- Sailboat Tips and Tricks
- Sailboat Types
- Sailing Adventures
- Sailing Destinations
- Sailing Safety
- Sailing Techniques
Memorial Day Savings - 15% Off When You Spend $200 with code MEMORIAL15
- Call Us +1-503-285-5536
- Sign in & Register
- Recently Viewed
- General Parts
Used Parts & Equipment
Looking for a great deal on lightly used sailing gear? We've collected some great gear from the warehouse including sails, rudders, and mast sections. This equipment is either lightly used or in new condition with small blemishes. Check the individual product page for more detailed information about product condition. Stock is limited, so order today!
There are no products listed under this category.
Subscribe To Our Newsletter
Sign up for our newsletter to receive exclusive discounts, new product announcements, and upcoming sales.
IMAGES
VIDEO
COMMENTS
The first word is the shape and rigging of the mainsail. So this is the way the sail is attached to the mast. I'll go into this later on. The second word refers to the mast setup and amount of sails used. Most sailboats are Bermuda sloops. Gaff-rigged sails are mostly found on older, classic boats. Square-rigged sails are generally not used ...
By Robin Iversen January 12, 2024. The running rigging on a sailboat consists of all the lines used to hoist, lower, and control the sails and sailing equipment. These lines usually have different colors and patterns to easily identify their function and location on the vessel. Looking at the spaghetti of lines with different colors and ...
The difference between standing rigging and running rigging. Sometimes things can get confusing as some of our nautical terms are used for multiple items depending on the context. Let me clarify just briefly: The rig or rigging on a sailboat is a common term for two parts:. The standing rigging consists of wires supporting the mast on a sailboat and reinforcing the spars from the force of the ...
5. Secure the mast using the appropriate rigging and fasteners. Attach the standing rigging, such as shrouds and stays, to the mast and the boat's hull. Fact: The mast of a sailboat is designed to withstand wind resistance and the tension of the rigging for stability and safe sailing. 2.
Sailboat rigging refers to the configuration and setup of ropes, wires, and other components that control your boat's sails. These interconnected systems play a crucial role in adjusting sail shape, maintaining stability, and achieving optimal performance while navigating wind currents. 2. Essential Equipment for Rigging:
Short answer running rigging for sailboats: Running rigging refers to the set of lines or ropes used to control the sails on a sailboat. It includes halyards, sheets, and control lines that regulate sail positioning, trim, and hoisting. These essential components are crucial for maneuverability and sail adjustment during sailing. Introduction to Running Rigging for
When it comes to sail rigging, there are several types commonly used in sailing vessels. The most common ones include sloop rig, ketch rig, schooner rig, cutter rig, catboat rig, and yawl rig. Each type has its distinctive features and advantages depending on factors like boat size, wind conditions, and intended use. 2.
Check out these Rigging Guides with photos and tips for rigging a variety of small sailboats. Available as PDF downloads for ease of use. Hobie Cat Rigging Guides. Hobie Bravo Rigging Guide. Hobie Wave Rigging Guide. Hobie Getaway Rigging Guide. Hobie 16 / Hobie 14 Rigging Guide. Hobie 17 Rigging Guide. Hobie 17 Sport Rigging Guide. Hobie 18 ...
There are two types of rigging: running and standing rigging. The difference between the two is very simple. The running rigging is the rigging on a sailboat that's used to operate the sails. For example, the halyard, which is used to lower and heave the mainsail. The standing rigging is the rigging that is used to support the mast and sail plan.
Colligo Dux: A relative newcomer to sailboat rigging, Colligo Dux is pre-stretched and heat-treated Dyneema. This process, however, produces an extremely strong rope with virtually no creep that is suitable for service in standing rigging. ... Nylon: Strong yet stretchy nylon is commonly used in applications for which shock absorption is ...
The domain of rigging is an essential matter for the safety and good performance of your sailboat. Nowadays, the type of rigging is still evolving. Generally, rigging is depending on the type of sail used or the number of masts. As a basic rule, the replacement of the standing rig should be done every 10 years, except for multihulls or regattas, and rod or composite fiber rigging. A good set ...
Aug 14, 2015. It's one of the most important features on a sailboat, but many owners put standing rigging at the back of their minds when it comes time to do their pre-season safety checks. A prudent sailor should inspect his or her standing rig at least once each season and should know when the time comes to replace most or all of it.
A sailboat's standing rigging is generally built from wire rope, rod, or occasionally a super-strong synthetic fibered rope such as Dyneema ®, carbon fiber, kevlar or PBO. 1×19 316 grade stainless steel Wire Rope (1 group of 19 wires, very stiff with low stretch) is standard on most sailboats. Wire rope is sized/priced by its diameter which ...
Get the best deals on Sailing Rigging & Fittings when you shop the largest online selection at eBay.com. Free shipping on many items | Browse your favorite ... NOS SCHAEFER SNATCH BLOCK 05-99 SAILBOAT HARDWARE. New (Other): Schaefer. $82.50. Was: $150.00. or Best Offer. $12.95 shipping. 5/8" Pin Chainplate Straight 84-91 marine rigging. Brand ...
Since 1961, RIG-RITE has engineered, manufactured and distributed Spars, Rigging and Hardware Systems for Sailboats. RIG-RITE stocks the largest variety of related Systems and Hardware available anywhere, Specializing in original replacement parts for Systems on yachts built the world over. Spars - Masts, Booms, Spreaders, Spinnaker Poles ...
Short answer: rig sails Rig sails refer to the various types of sails used in sailing rigs. They include mainsails, jibs, spinnakers, genoas, and more. Rig sails play a crucial role in harnessing wind power to propel boats and are designed for different wind conditions and sailing purposes. How to Rig Sails: A Step-by-Step Guide.
However, like a new car, a sailboat will depreciate in value over the first few years. Used - Pros & Cons If budget is a critical factor when choosing your sailboat, a used boat may be a wise decision. A five year old model could save you 50% of the cost of a new boat. A larger boat is possible for a lower purchase price when buying used.
Sailboat rigging rope is the lifeline of a sailboat, connecting the sails to the mast and allowing the boat to harness the power of the wind.. Essentially, it is a specialized type of rope that is designed to withstand the forces and stresses encountered while sailing. Why is a rope called a line on a boat? In nautical terms, a line refers to a rope that has a specific purpose or is used for a ...
Sailboat Reviews; used_sailboats; DIY Survey Checklist for Used-boat Buying Before hiring a professional surveyor, look for these danger signs. By. ... Bottom line: While the life expectancy of wire rigging is determined by a myriad of factors (where the vessel is located, type of stainless, amount of use, etc.), the general rule of thumb is ...
A pole used as part of the sailboat rigging, such as masts, booms, spinnaker poles and gaffs. Spell To relieve someone when taking turns at a task, such as manning the helm. Spherical buoy A ball shaped buoy marking a navigational hazard. Spider band A metal band around a spar with an eye to take the shackles used on the running rigging. Spill ...
Sloop rigging refers to a type of sailboat rigging that consists of a single mast with one mainsail and one headsail. This configuration allows for simpler handling and better upwind performance than other types of rigs. Sloop rigging is commonly used in smaller sailing vessels.
Short answer sailboat rigging parts: Sailboat rigging parts are the various components used to support and control the sails on a sailboat. They include standing rigging (such as shrouds and stays) which provide stability, and running rigging (such as sheets and halyards) which allow for adjustment of the sails. These parts are crucial for safe.
Used Parts & Equipment. Looking for a great deal on lightly used sailing gear? We've collected some great gear from the warehouse including sails, rudders, and mast sections. This equipment is either lightly used or in new condition with small blemishes. Check the individual product page for more detailed information about product condition.